FAQs
How do I get a quote for works?
If you drop us an email to enquiries@kandr-group.com or call 01249 914109 we will get out to look at the proposed works and provide an estimate as soon as possible.
How much will it cost to plaster my room?
The cost of plastering really depends on exactly what needs to be done, the size of the room and any added complexity, such as access.
For example a simple plastering repair for just one wall or area of a room is likely to cost considerably less than plastering a whole room. If a room needs to be plasterboarded before skimming this is going to cost far more than purely skimming a wall because there are more materials required and it will also take longer to complete.
It is possible to give an estimate by phone if you are able to provide the room dimensions, however to provide a quotation to complete the plastering work we will need to come and take a look at what’s required, check the condition of the area to be plastered and take our own measurements.
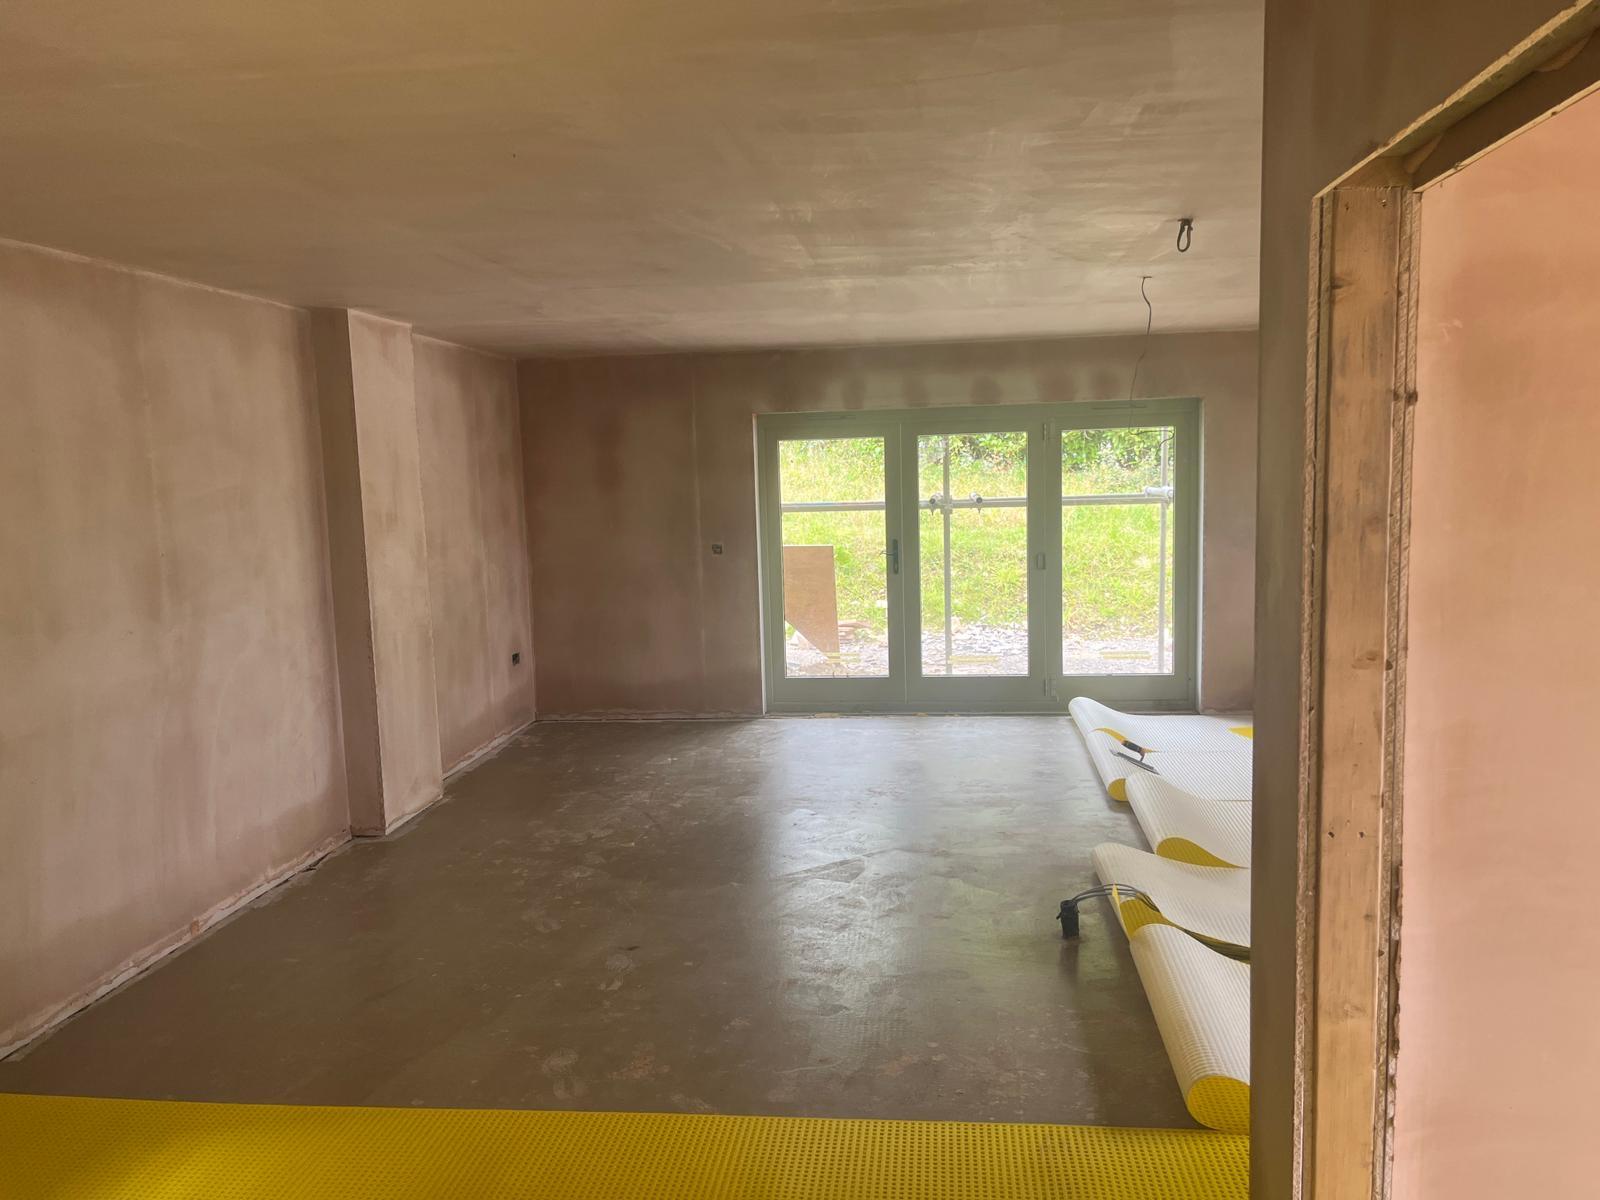
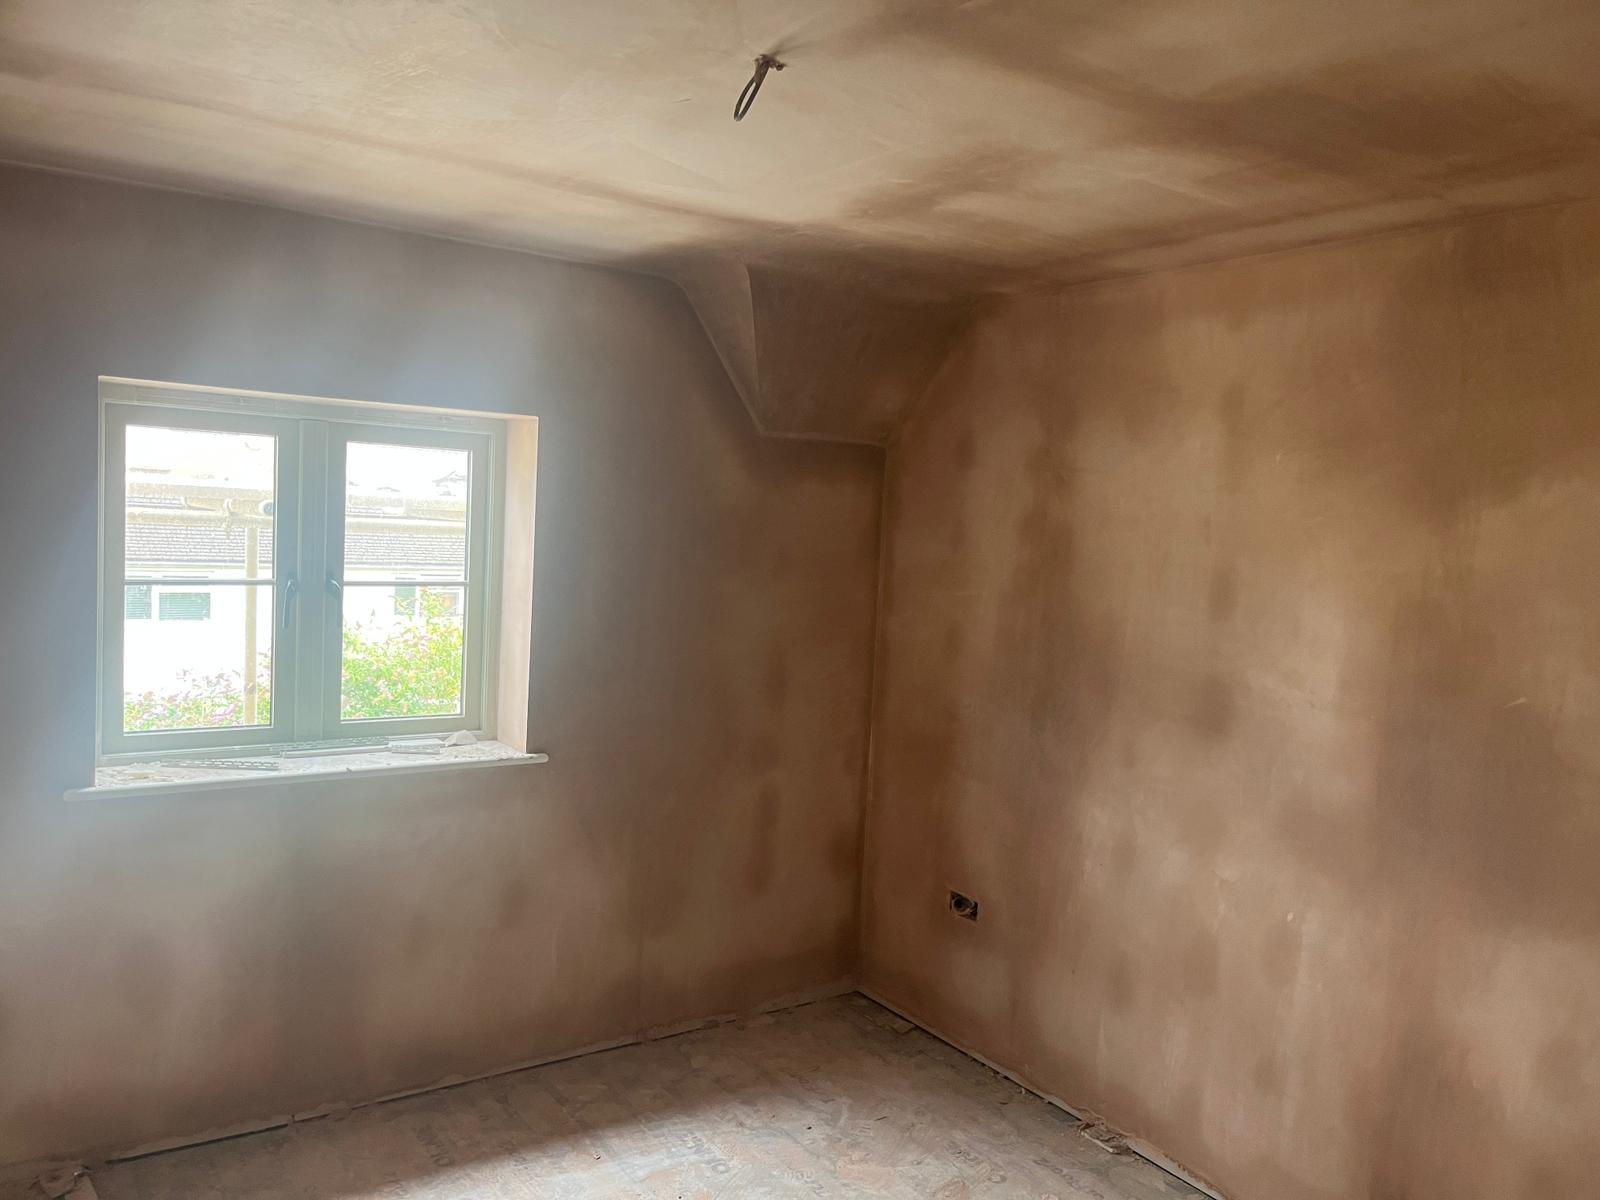
How can I tell if my plaster is dry?
When your plastering is first completed it will be rich brown in colour because the plaster will be fresh and full of moisture. As the plaster dries out it will become patchy, a mixture of brown and pink. Once dry, the plaster will be pale pink in colour and all of the brown patches will have disappeared. Certain areas of the plastering may take longer than others to dry out, for example, corners, areas where the plaster may have been applied more thickly, and areas that have had to have additional filling. Your plastering is completely dry once all brown patches have dried out and the surface is a consistent pale pink colour.
Which areas do you do plastering jobs in?
We complete plastering work in throughout the South and South West of England. We have completed plastering jobs and projects of all types across all areas of Devon, Gloucestershire, Oxfordshire, Somerset and Wiltshire.
How long does it take for plastering to dry?
Generally, it will take around 3-5 days for plastering to dry out however there are a few factors that will affect the drying time of your plaster.
The thickness of the plastering will affect the time it takes for the plaster to dry out
If there are any areas that require additional work, for example, if there is a void, a large crack, or a gap which requires filling then a base coat or bonding plaster may be required before skimming. This means that certain areas may be thicker than others and therefore require more time for the plaster to thoroughly dry out. If there has been significant filling it could take as long as two weeks for the plaster to be thoroughly dry and ready for painting and decorating.
Another factor that will affect the drying time for your plastering work is the room temperature and ventilation. It can be tempting to turn the heating right up to speed up the drying process but this is not recommended. Excessive heat will cause the plaster to dry too quickly which may result in cracking or hazing. The best condition for allowing your newly plastered walls/ceiling to dry is to provide some ventilation by opening a couple of windows slightly. You can put the heating on, however, we recommend you keep this at a low temperature for a number of days after the plastering is completed. This will help with the drying process whilst avoiding the plaster cracking.
Will the plastering dry more quickly if I put the central heating on high?
Please do not turn the heating on full blast to try and accelerate the drying process of your plastering. It is also not a good idea to bring in additional heaters or dehumidifiers in an attempt to dry the plaster out quickly. Unfortunately it’s just a matter of being patient and allowing the plaster to dry out at its own speed. Open a couple of windows slightly to provide light ventilation. You can also put heating on but only at a low temperature. If you try and rush the process with excessive heat you’ll ruin the results and the finish of your newly plastered surface. When plaster dries out too rapidly it causes cracks or haze cracking.
How soon can I paint my newly skimmed walls?
Please ensure your plaster is thoroughly dry before you consider decorating. The plaster will take a minimum of 3-5 days to dry thoroughly and in some cases longer. Once dry, the plaster will be pale pink and all brown patches will be gone.
Can you plaster over artexing?
It is possible to plaster over artexing however there are often some additional preparation steps required. It’s best if we can take a look at the artexing so we can tell you what steps need to be taken and so we can give you an accurate price. We can also assess the artex surface for asbestos and make any recommendations for an asbestos survey. When plastering over artex, depending on the thickness and design of the artex it may be necessary to scrape back the artex to reduce the peaks and then coat the surface with PVA before skimming with plaster. This can be a messy process so in some cases we may choose an alternative and instead fill out the artexed surface by applying a bonding coat to flatten it before skimming it. The route we take will be dependent on the thickness of the artex, the size of the area to be covered, and whether or not there is any coving in place. Our priority will be to assist you in eliminating your artex in the most cost-effective way with the least amount of mess and disruption. Give us a call and we’ll come and take a look and let you know what’s required.
Do you plaster ceilings?
Yes, we complete plastering works of all types from ceilings to walls, plaster repairs, skimming, plasterboarding, overboarding, plastering whole rooms, plasterboarding and skimming house extensions, and new build houses consisting of many rooms and also plastering renovation properties. No job is too big or too small. Please contact us for a quotation for your plastering requirements.
Can you help erect a partition wall?
We can help erect partition walls. A partition wall or stud wall is a non load bearing wall which can be installed to divide up a space. When erecting a stud wall we can help with constructing the studs, which is the timber frame that provides the structure, plasterboarding, and them skimming the surface.
What is overboarding?
Overboarding is applying new plasterboard over the top of the existing plastered surface as opposed to the new plasterboard being screwed directly to the ceiling joists. Essentially it’s like applying a new skin over the top of the old one. In the case of an artexed or lath and plaster ceiling, new plasterboard would be installed over the top of the existing ceiling. When overboarding it is very important to locate and fix into the original ceiling joists.
Why are there small cracks and hazes in my new plastering?
Sometimes small cracks and hazes may be seen in new plastering as it dries due to the materials shrinking. Sometimes this can be more evident if plaster has been dried out too quickly, maybe if the heating has been put on high. Hairline cracks can occur in places and are fairly normal with temperature changes as everything does expand in higher temperatures.
What is skimming?
Skimming means to apply a thin coat of finishing plaster to an existing wall or ceiling or to new plasterboards. Skimming creates a smooth finish to walls and ceilings before painting or applying wallpaper.
What do I need to prepare for you to plaster my room?
There are a number of things you can do in advance of us arriving to plaster your room.
Where possible please remove furniture and accessories such as pictures, mirrors, and ornaments
If a piece of furniture is too large or heavy to be moved we will cover it for protection and work around it
We will cover carpets and flooring with our own dust sheets when we arrive and before any work commences
We will need access to water to carry out our work so we may need to access other rooms to fetch water and we will discuss this with you when we arrive
We will bring additional dust sheets to cover flooring in any rooms we need to access to obtain water
If there are any existing wall coverings in place such as wallpaper or flaky paint these can be removed. We are happy to complete this work for you, however, if you can do this work yourselves prior to our arrival this will help to keep costs down. If you would like us to complete any such preparation work please make us aware of this when we are discussing your plastering job and providing our quotation
When we are plastering we need to cover light fixtures to protect them. We do this using black plastic sacks and tape. We also need to remove all sockets and light switch plates
In most cases, we will do this type of preparation ourselves on arrival. Once we’ve finished plastering it’s best if these can be left uninstalled for a short period of time to allow for the plaster to dry. If you would like us to return to reinstall them a few days after we have finished work please let us know at the quotation stage
It would be most helpful if you could keep pets and children in another room whilst we are working. This is for safety reasons and to avoid the transfer of plaster and dust into unprotected areas of your property
Will you protect my flooring and woodwork from getting ruined by plaster?
We will bring dust sheets and plastic with us to protect your flooring, woodwork and to cover any furniture which cannot be moved to another room.
How long will it take for your to plaster a room?
The time is takes to plaster a room depends on what’s required, and on the size of the room. We can give you an estimated completion time when we come and look at the job and provide a quote.
Do you offer painting and decorating services?
We are able to refer you to local trades for painting and decorating services.
Can you skim over my lath and plaster ceiling?
Skimming over lath and plaster is not recommended and could cause the original plaster to pull away from the laths which would be very messy indeed! If you have lath and plaster there are really two options, to remove the lath and plaster completely and start again, generally with plasterboard, or alternatively we can simply plasterboard over the top of the existing lath and plaster and skim to finish. Removing lath and plaster can be messy so in most cases, people opt to plasterboard over it.
My walls have just been plastered. How long do I have to wait before I can paint my new plaster?
Depending on the work carried out, it would usually take around one week for the plaster to dry. During the work, the skim finish will be light pink, within three to four hours this turn a deep brown colour as the plaster cures. As it begins to dry, it returns to a very light pink colour, as this happens it will be obvious it is beginning to dry. You should wait for the entire area to be light pink before decoration.
I have some joint cracks in my plaster ceiling. How can I fix them?
Cracking in a ceiling are usually caused by movement in the timber joists above, you can use a lightweight filler such as Easy fill to try and minimise future cracking.
Do I need to put PVA on the newly plastered walls before painting them?
No, this is common practice for people hanging wallpaper to seal the newly skimmed walls, this helped paper to stick and allow decorators time to position the paper but it actually makes the walls harder to paint as emulsion does not stick well to PVA and cannot soak into the plaster.
Can you plaster over wallpaper or do I have to remove the wallpaper before?
All surfaces need to be stripped before re-skimming can take place.
After removing the wallpaper I noticed that there are cracks, do they need plastering?
Some traditional two coat plaster can be 60 or seventy years old, cracking is normal, you might want to have the walls skimmed for a paintable finish but if you are hanging new paper generally you will be fine to carry on.
Can you simply patch up a damaged area?
Usually, damaged plaster can be removed and repaired to blend in with the remaining existing plastered surfaces.
Can I get my insurance company to pay for the plastering repairs?
This would depend on the insurance company you are covered by. Some will supply their own contractors; some may ask you to get three quotes for comparison. We offer free written quotes that you can forward on to your insurer.
Do you require access to water or electricity onsite?
We would need access to clean mixing water from a tap and power for our mixing equipment. We do have a portable generator, but these are impractical to use in a domestic plastering setting.
Will there be a lot of dust? How messy is plastering?
Plaster is supplied as a dry powder in 25kg bags, these need to be mixed with clean water on-site so there is unfortunately always going to be some dust that we cannot contain. All rooms are cleaned as we finish our work but over the next day or so, some dust will settle again. Nothing that a damp cloth or a bit of Mr sheen won’t take care of though so there’s no need to be concerned.
After you finish work do I have to remove any debris?
We will always sweep and leave the area tidy upon completion of the work. We can arrange for waste disposal if required, this will be included in your Estimate. Alternatively you can arrange disposal of any debris.
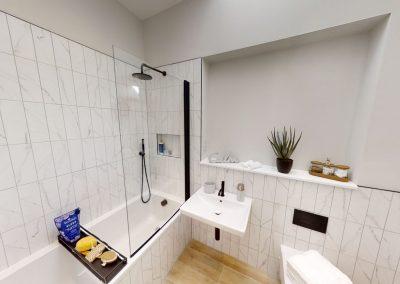
I am having a new bathroom fitted. At what point should the walls and ceiling be plastered?
Your bathroom fitter will usually call us in shortly after they have removed the old suite and tiles. We will then prepare the walls ready for painting or tiling when the new suite has been fitted.
What areas do your plasterer’s cover?
We cover Devon, Gloucestershire, Oxfordshire, Somerset and Wiltshire.
Do you do damp proofing?
We are able to offer damp proofing. Please speak to us to request an Estimate.
Can you work alongside builders in a new development?
We work alongside builders and trades on a daily basis and are always happy to quote on a new development. We can work out a cost from approved plans also if you are trying to schedule the works well in advance.
Can the work be done on weekends?
Typically we would work in the week, access to your property in the form of a key is fine for us as we prefer the rooms to be empty while we work anyway but if it’s essential to have your plastering done at a weekend we can certainly arrange this.
What type of payments do you accept?
Our preferred method of payment is bank transfer.
Can you plaster around my radiators, sockets and light switches?
We will remove sockets and light switches before plastering to ensure the best finish. Radiators would ideally be removed prior to us arriving for that reason also.
My wall or ceiling and it is uneven. Can I use undercoat plaster to even it out?
No, an undercoat plaster is very coarse and designed to fill out a deeper area. Uneven walls would usually be better off with a reskim.
Do I need to put PVA on the new plastered walls before I can wallpaper?
If you are wanting to wallpaper straight onto newly plasterered walls then unlike the painting question above you will need to apply a coat of PVA first otherwise the plaster will just suck all the moisture out of your wallpaper paste and you won’t be able to move the wallpaper around into position.
Do you do small jobs?
Yes we undertake all jobs small and large but you must bear in mind that to plaster a 3ft square area of wall will still require a plasterer to be on site for up to 3 hours as plaster has to be given time to set slightly before it can be trowelled up smooth. Small jobs can therefore seem quite expensive in comparison but it’s due to the time we have to wait for it to set. If you have a patching job it’s usually much more economical to get it done at the same time as something else so as to utilise the plasterers time well.
I have a hole in my ceiling that is artexed is it possible to patch it up?
Yes a good artexer should be able to patch the artex up for you once the ceiling is repaired but depending upon the artex pattern it may be difficult to get an exact match to the existing pattern. Most of our customers choose to have the ceiling re-skimmed in such cases.
I have a victorian property that has some damaged cornice but I cannot find anything like it on the market can you help me?
Trying to find original cornice to match up can be an extremely difficult, expensive and a time consuming task. Sometimes you may get lucky and find some in a reclamation yard but it is rare to find any that matches your exact style that is in good condition and intact. Our coving and cornice restoration service is just what you need. We can supply any custom made to match decorative plaster moulding from cove to ceiling roses and as the new piece is an exact replica of the original once fixed you will never know it has ever been replaced thereby keeping the original property features and not having to compromise on a quality finish.
My property is old and the ceilings are bowing will they need to come down and be re-done or is it possible to plasterboard over them?
We would prefer to look and carry out our own survey of any ceilings like this on an individual basis but generally yes it is possible to plasterboard over it and in some cases this is a better option and will certainly be cheaper and create less mess.
What is dry lining?
Dry lining or drywalling is an alternative to wet plaster. Dry lining a wall means that you attach plasterboard to the wall and fill the joins using a jointing tape and compound. In our experience, a far superior finish is achieved when the plasterboard is skimmed by a professional plasterer.
What is the difference between a square and tapered edged plasterboard?
A square edge board is designed for plastering over. A tapered edge board is designed for taping and jointing where a specialist filler is applied to the plasterboard and sanded flat ready for painting directly on to the plasterboard. This method is usually used on a commercial scale i.e. hotels, warehouses etc for speed. It isn’t ideal for a home though as it is very easy to damage the wall surface.
Can you render over old rendering or it has to be removed?
It is best to remove old render whenever possible. If the existing render is solid, then it can be rendered over also and last just as long. Each property and project is different though so this is specific to each job.
What is rendering in construction?
Rendering is the process of applying a coat of plaster, cement, or other materials to external or internal walls to protect them and improve the building's appearance. It's primarily used on the exterior to provide weather resistance and insulation.
What are the different types of rendering?
There are several types of rendering, including sand and cement render, lime render, silicone render, acrylic render, and monocouche render. Each type has specific properties, making them suitable for different applications.
What causes render to fail?
Render can fail due to poor surface preparation, incorrect mix ratios, insufficient curing, or extreme weather conditions such as heavy rain or freezing temperatures during application.
Can rendering be applied in cold weather?
Rendering in cold weather (below 5°C) is not recommended as it can prevent the materials from curing correctly. Freezing temperatures can also cause water in the render to freeze, leading to cracks and poor adhesion.
What is the best time of year to render?
Render can fail due to poor surface preparation, incorrect mix ratios, insufficient curing, or extreme weather conditions such as heavy rain or freezing temperatures during application.
How can I tell if my render has been applied correctly?
Properly applied render should have a uniform, smooth finish with no visible cracks or bubbles. It should also be firmly adhered to the wall, without flaking or peeling.
What should I do if my render is falling off?
Render that is peeling or falling off indicates poor adhesion. The affected area will need to be removed, and the surface should be prepared again, possibly with the use of a bonding agent before reapplying render.
What are the signs of poor rendering work?
Signs of poor rendering include uneven surfaces, visible cracks, areas where the render is separating from the wall, and discolouration shortly after application. Water ingress may also indicate improper rendering.
How do I know which type of render is best for my property?
The best render for your property depends on factors such as the age and type of the building, the local climate, and the aesthetic you are trying to achieve. For example, silicone render is ideal for modern properties, while lime render is best for older, traditional buildings.
What should I do before rendering a wall?
Before rendering, ensure the wall is clean, free from dust and debris, and any cracks or damage are repaired. Applying a primer or bonding agent can improve the adhesion of the render.
How many coats of render should I apply?
Most rendering systems require at least two coats: a scratch coat and a finishing coat. In some cases, additional coats may be necessary, especially for thicker applications or for added protection in exposed areas.
What happens if render is applied too thickly?
If render is applied too thickly, it can sag and crack as it dries. Thick applications may also take longer to dry, leading to uneven curing and potential failure of the render.
Why is my render bubbling?
Bubbling in render is often caused by trapped air or moisture. It can also occur if the render is applied over a damp surface or if it dries too quickly in hot weather.
Can I render over paint?
Rendering over paint is generally not recommended as it can prevent the render from adhering properly to the wall. The paint should be removed or a bonding agent should be applied to ensure good adhesion.
What causes render to crack?
Cracking can be caused by building movement, improper curing, applying render in extreme weather conditions, or using the wrong mix of materials.
How long should render last?
Render can last 20 to 30 years, depending on the type used and environmental conditions. Silicone and acrylic renders tend to have longer lifespans due to their flexibility and weather resistance.
Can I render over brickwork?
Yes, render can be applied to brickwork, but the surface must be properly prepared, clean, and free of dust. Brick walls should also be primed or sealed before rendering to ensure proper adhesion.
What is the difference between plaster and render?
Plaster is typically used for interior walls, while render is used on external surfaces. Render is generally stronger and more weather-resistant than plaster due to its thicker composition and the materials used.
How do I remove old render?
Old render can be removed using tools like a hammer and chisel or power tools like a masonry grinder. Care must be taken not to damage the underlying surface. In some cases, professional help may be required.
What is the cost of rendering a house?
The cost of rendering depends on factors such as the size of the house, the type of render used, and labour costs. We will visit and provide an estimate of works upon request.
Is rendering a good investment?
Yes, rendering can protect your property from weather damage, improve energy efficiency, and enhance curb appeal, potentially increasing the property’s value.
Can render be applied to a timber frame building?
Yes, silicone and lime renders are often used on timber frame buildings because of their flexibility and breathability, which can accommodate the movement of the structure.
How do I maintain rendered walls?
Rendered walls should be cleaned annually to remove dirt and algae. Small cracks should be repaired promptly, and any areas of damaged render should be addressed before they worsen.
What’s the difference between monocouche render and silicone render?
Monocouche render is a single-layer, cement-based render that is applied in one coat, while silicone render is a flexible, breathable material applied in a two-coat system.
Can rendering improve a building’s insulation?
Yes, modern renders, particularly external wall insulation (EWI) systems, can significantly improve a building’s thermal performance by reducing heat loss.
Why is my render discolouring?
Discolouration can be caused by exposure to pollution, moisture, and UV rays. Using high-quality, UV-stable renders can help prevent this problem.
Is there a render that doesn’t need painting?
Silicone and acrylic renders are coloured through the material, meaning they don’t need painting. This provides a long-lasting finish without the need for regular maintenance.
Can rendering fix a damp problem?
Rendering can help protect against damp by providing a waterproof barrier. However, if the damp is caused by underlying structural or plumbing issues, these must be addressed first.
How do I prevent my render from drying too quickly?
To prevent rapid drying, apply render during cooler times of the day and avoid direct sunlight. In hot weather, dampen the wall slightly before applying the render.
What should I do if my render freezes during application?
If the render freezes during application, it will not cure properly and may need to be removed and reapplied. Always avoid rendering in freezing temperatures.
Can I render over insulation boards?
Yes, rendering over insulation boards is common in external wall insulation systems. A base coat and mesh are applied over the boards before the final render coat.
How do I prepare my wall for rendering?
To prepare your wall for rendering, clean the surface, remove any loose material, and repair any cracks or damage. Applying a bonding agent or primer can improve adhesion.
What is breathable render?
Breathable render allows moisture to escape from the building’s walls while preventing water from penetrating from the outside. Lime and silicone renders are examples of breathable systems.
Can render be applied to painted brick?
Rendering over painted brick is possible, but the paint should be removed, or a strong bonding agent should be used to ensure proper adhesion.
What are the benefits of silicone render?
Silicone render is highly flexible, resistant to cracking, breathable, and available in a variety of colours, providing a durable and low-maintenance finish.
How thick should my render be?
The thickness of render depends on the type being applied. For traditional sand and cement render, a thickness of 10-15mm is recommended. For silicone or acrylic renders, a thinner application is often sufficient.
What is lime render used for?
Lime render is commonly used on older or historic buildings because it is breathable and can accommodate the movement of older structures without cracking.
Can I DIY render my home?
While it’s possible to render your home as a DIY project, it requires skill and experience to achieve a good finish. For larger or more complex jobs, it’s recommended to hire a professional.
What is the drying time for silicone render?
Silicone render usually dries within a few hours to a day depending on weather conditions, but full curing may take several days.
What are the common mistakes made when rendering?
Common mistakes include applying render too thickly, using the wrong materials, failing to prepare the surface correctly, and rendering in poor weather conditions.
Is silicone render worth the extra cost?
Silicone render is more expensive than traditional sand and cement render, but its flexibility, weather resistance, and low maintenance make it worth the investment for many homeowners.
Can I render in the rain?
Rendering in the rain is not recommended as the water can prevent proper adhesion and curing, leading to cracking and failure of the render.
How do I repair cracked render?
Small cracks can be repaired using exterior filler, while larger cracks may require a patch of the same render material. It’s important to repair cracks promptly to prevent further damage.
Can I render over pebbledash?
Rendering over pebbledash is possible, but it’s important to assess the condition of the pebbledash first. A bonding coat may be necessary for proper adhesion.
What is a scratch coat?
A scratch coat is the first layer of render applied to the wall. It is scratched or scored to provide a key for the second, finishing coat to adhere to.
How do I remove algae from rendered walls?
Algae can be removed using a mild detergent, soft brush, or pressure washer on a low setting. Regular cleaning helps prevent algae build-up.
What is acrylic render?
Acrylic render is a flexible, decorative render that contains plastic polymers. It provides a durable, water-resistant finish and is often used as a topcoat over base renders.
How can I prevent cracks in newly applied render?
To avoid cracking, ensure that the surface is properly prepared, use flexible materials like silicone render, and apply mesh reinforcement at weak points such as joints and corners. Rendering should also be done in optimal weather conditions, avoiding freezing or very hot temperatures.
Should I be worried about hairline cracks in render?
Hairline cracks are often cosmetic, but they can allow water to penetrate over time, leading to larger cracks or damage beneath the surface. It’s best to repair them as soon as possible to prevent further issues.
What are shrinkage cracks in render?
Shrinkage cracks occur when render dries too quickly, causing it to shrink and crack. This often happens when render is applied in hot weather or when the mix contains too much water.
How do I repair cracks in render?
Small cracks can be repaired using exterior filler or patching material. For larger cracks, you may need to remove the affected area of render, reapply a base coat, and then finish with the same render mix to match the existing surface.
What are movement cracks?
Movement cracks occur when the underlying structure of the building shifts or settles, causing the render to crack. Flexible renders like silicone or lime can help accommodate movement and reduce the likelihood of these cracks.
Can I use filler to repair render cracks?
For small cracks, exterior-grade filler can be used. However, for larger or more significant cracks, it’s better to use a patch of the original render material to ensure a more durable repair.
Why is my render cracking after a few weeks?
Render that cracks shortly after application is often a result of poor surface preparation, incorrect application, or drying too quickly in hot weather. Using the wrong render mix or applying it too thickly can also lead to early cracking.
Can weather cause my render to crack?
Yes, extreme weather conditions such as heavy rain, freezing temperatures, or hot sun can cause render to crack, especially if it hasn’t been applied or cured properly.
Why is my render absorbing water?
Render may absorb water if it hasn’t been properly sealed or if it is made of a material that isn't water-resistant. Traditional sand and cement renders are more porous than modern silicone or acrylic renders, which are designed to repel water. Poor installation or cracks in the render can also allow water to seep through.
How do I stop water from seeping through render?
To stop water from seeping through, ensure the render is properly applied without cracks or gaps. Silicone-based renders are particularly effective at repelling water. If your existing render is absorbing water, consider applying a waterproof sealant or re-rendering with a more water-resistant product.
Can poor rendering cause damp in my home?
Yes, if the render is cracked or improperly applied, it can allow water to seep into the walls, leading to damp problems inside the property. Damp can cause mould growth and damage to interior walls, making it essential to maintain the render properly.
Why is there dampness under my render?
Dampness under render can be caused by water penetration through cracks or gaps in the render, poor ventilation, or rising damp from the ground. It’s important to identify the source of moisture and repair the render or improve drainage to prevent further damage.
What is the best render to prevent dampness?
Silicone and acrylic renders are ideal for preventing dampness as they are water-resistant and allow moisture from inside the building to escape. Lime render is also good for older buildings as it is breathable and can accommodate natural movement.
How can I prevent damp patches from forming on my rendered walls?
Damp patches can be prevented by using a breathable, water-resistant render like silicone or lime, and ensuring that the surface is properly sealed. Regular cleaning and maintenance of gutters and downpipes can also prevent water from running down the walls.
What should I do if my render is trapping moisture?
If your render is trapping moisture, it may be due to poor breathability or a lack of ventilation. In some cases, reapplying a breathable render like silicone or lime may be necessary to allow the moisture to escape. You may also need to improve drainage around the base of the building.
Why is my render discolouring due to damp?
Discolouration caused by damp is often due to water being absorbed by the render, leading to stains or patches of mould or algae growth. Waterproof render or sealant can help prevent this by repelling moisture and preventing water from penetrating the render.
Can dampness in render cause structural damage?
Yes, if dampness penetrates deep into the walls and is left untreated, it can weaken the structure of the building. Prolonged exposure to water can cause timber to rot, metal components to rust, and masonry to weaken.
What’s the difference between rising damp and penetrating damp?
Rising damp occurs when moisture from the ground moves up through walls due to capillary action. Penetrating damp occurs when water enters the building through defects in the exterior, such as cracks in the render or damaged roofing.
How do I fix penetrating damp caused by poor rendering?
To fix penetrating damp, you’ll need to repair the defective areas of render by filling cracks and reapplying a waterproof finish. In some cases, the entire area may need to be re-rendered if the existing render has failed.
Why is my render bubbling after rain?
Bubbling in render after rain indicates that moisture is trapped beneath the surface. This can happen if the render was applied to a damp surface or if there are cracks allowing water to enter. The affected area may need to be repaired or re-rendered.
Can poor ventilation affect render?
Yes, poor ventilation can cause moisture to build up inside the walls, leading to dampness and potential damage to the render. Proper ventilation is essential for maintaining the longevity of the render and preventing issues like mould or damp patches.
What’s the best render for rainy climates?
Silicone render is ideal for rainy climates as it is highly water-resistant, flexible, and breathable. It prevents water penetration while allowing moisture from inside the building to escape, reducing the risk of dampness.
Why is my render turning green?
Green discolouration is usually caused by the growth of algae, which thrives in damp, shaded areas. This is more common in regions with high humidity or regular rainfall. Regular cleaning and using a render with anti-algae properties can help prevent this.
How can I remove algae from my rendered walls?
Algae can be removed by gently scrubbing the surface with a soft brush and a mild detergent or by using an algae remover. Pressure washing on a low setting can also help, but care must be taken not to damage the render.
Why is my render turning black?
Black stains on render are often caused by the growth of mould or sooty pollution deposits. This is common in areas with poor air quality or where the render is exposed to high levels of moisture.
How do I clean discoloured render?
Discoloured render can be cleaned using a soft brush and mild detergent. For more stubborn stains, a specialist render cleaner or low-pressure washing can be used. Avoid harsh chemicals or abrasive scrubbing, which could damage the render.
What is causing white stains on my render?
White stains, known as efflorescence, are caused by salts migrating to the surface of the render. This is common in cement-based renders and occurs when water penetrates the render, bringing salts to the surface as it evaporates.
How can I prevent algae from growing on my render?
To prevent algae growth, ensure that the render is applied correctly and that the wall is kept clean and dry. Consider using an anti-fungal or algae-resistant render, and regularly clean shaded or damp areas where algae are more likely to grow.
Can render be stained by pollution?
Yes, pollution can cause staining on render, particularly in urban areas with high levels of vehicle emissions or industrial pollution. Silicone or acrylic renders with dirt-resistant properties can help reduce the likelihood of pollution staining.
Can render be stained by pollution?
Yes, pollution can cause staining on render, particularly in urban areas with high levels of vehicle emissions or industrial pollution. Silicone or acrylic renders with dirt-resistant properties can help reduce the likelihood of pollution staining.
Why is my render fading in colour?
Fading can occur when render is exposed to UV rays over time. This is more common with cement-based renders that require painting. Silicone and acrylic renders are more UV-resistant and tend to retain their colour for longer.
Can I repaint faded render?
Yes, faded render can be repainted. It’s important to clean the surface thoroughly and use a suitable exterior-grade paint that is compatible with the render type.
What causes yellow stains on render?
Yellow stains on render are often caused by contaminants such as pollen, lichen, or chemicals from nearby plants or materials. These can usually be cleaned off with water and a mild detergent.
How do I mix render properly?
For traditional sand and cement render, the standard mix is typically 4 parts sand to 1 part cement. Always add water slowly and mix until you achieve a smooth, workable consistency.
How long should I wait between render coats?
Allow the first coat (scratch coat) to dry for at least 24-48 hours before applying the second coat. Drying times may vary based on the weather and the thickness of the coats.
Can I apply render in layers?
Yes, render is typically applied in layers to ensure proper bonding and curing. Applying too much in one go can lead to problems with cracking and poor adhesion.
What type of render is best for brick walls?
Sand and cement render is commonly used on brick walls, but silicone or acrylic render can be better for longevity and flexibility, especially if the brickwork is prone to movement
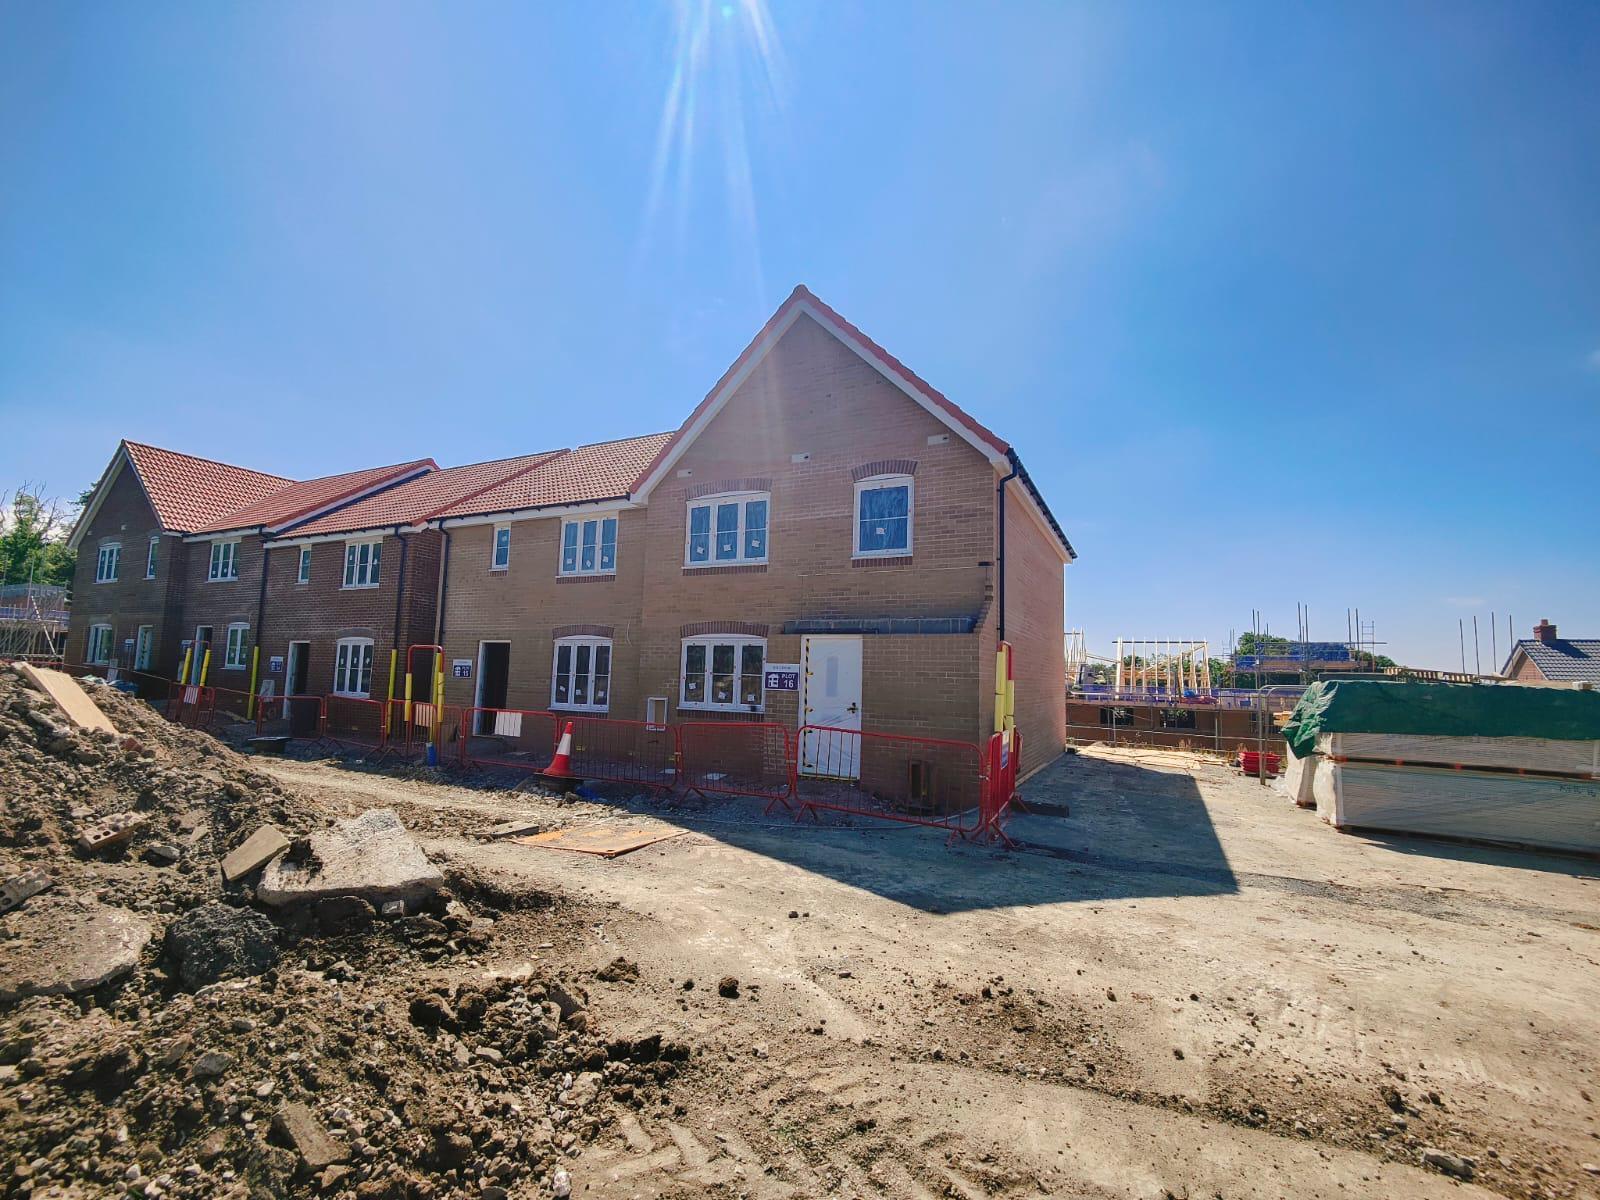
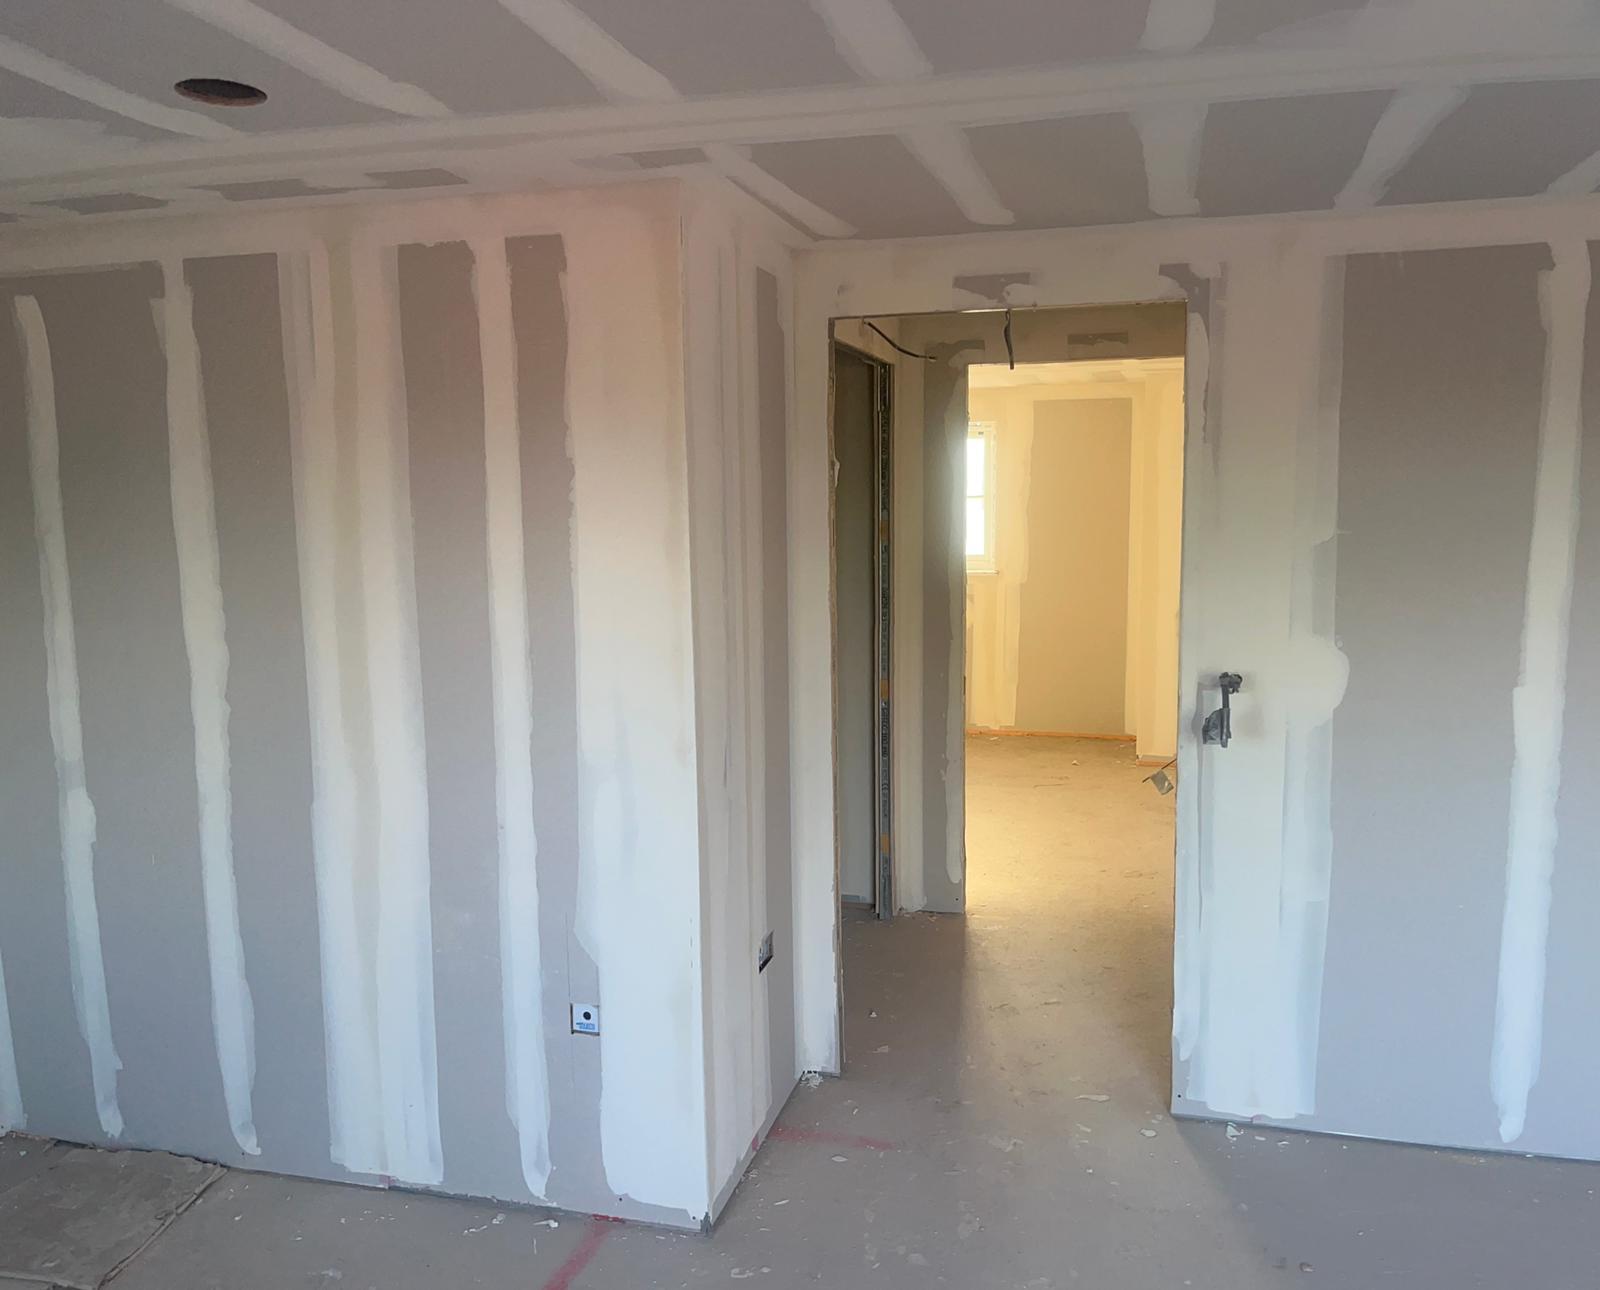
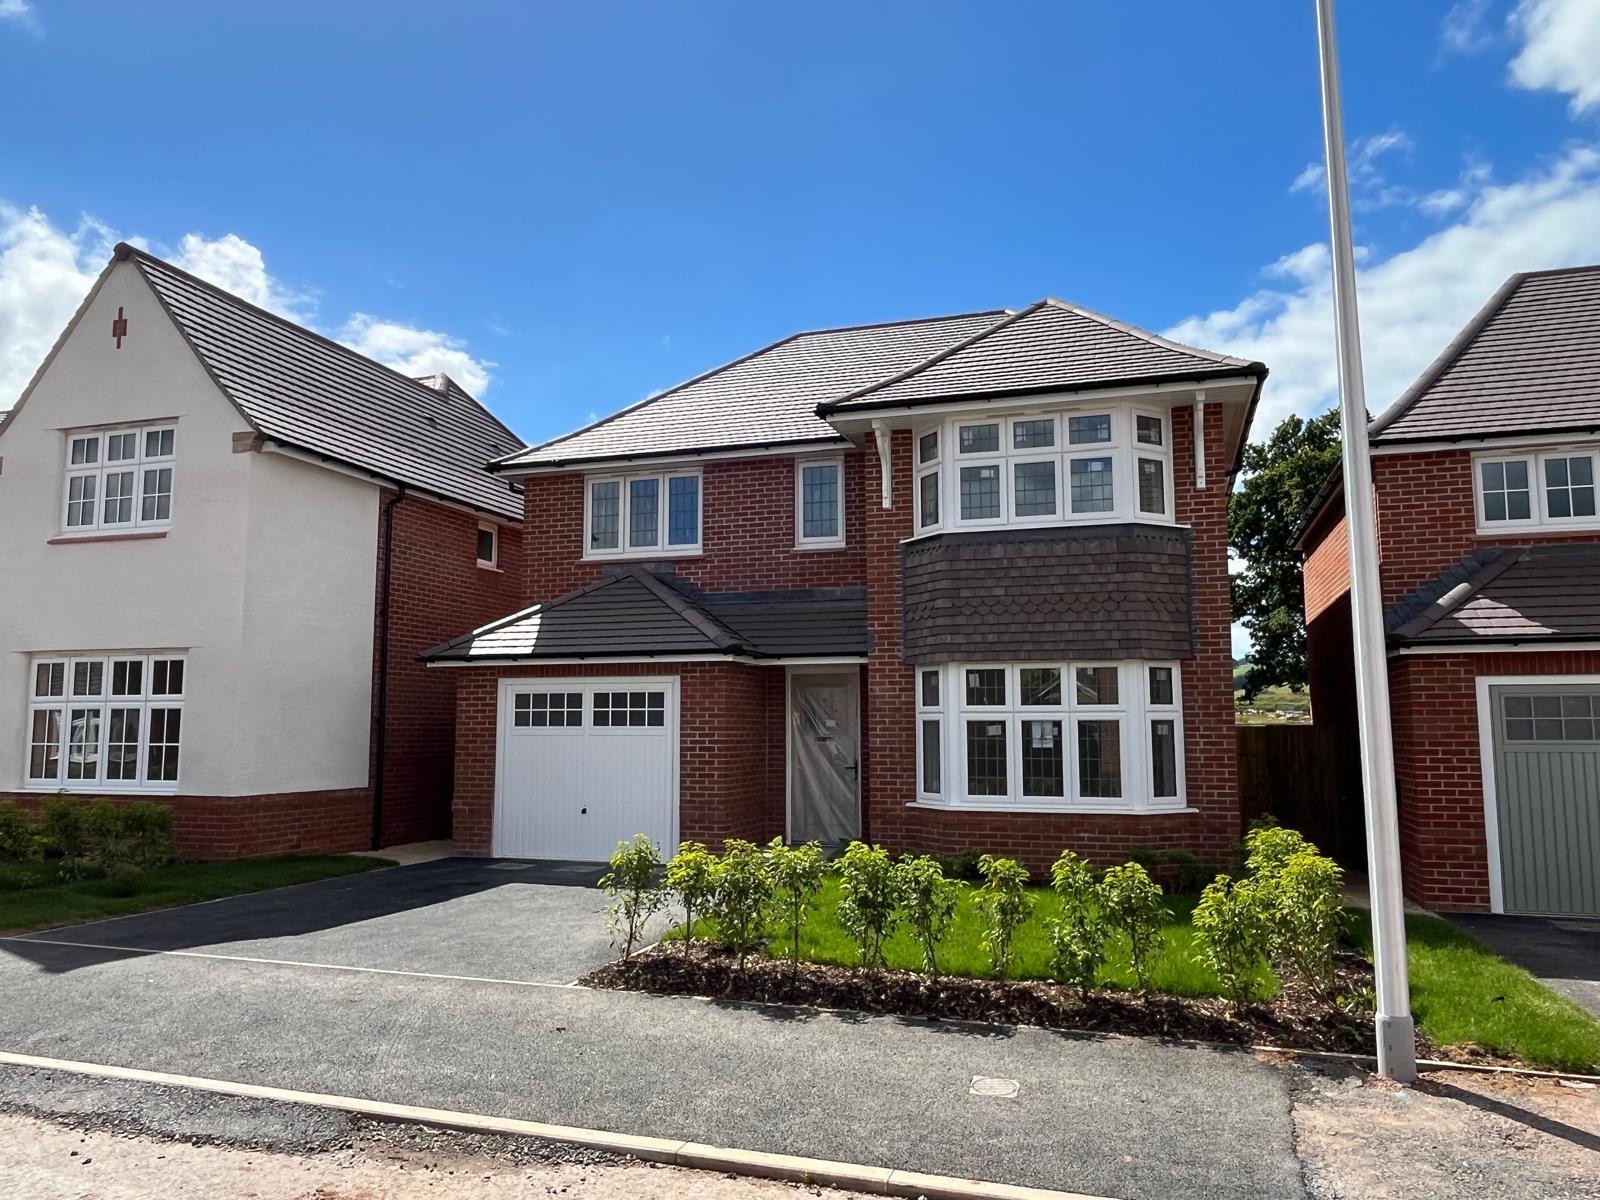
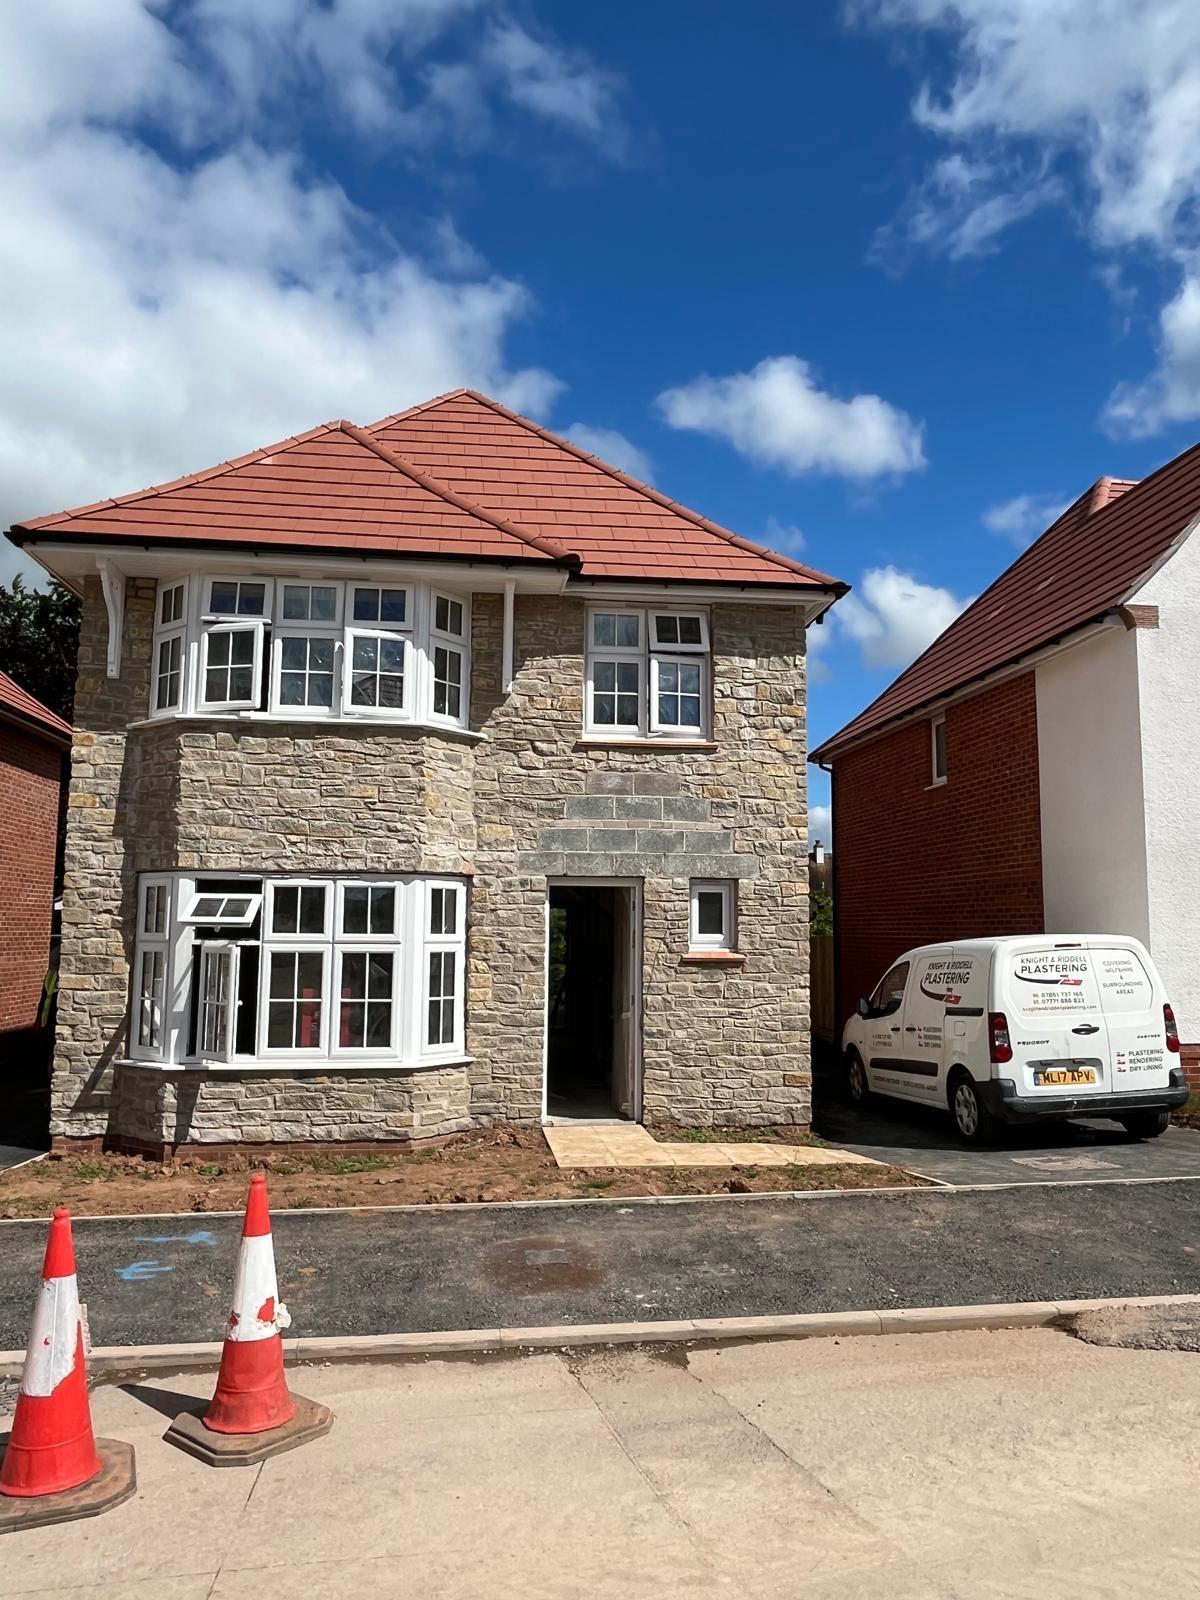
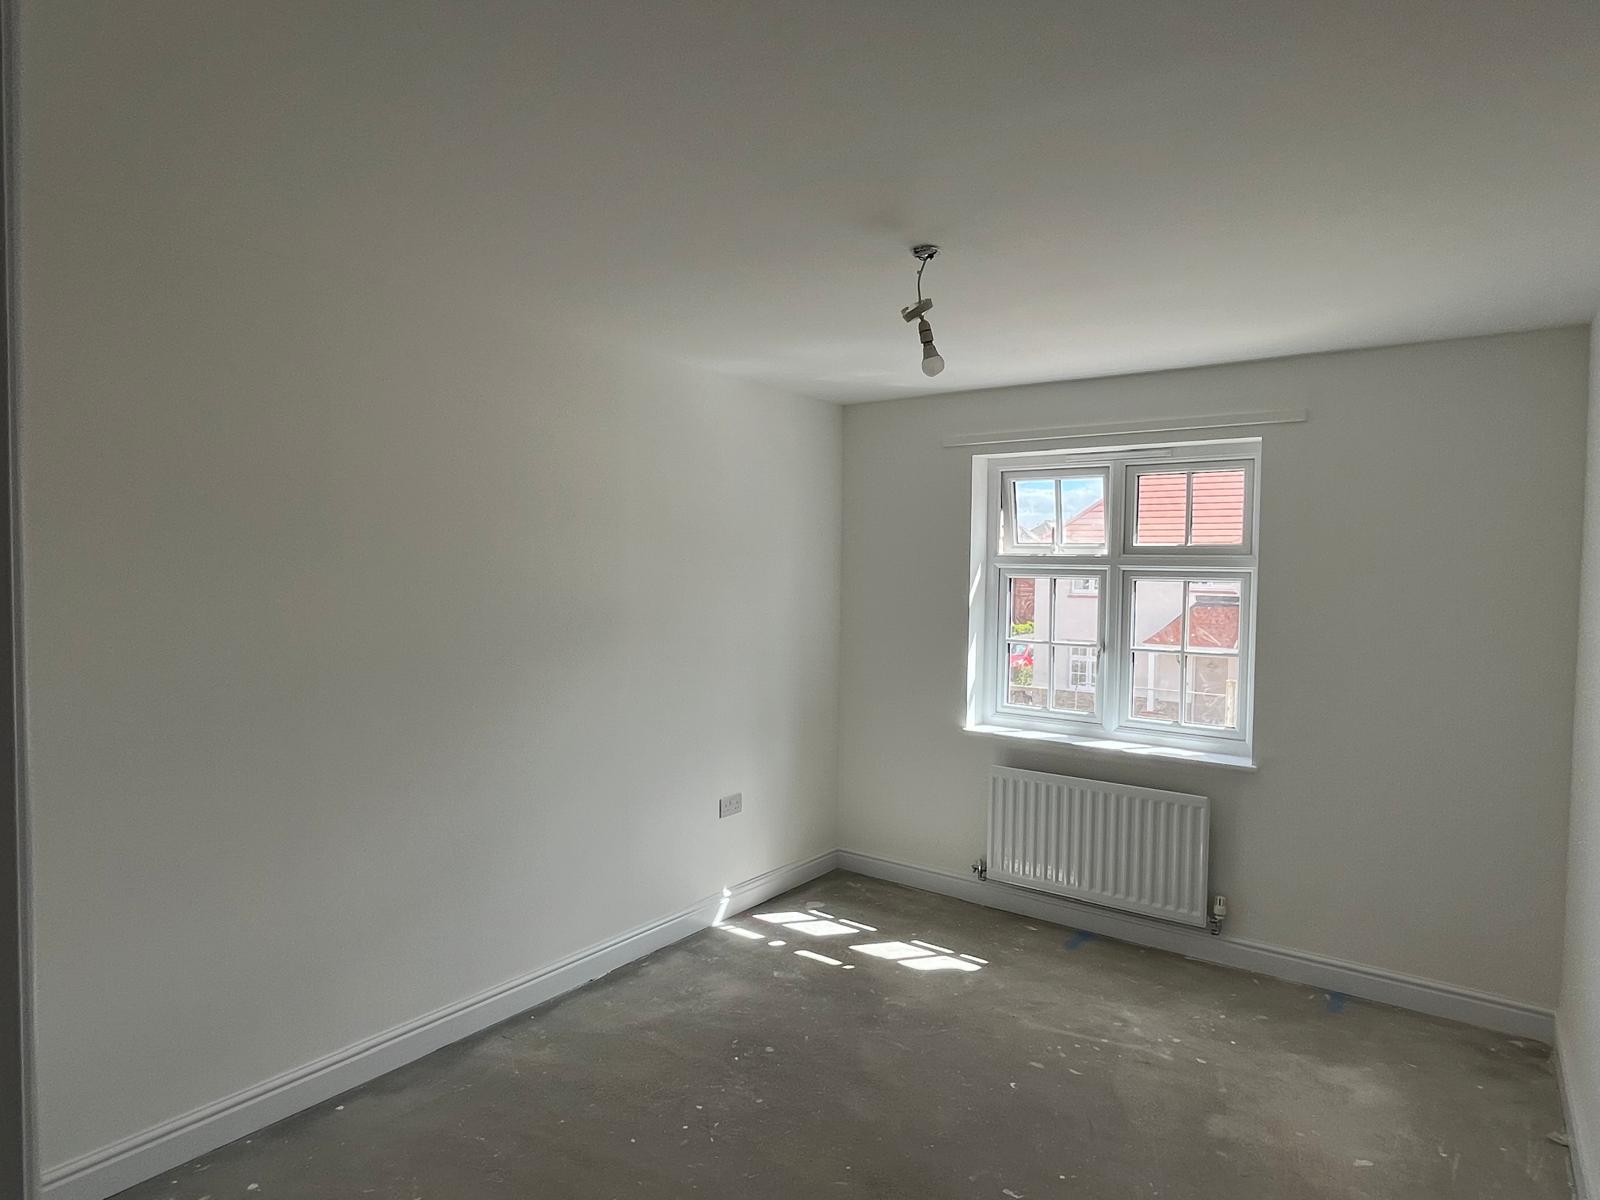
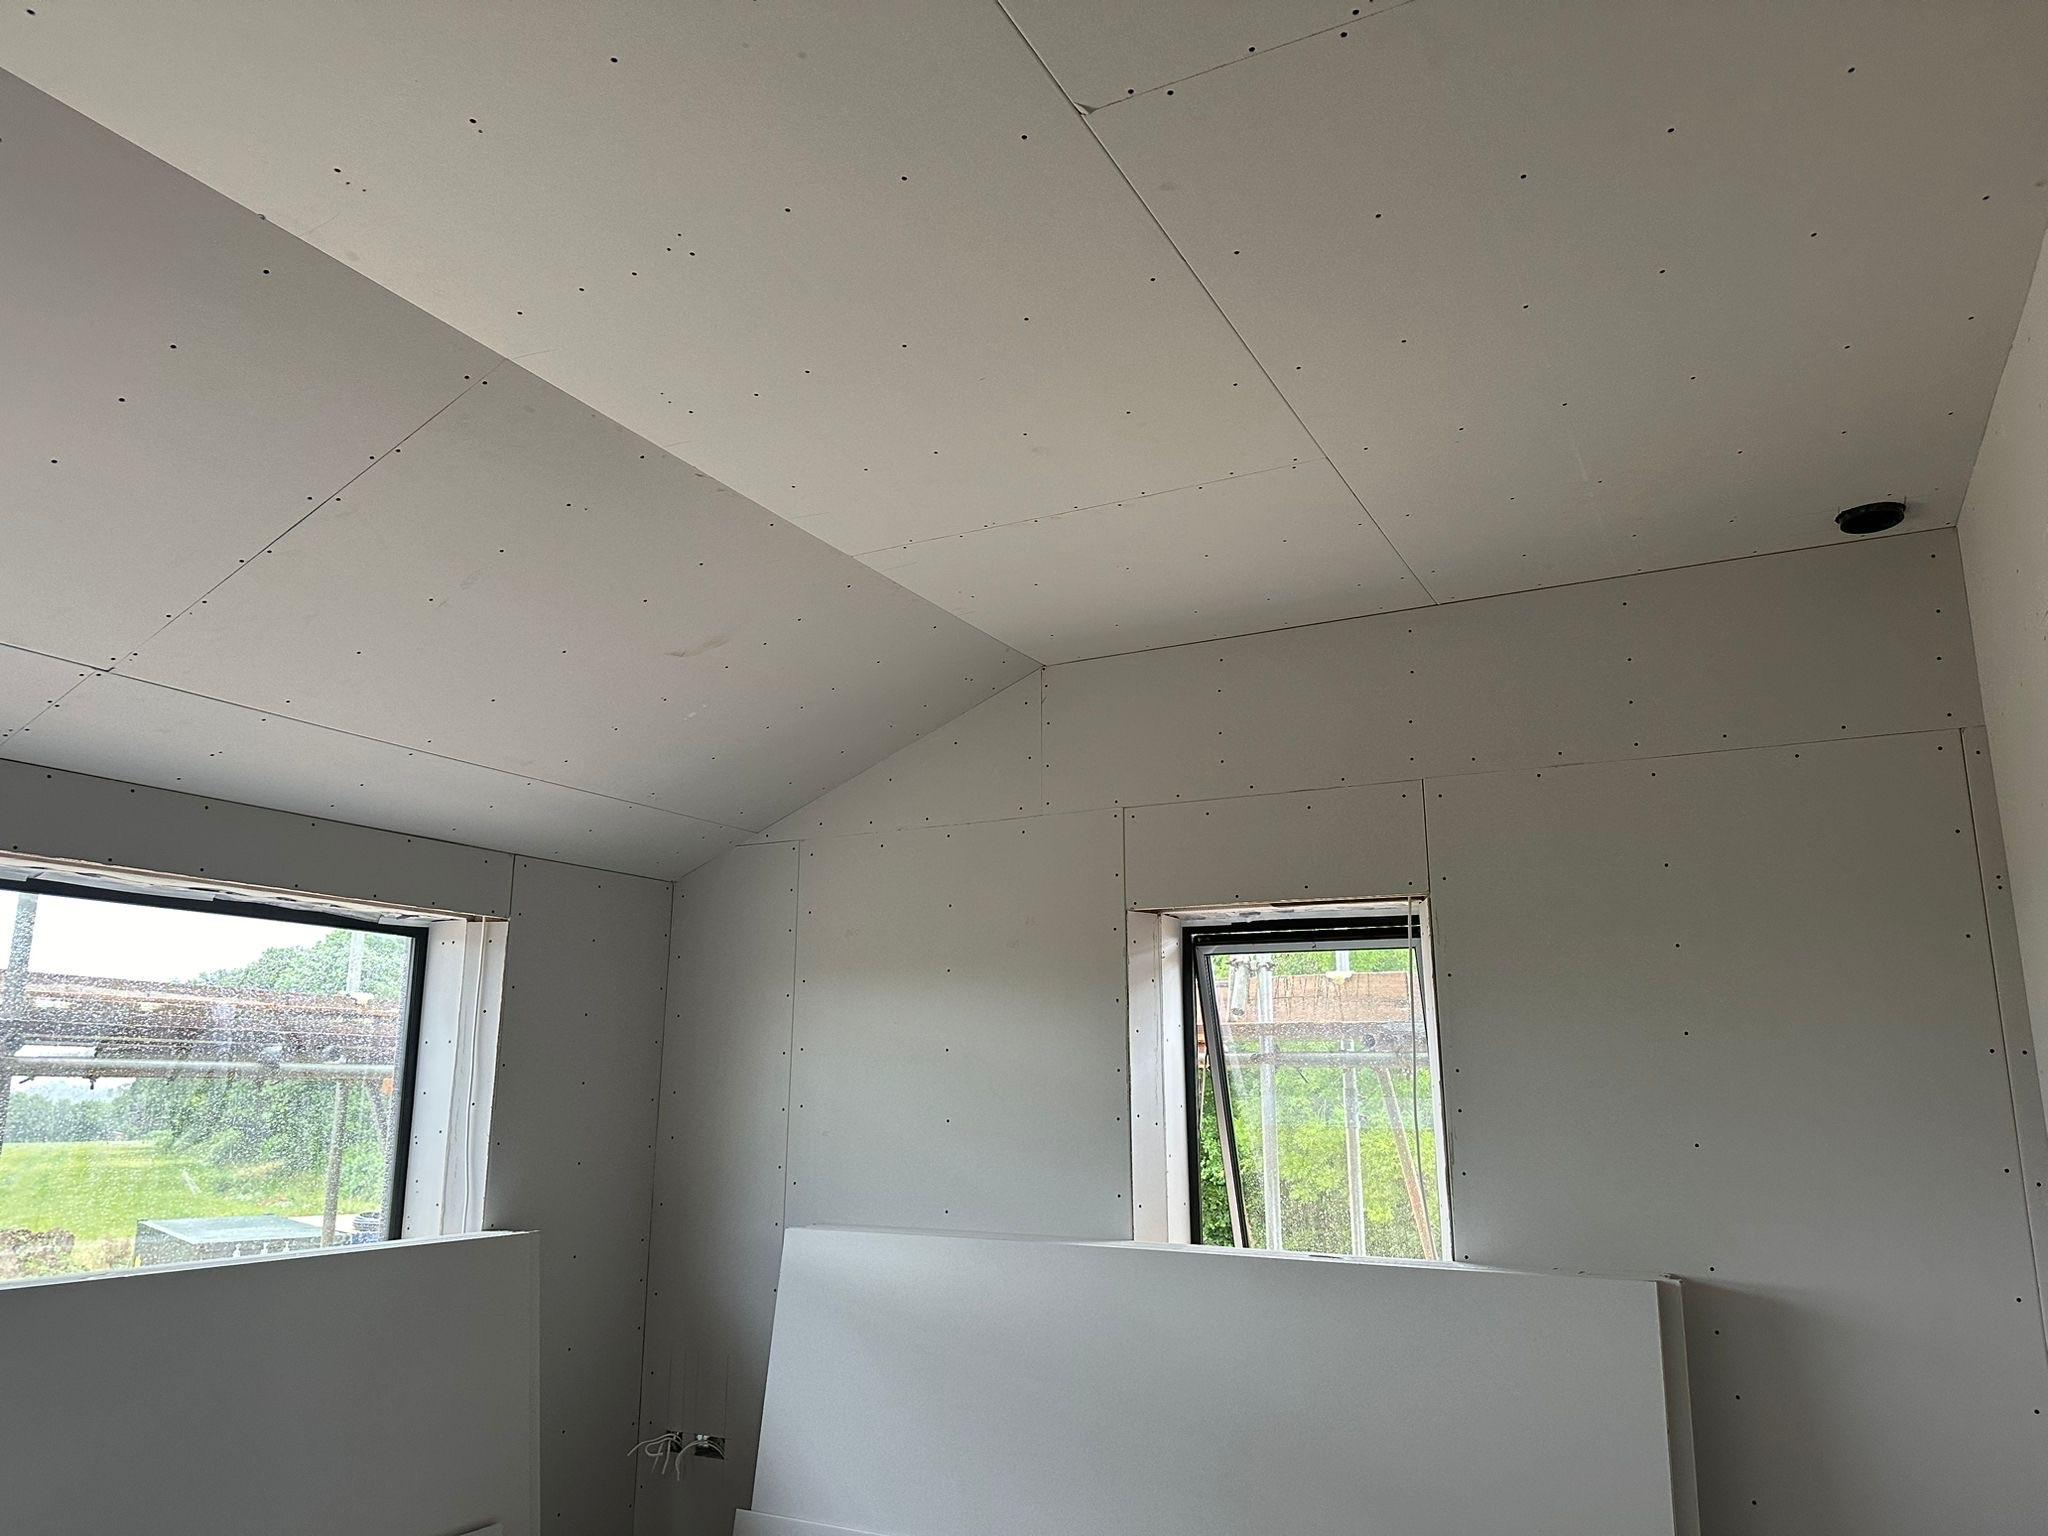
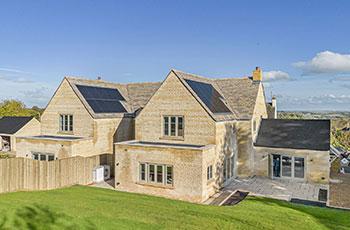
Case Studies
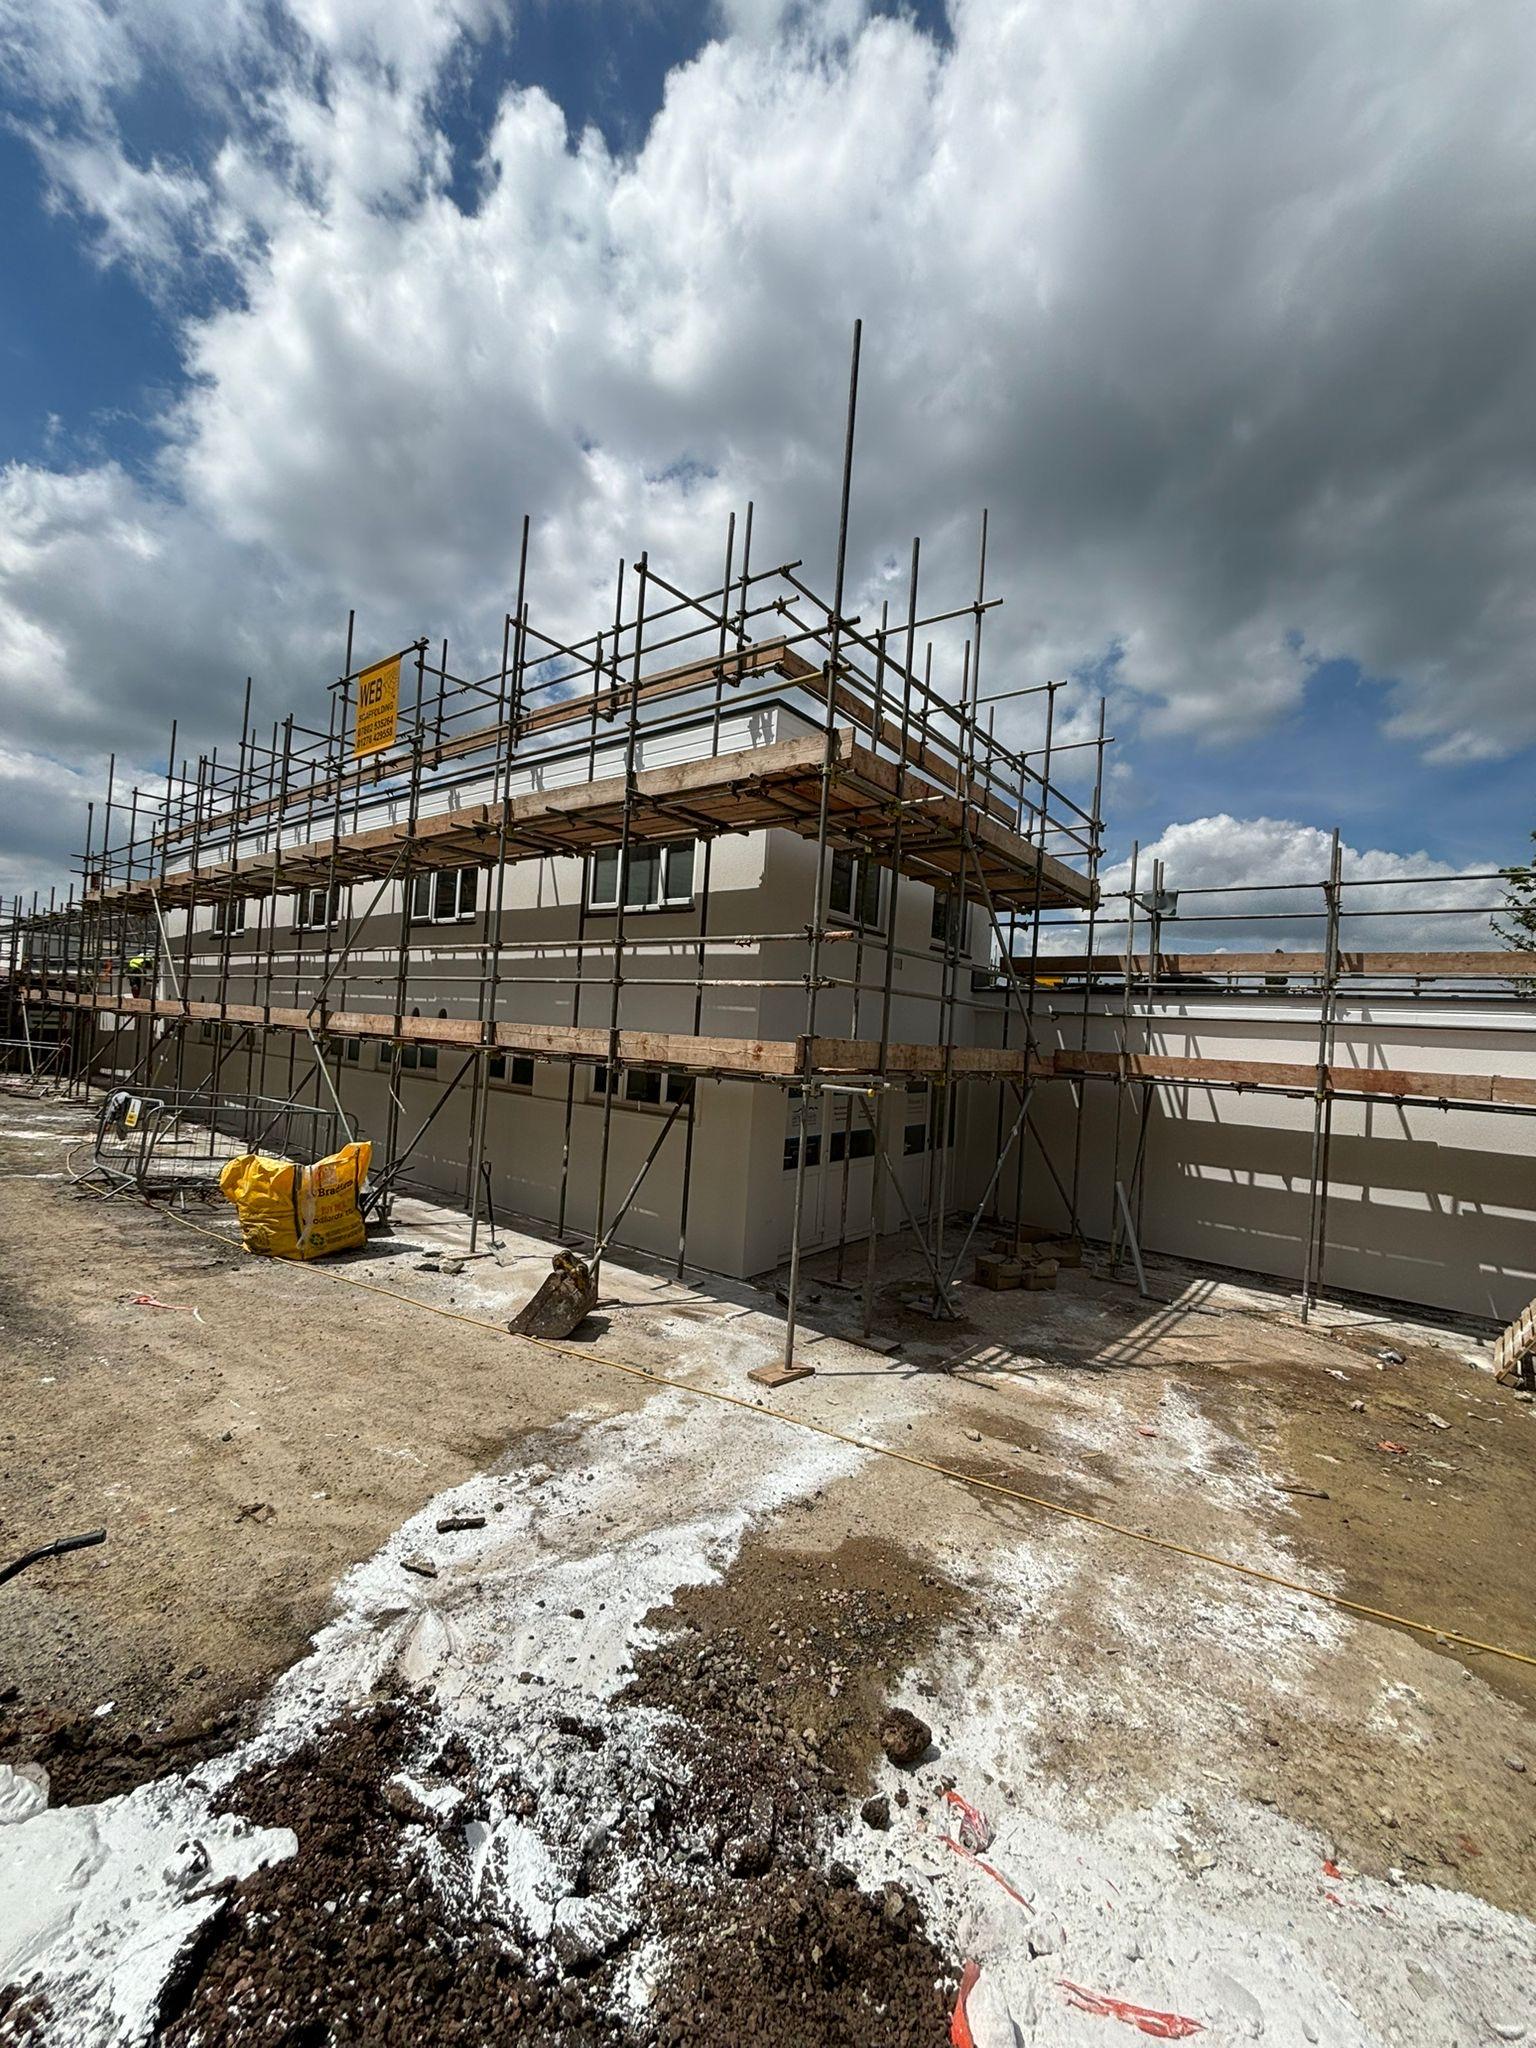
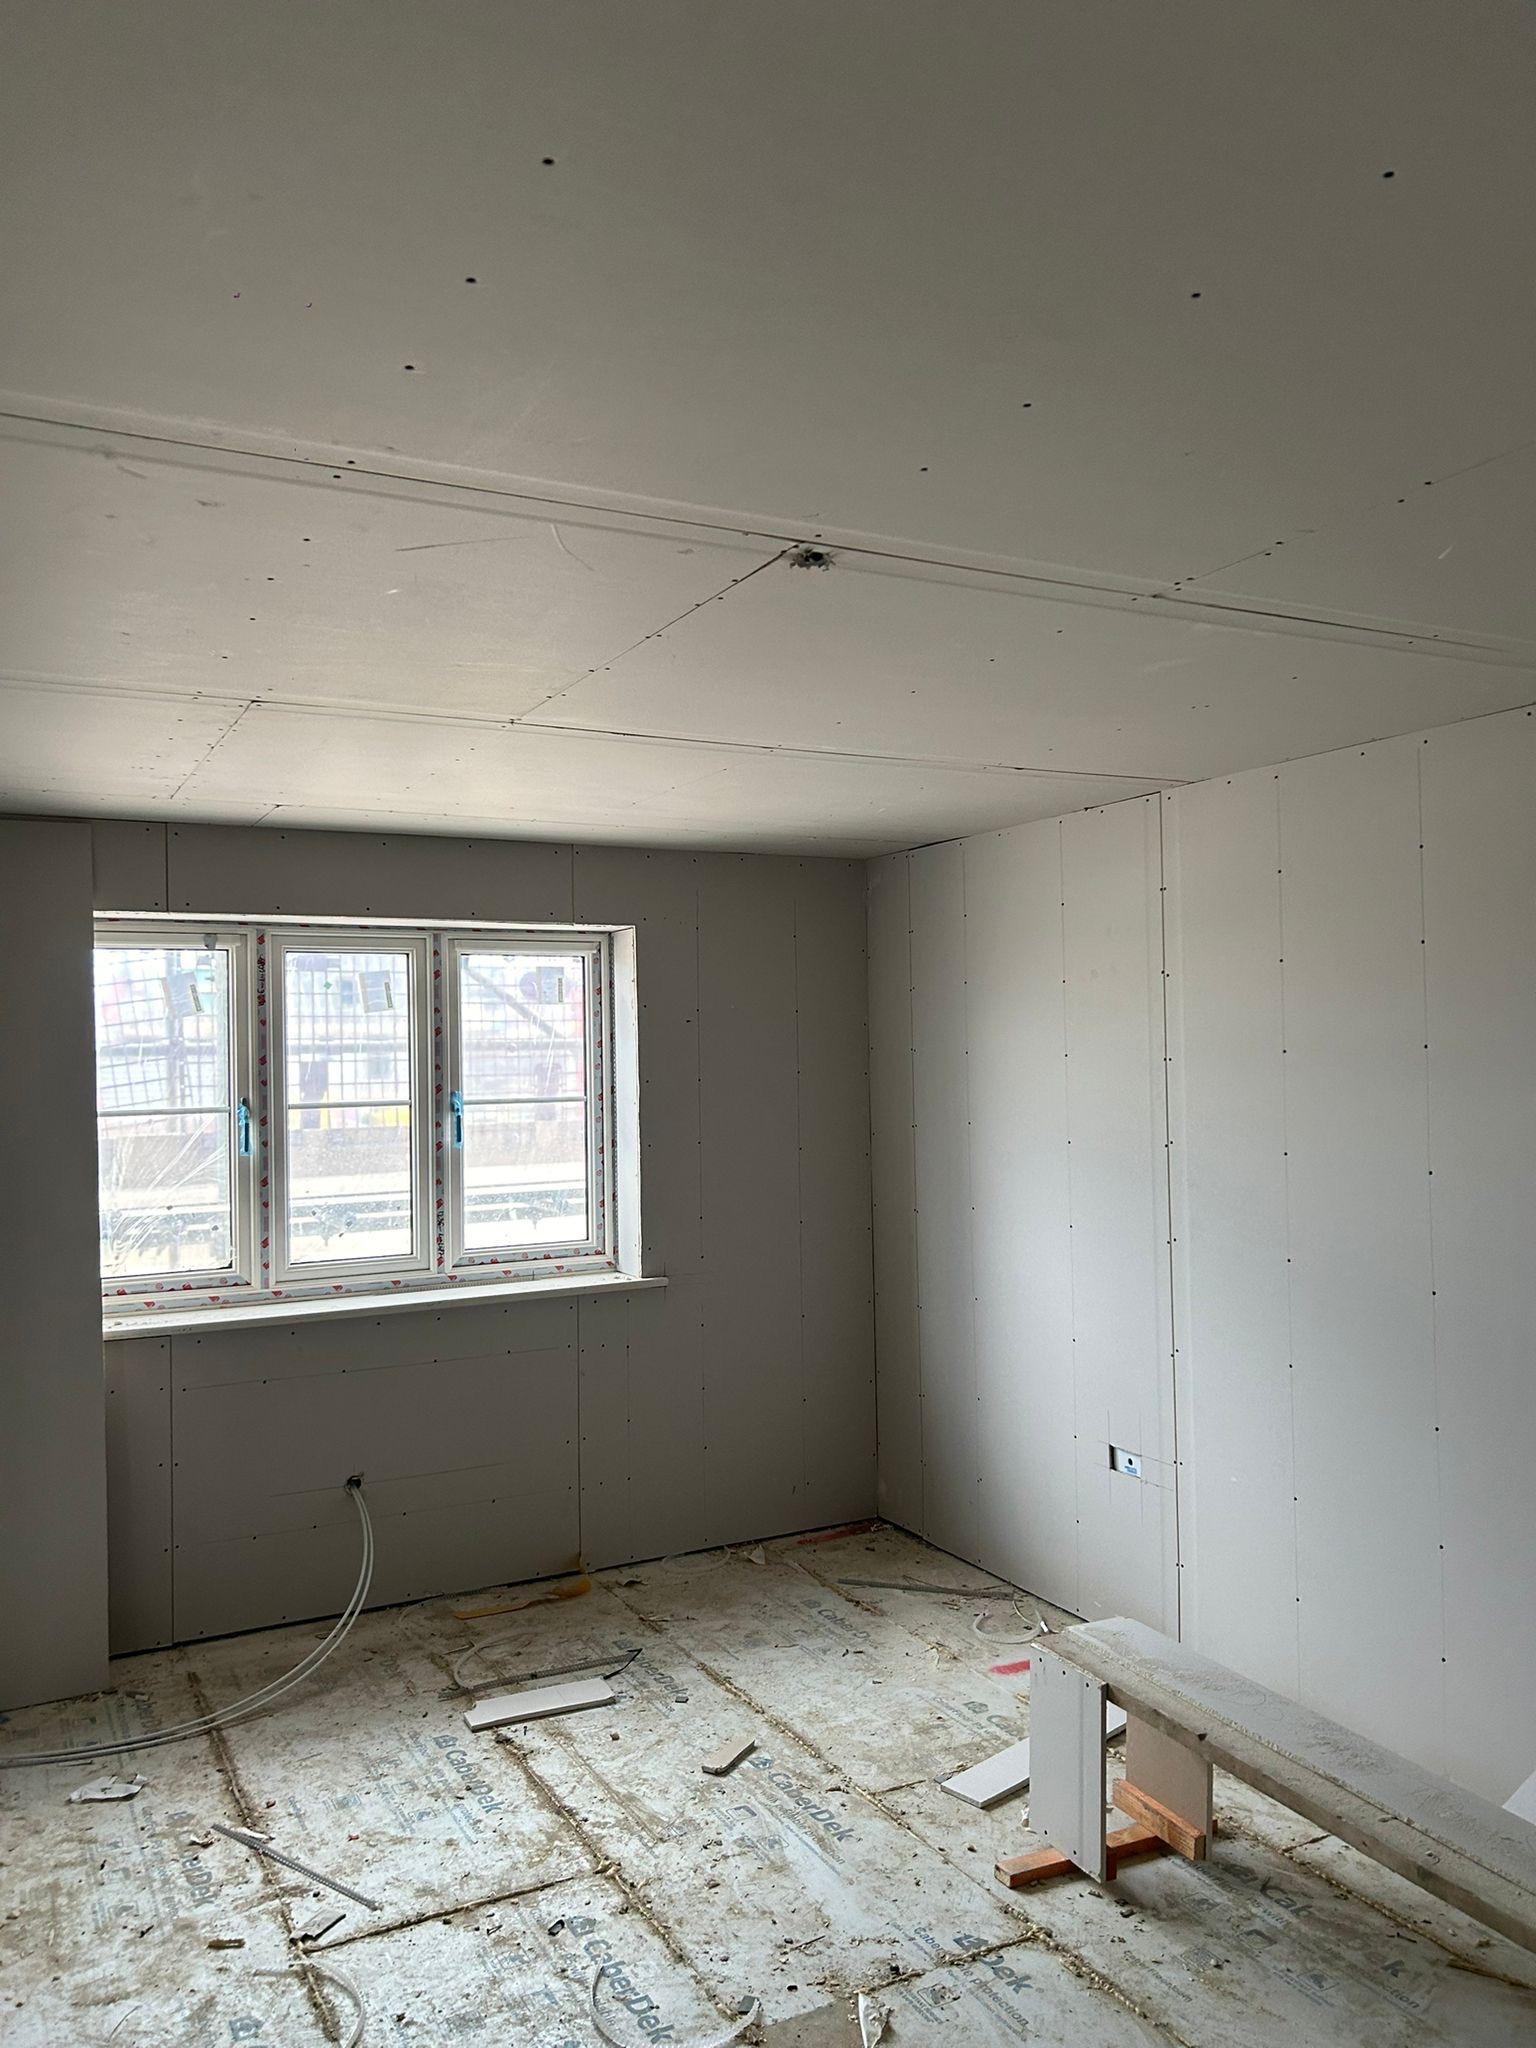
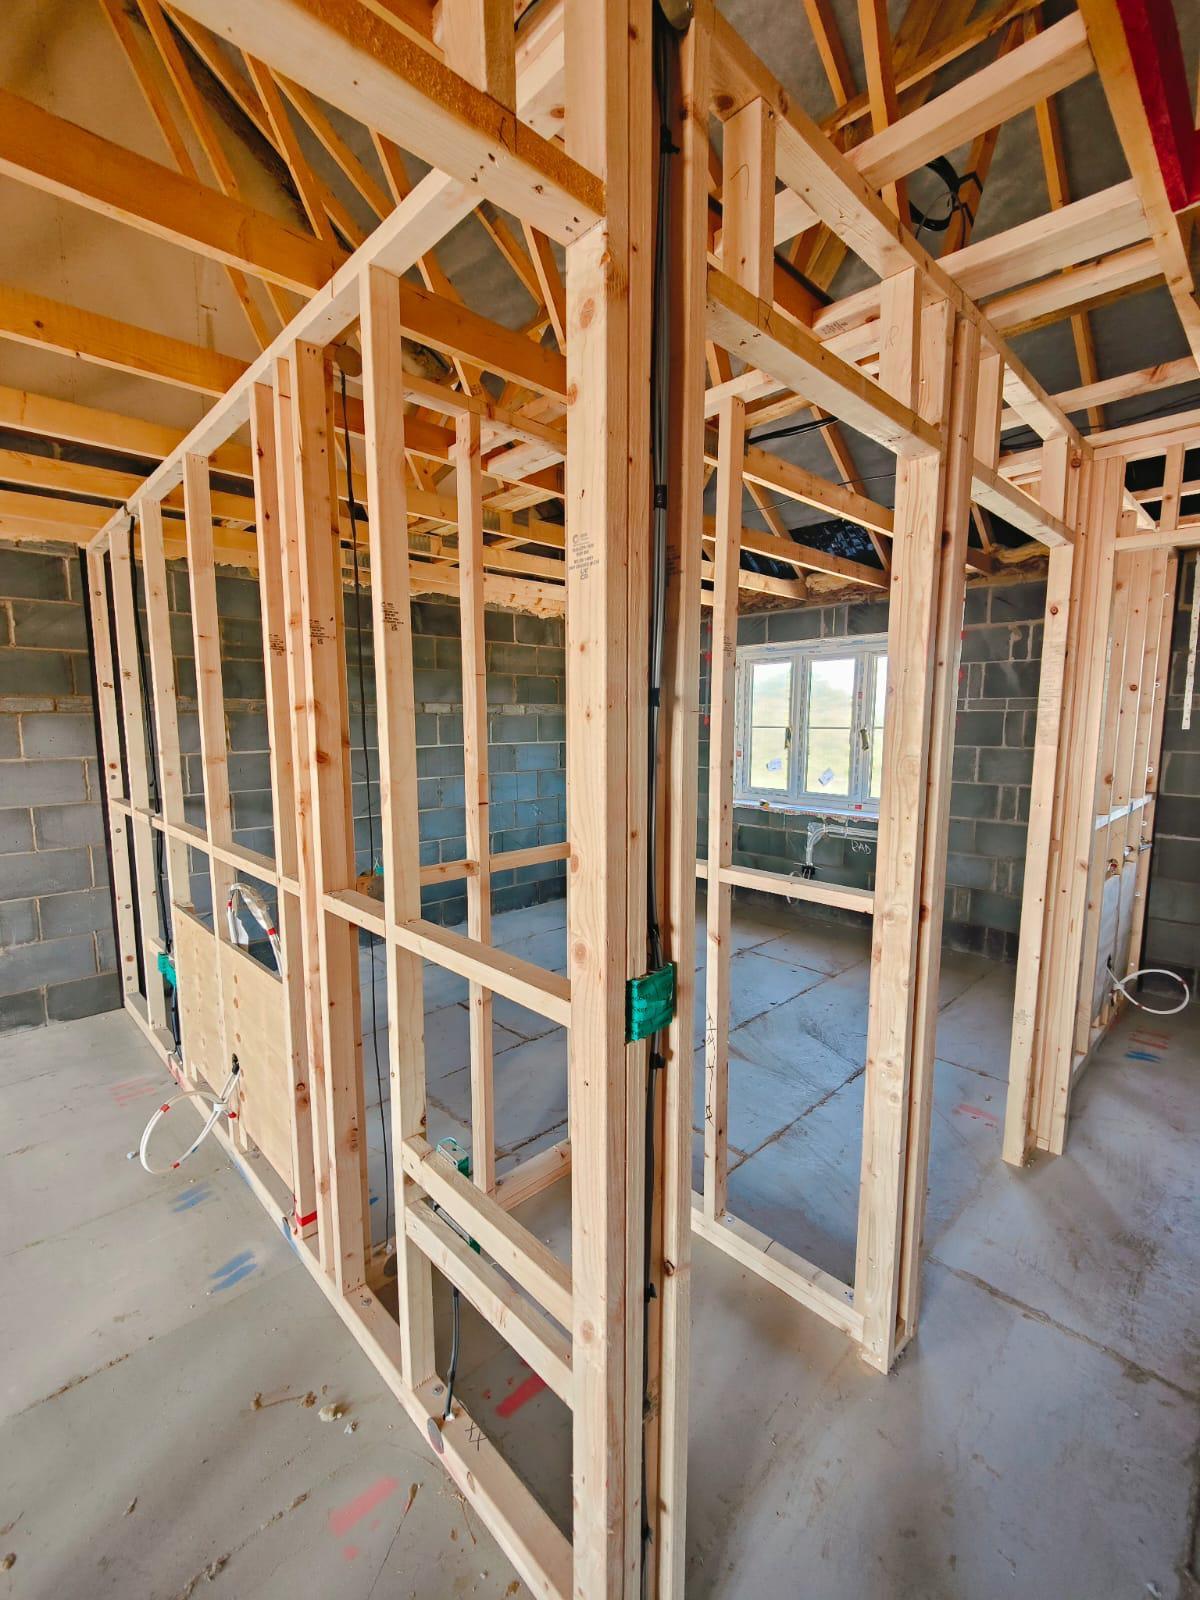
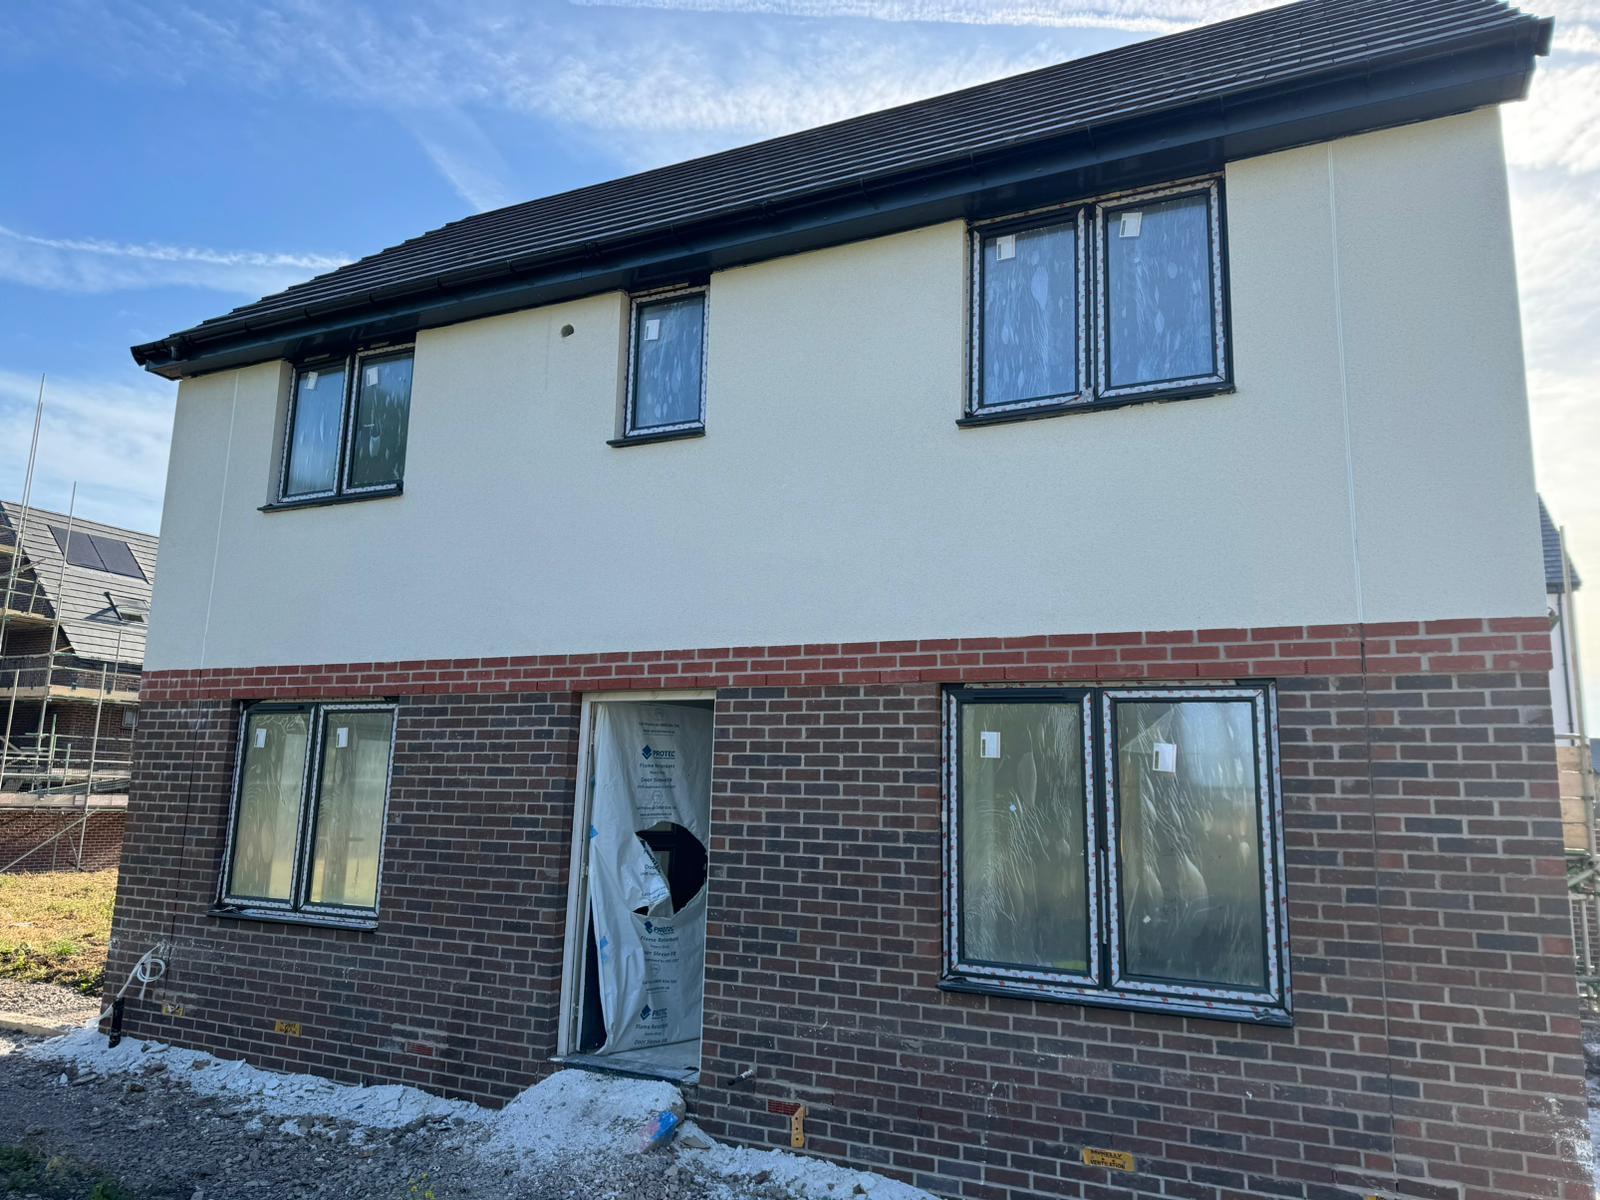
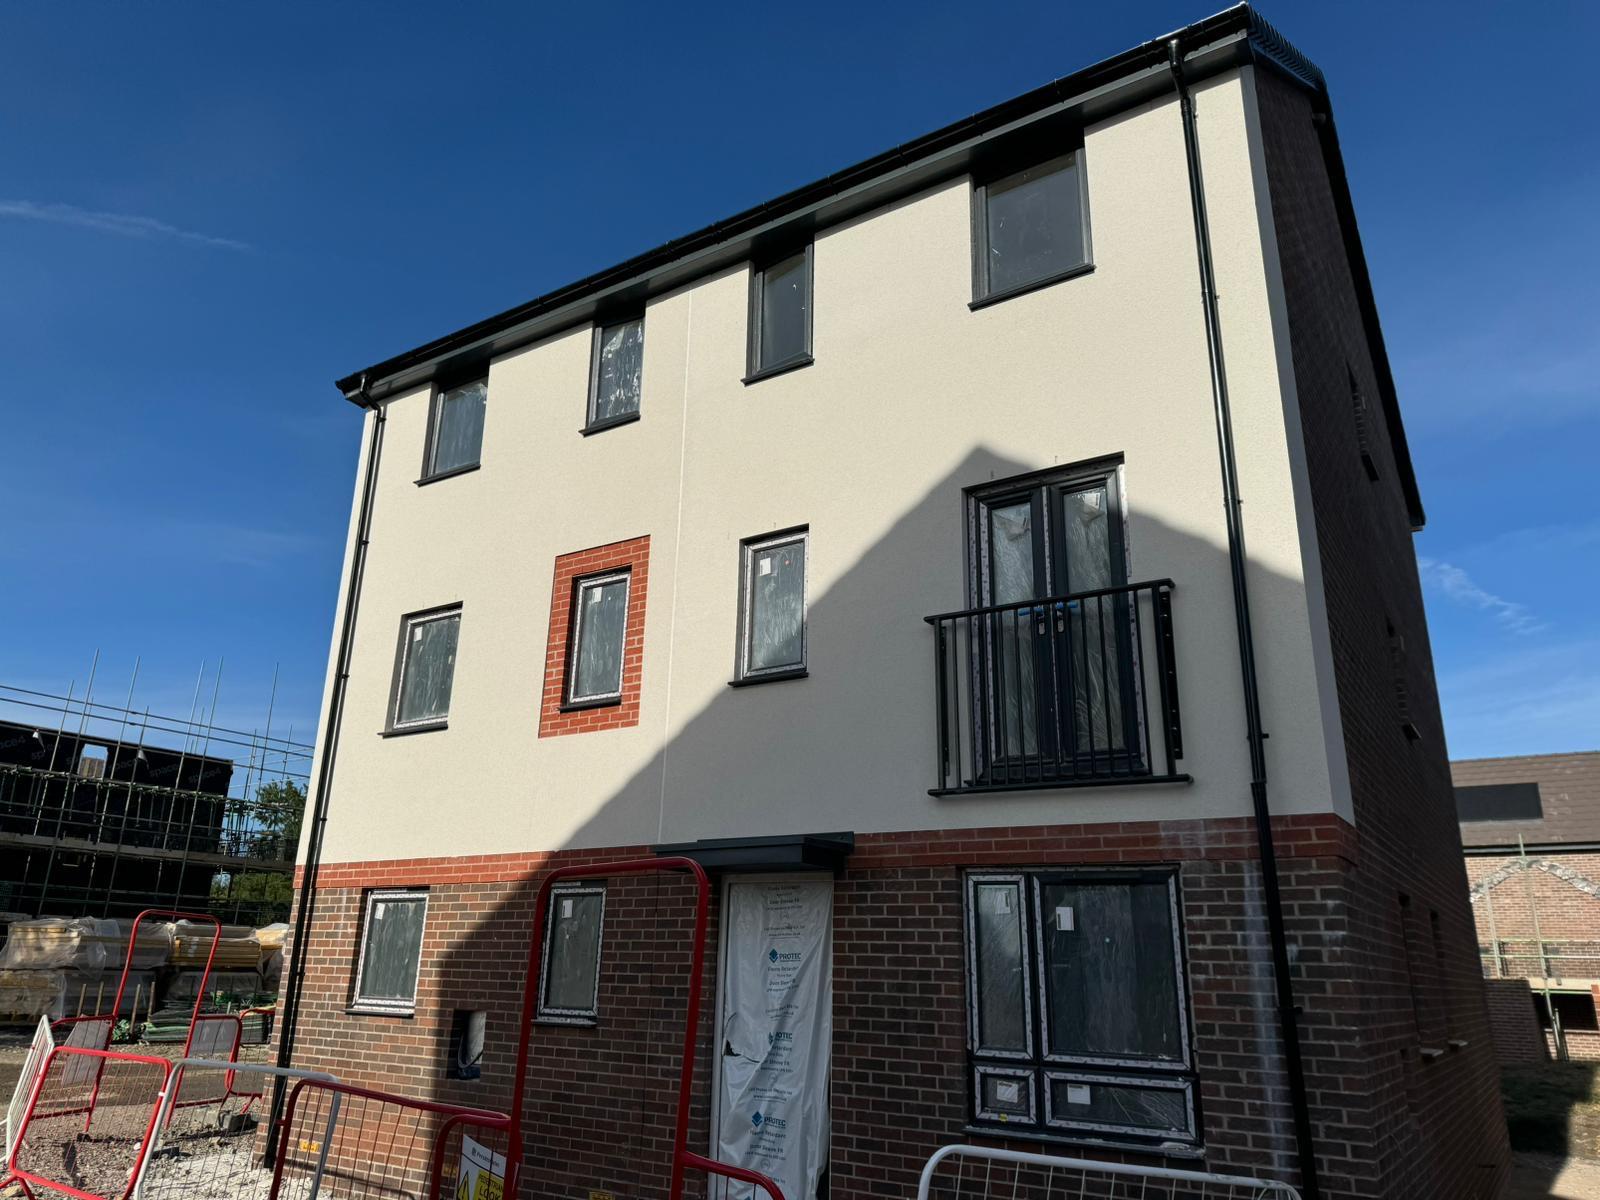
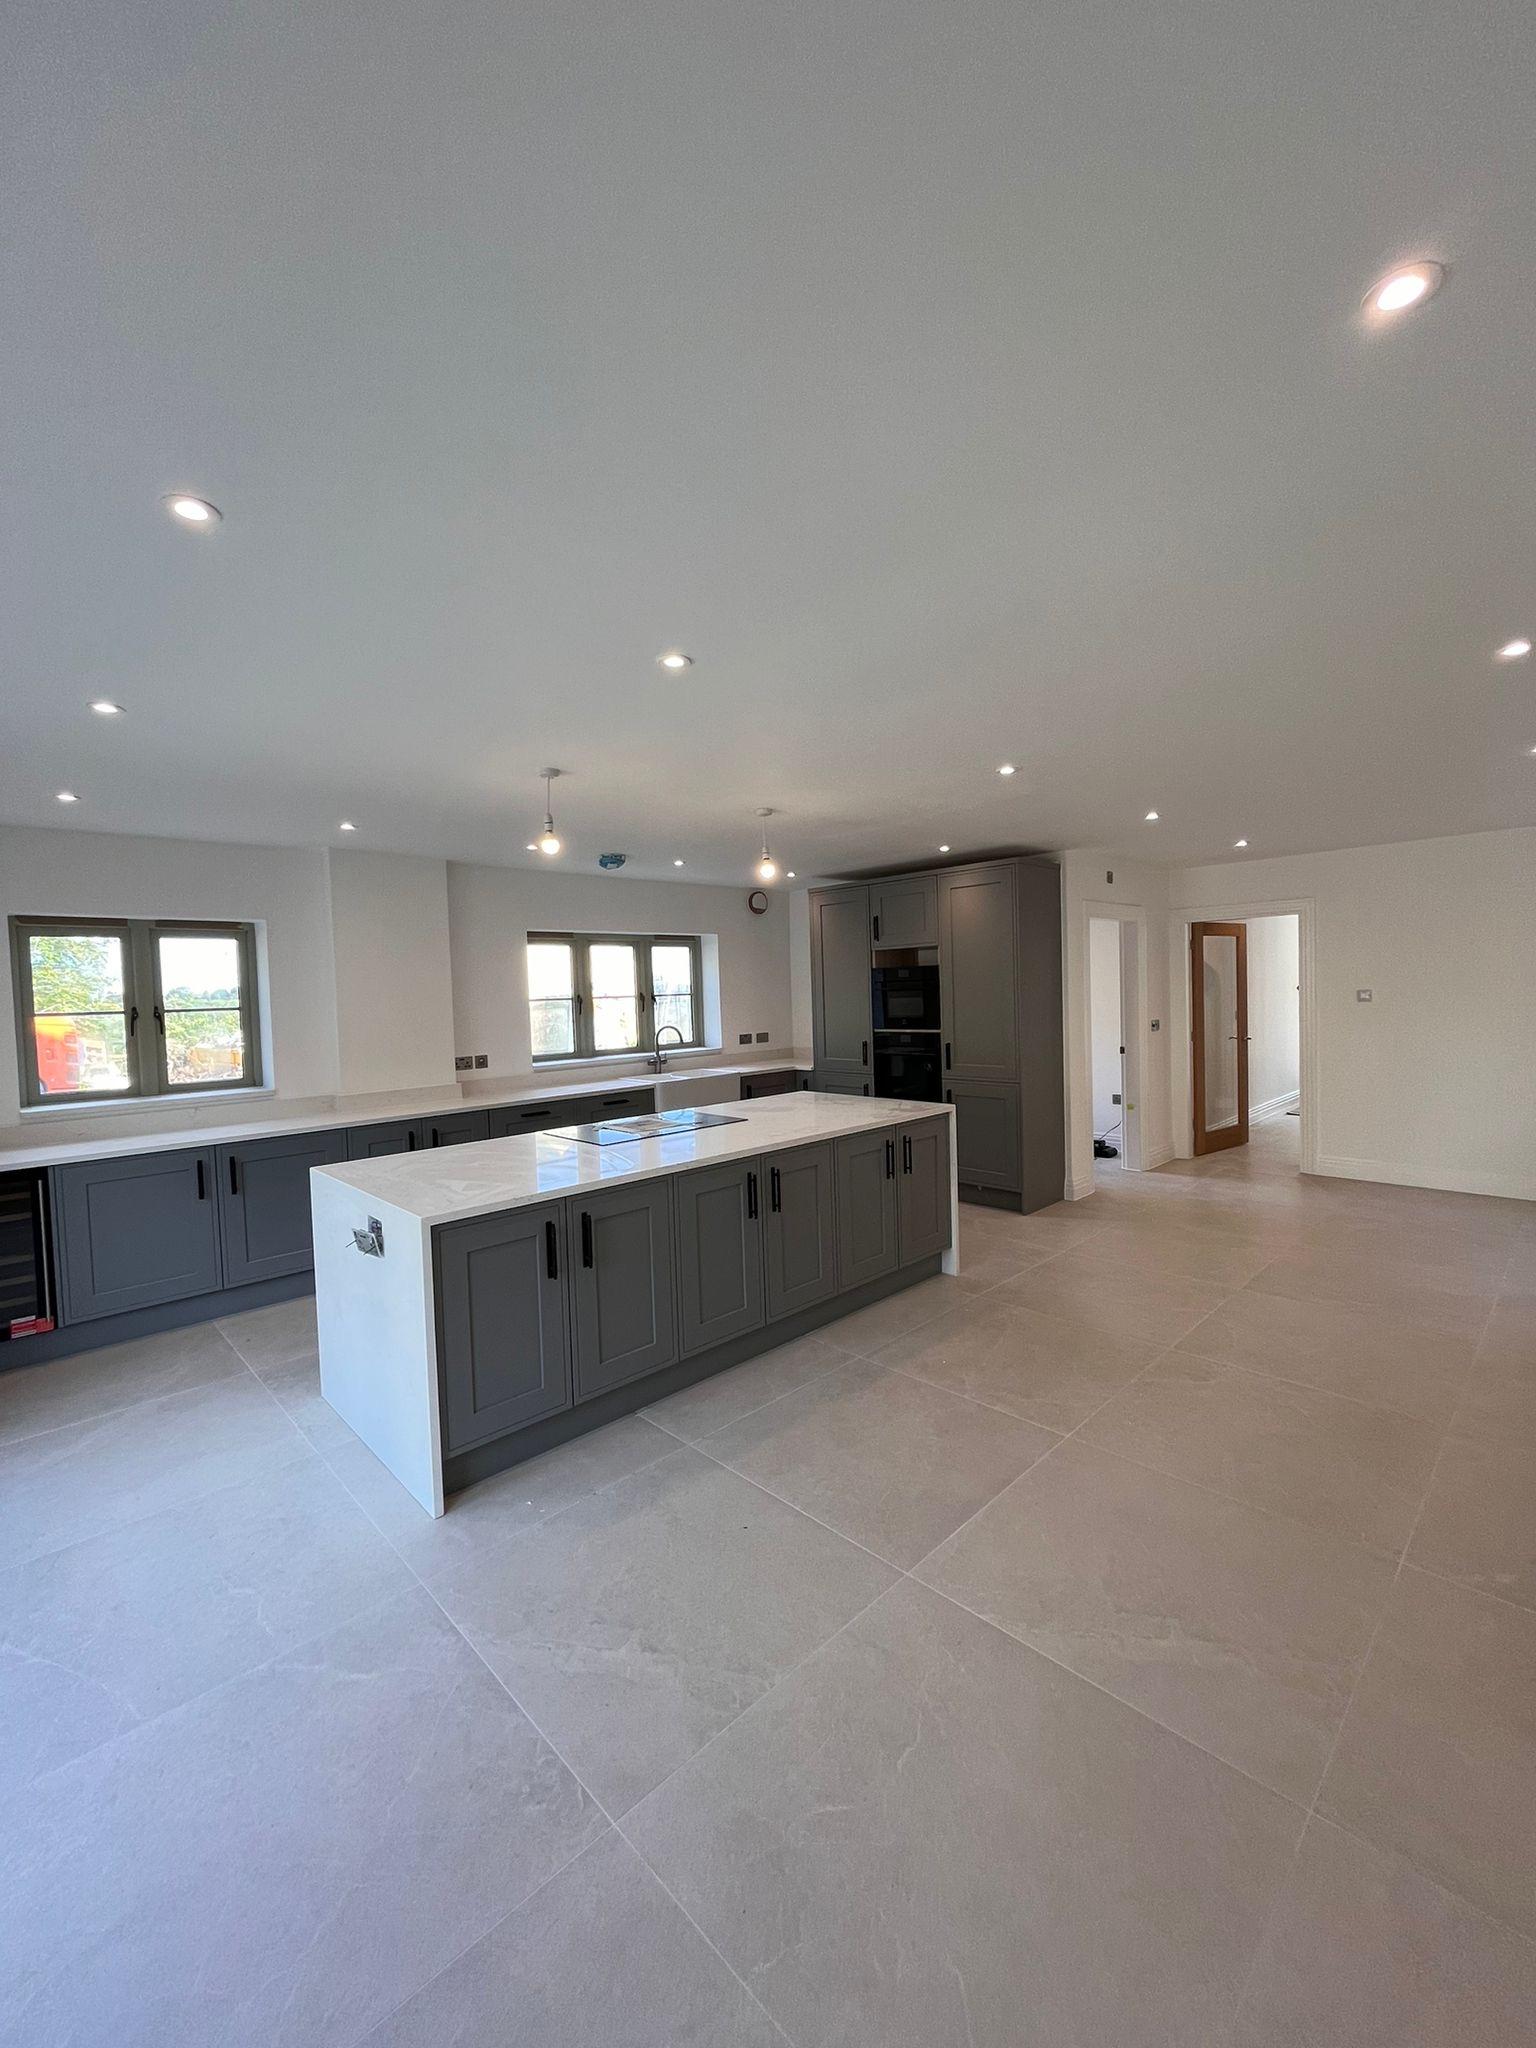
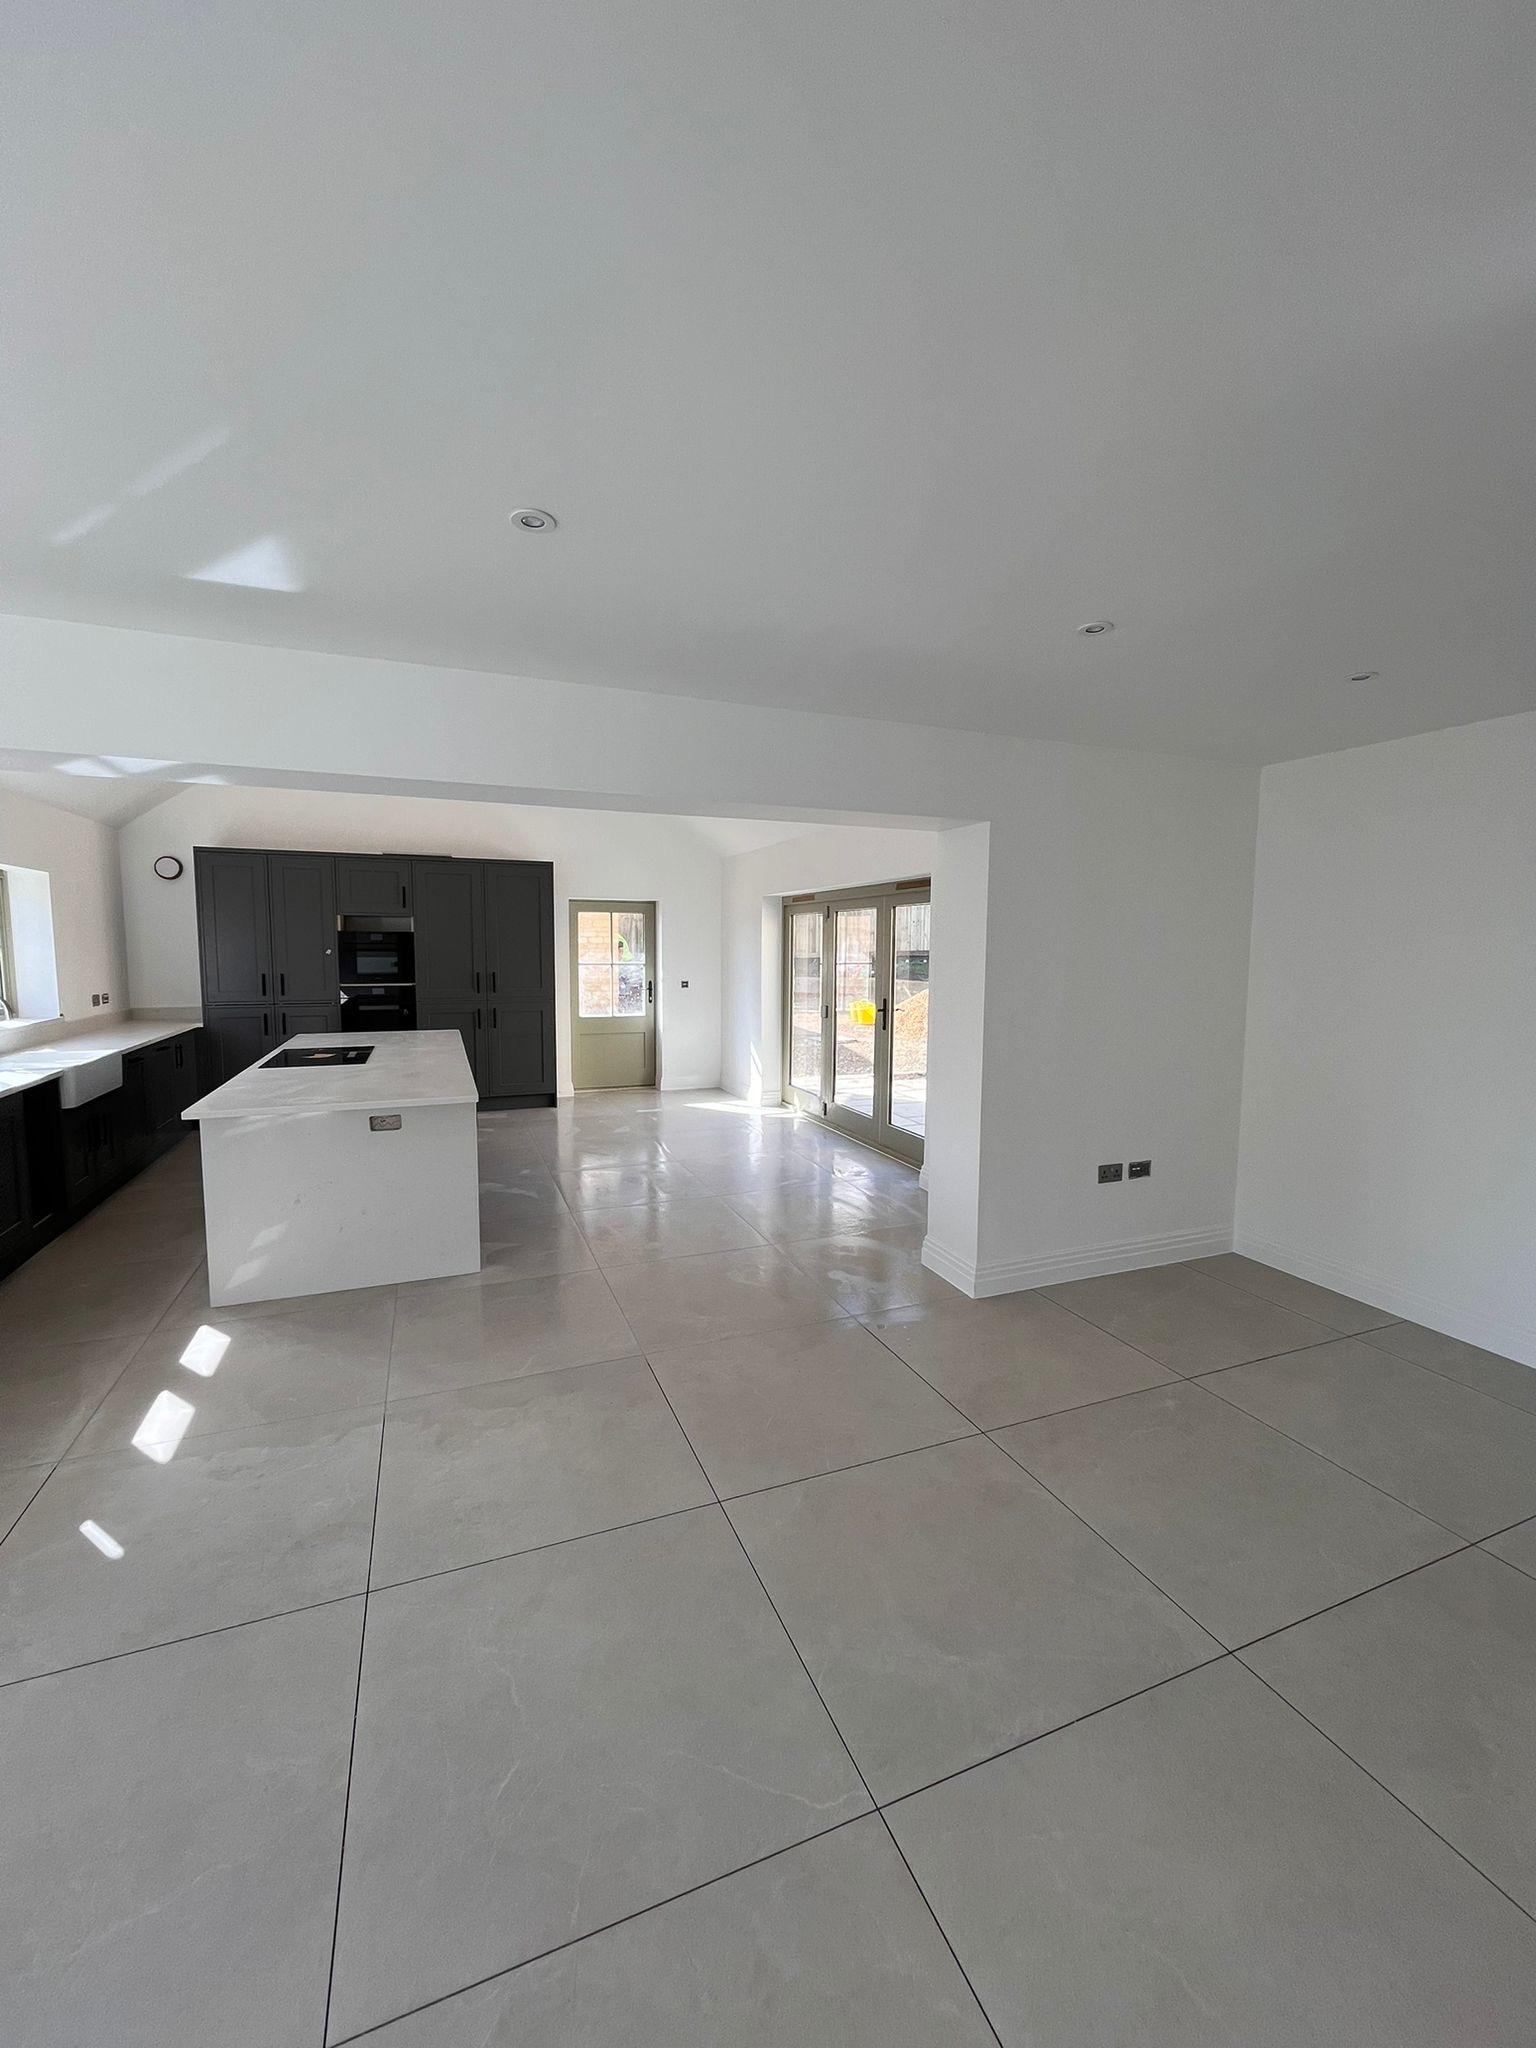
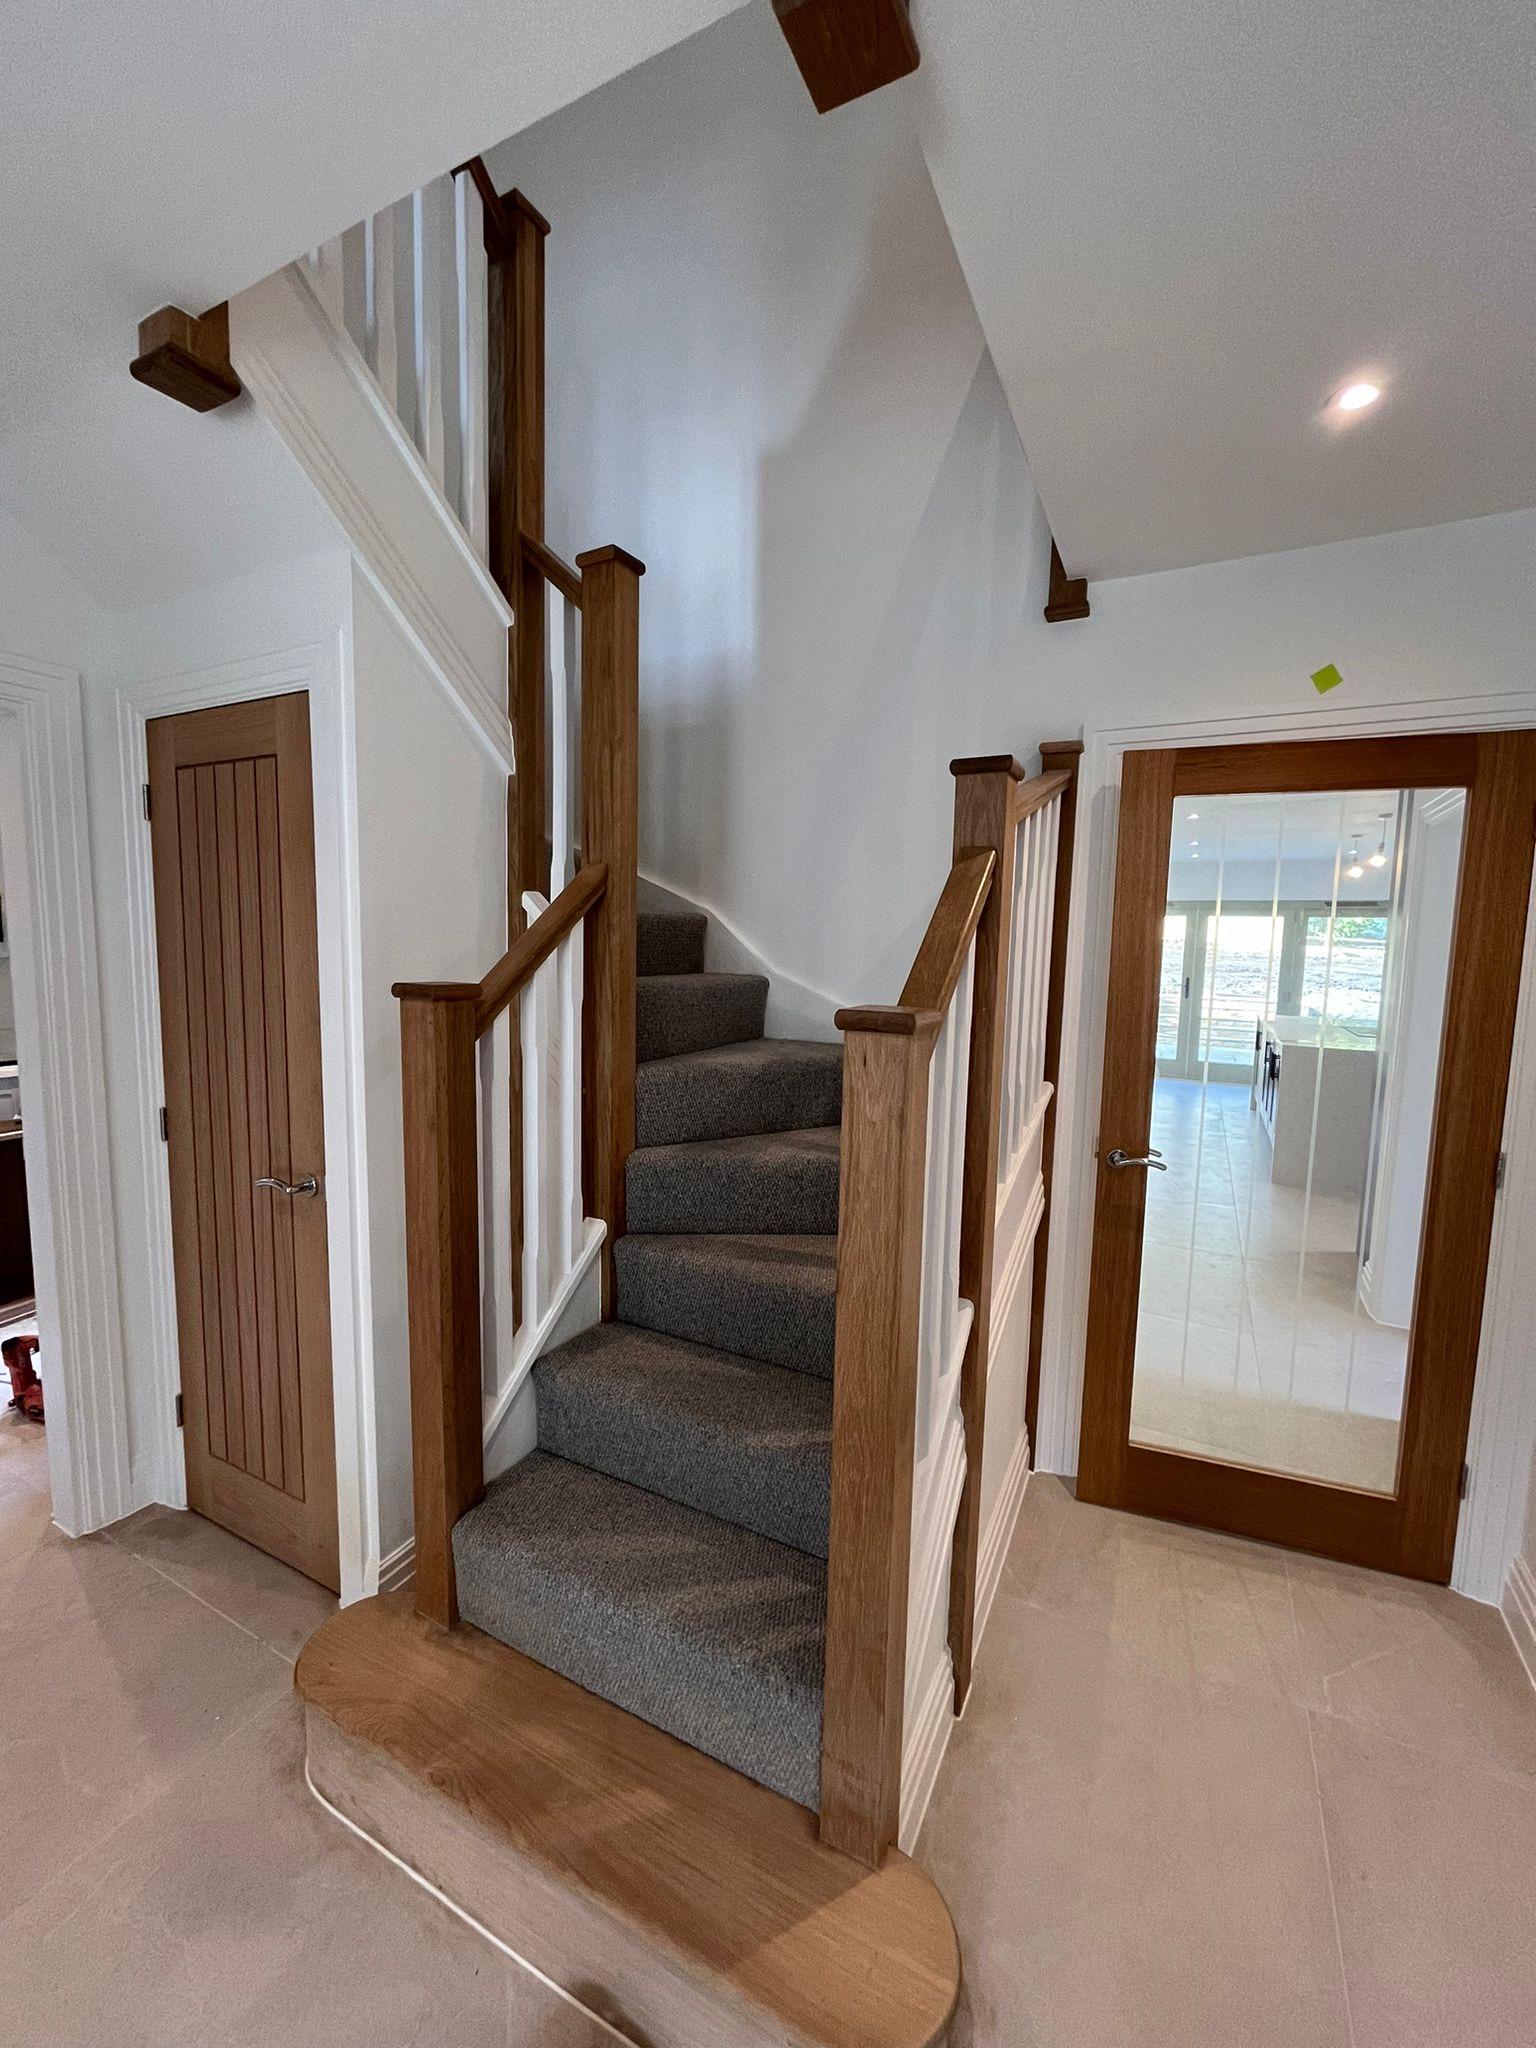
Exclusive New Builds - Bromham, Chippenham
We had the pleasure of completing:
Drylining
Skimming
Rendering
to these two bespoke new build properties for Moloney Contractors in Bromham, near Chippenham.
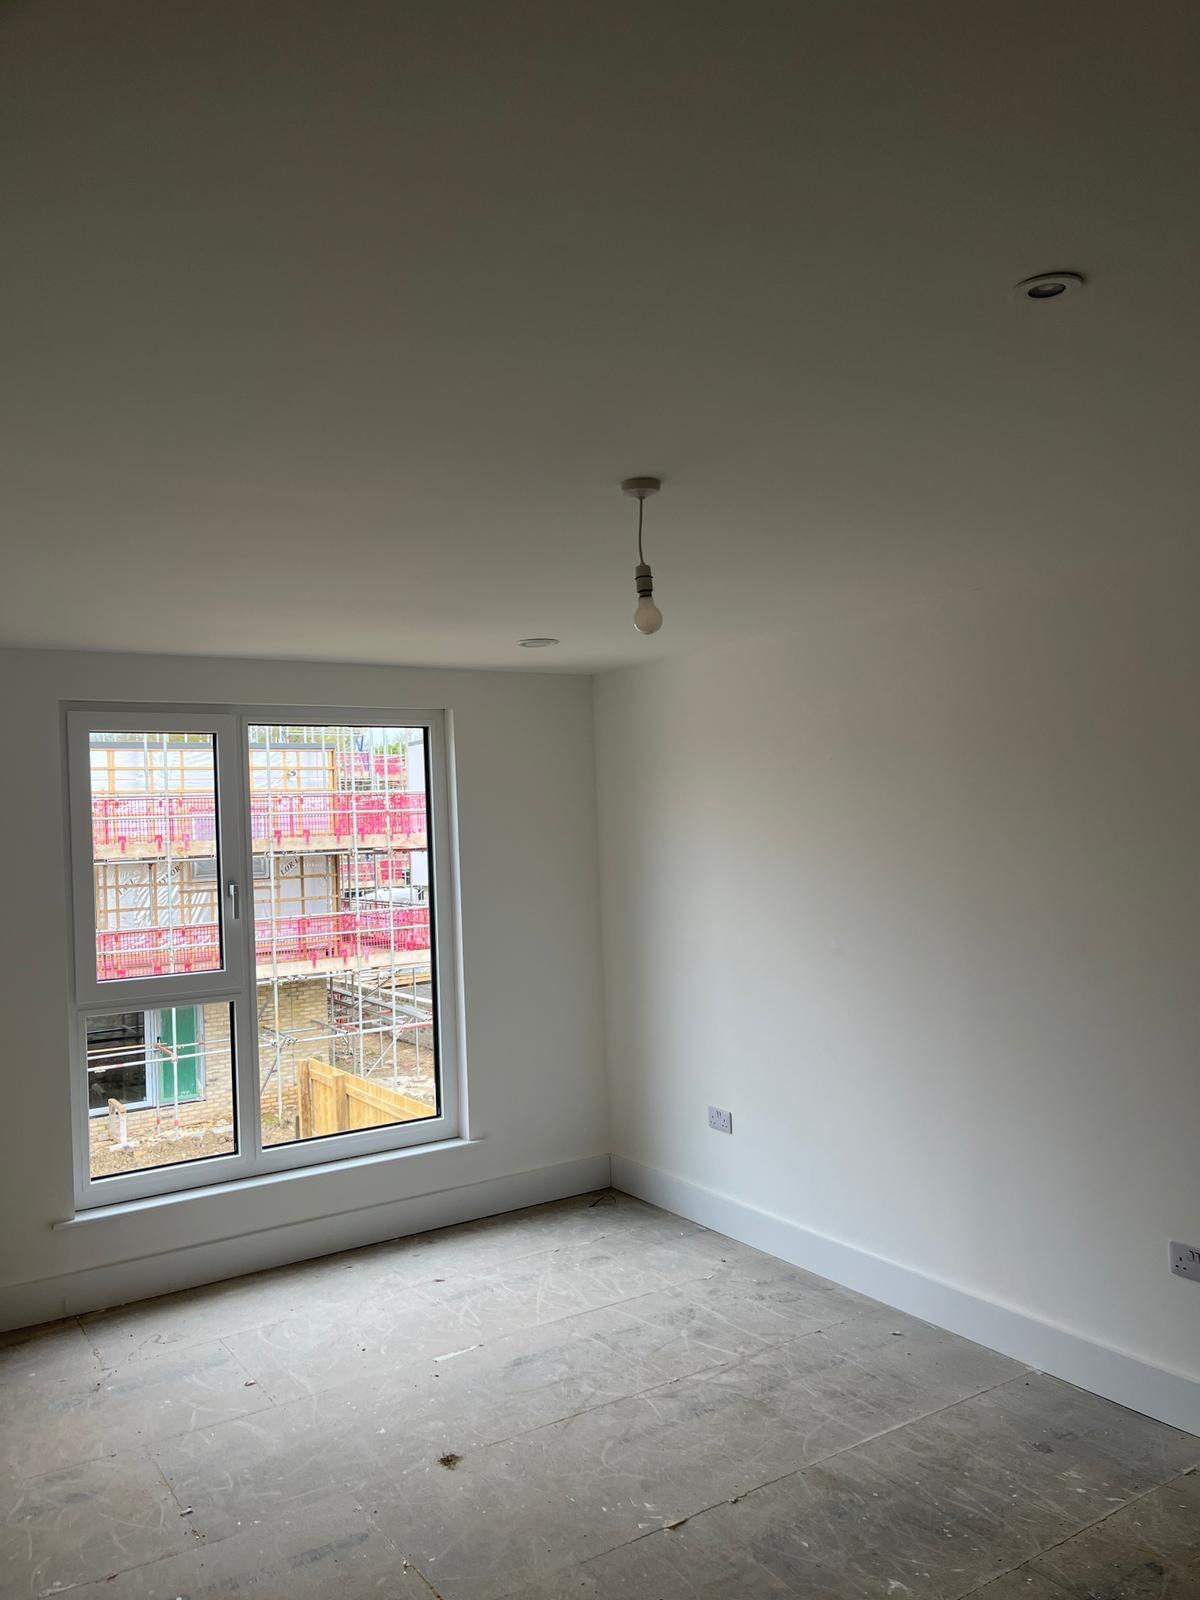
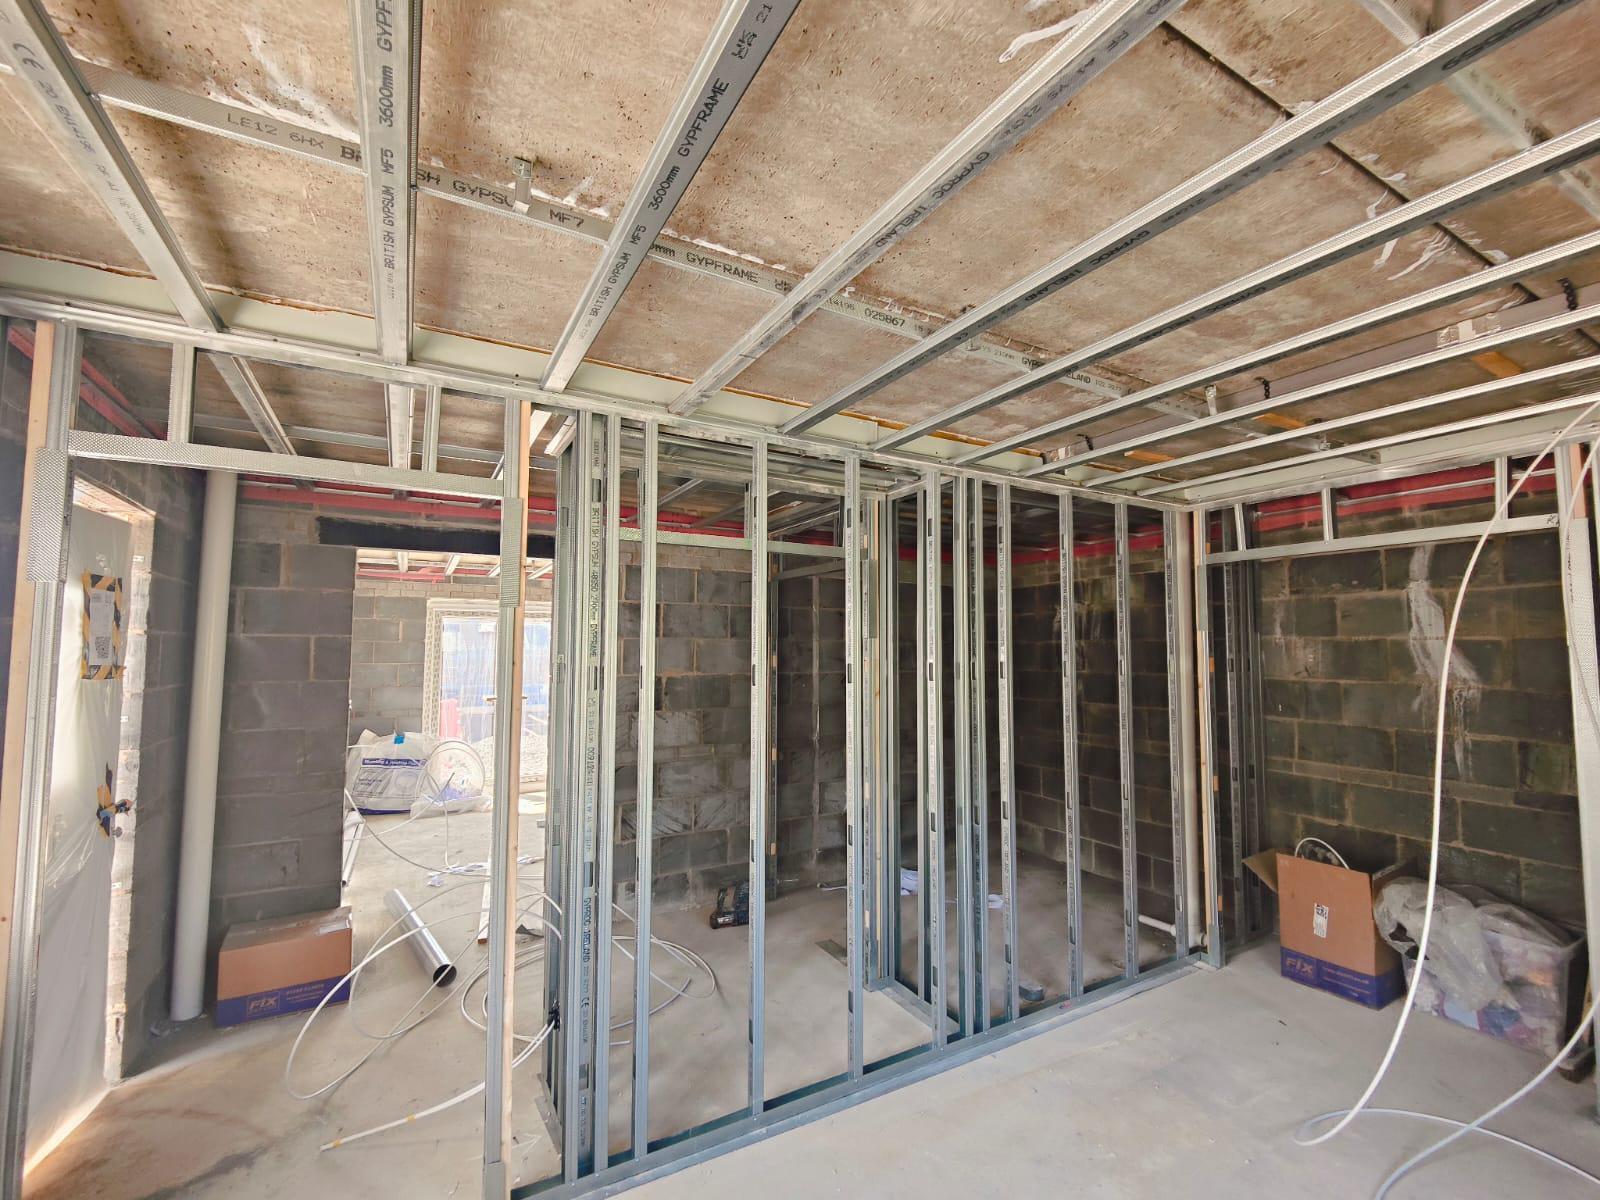
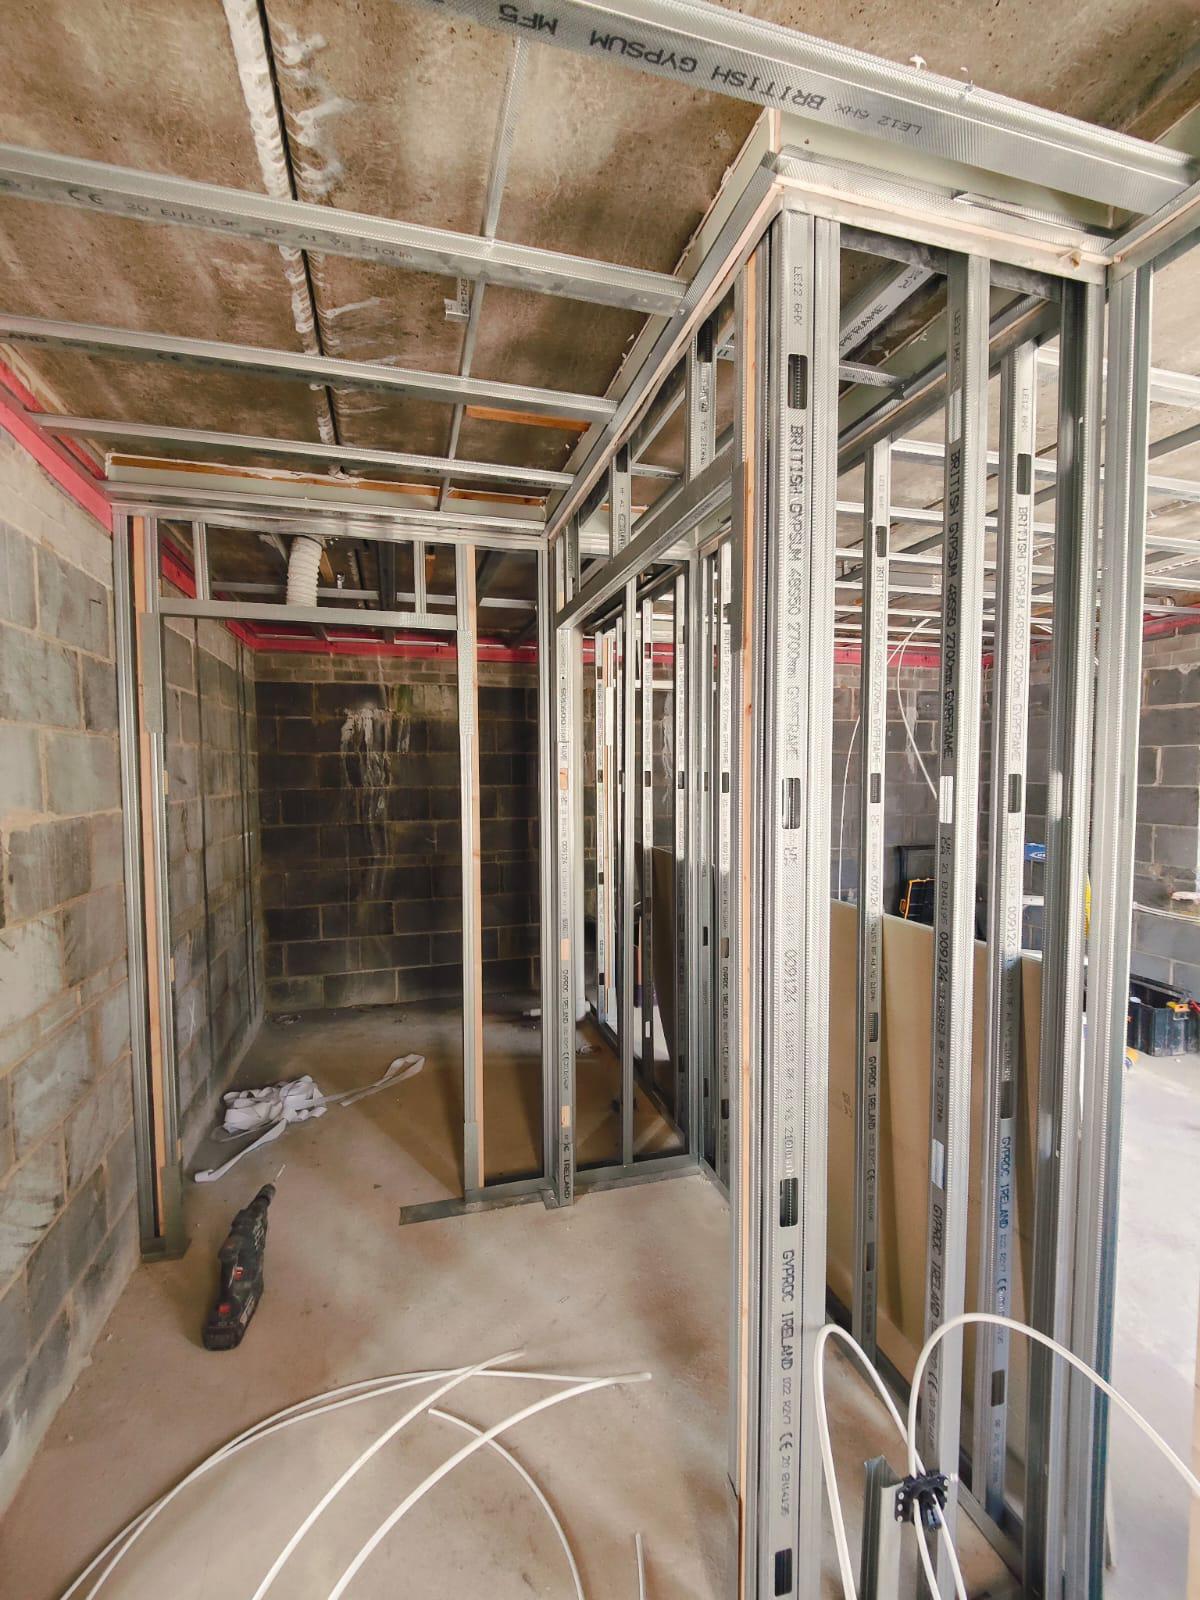
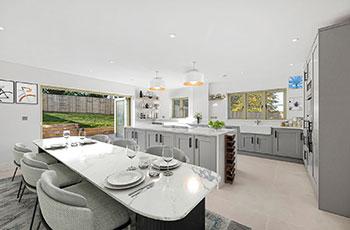
New Housing Development - College Road, Clifton
These beautifully crafted 1 - 4 bedroom apartments and penthouses offer a refined living experience that's truly one of a kind.
Designed and built to impeccably high standards, each home at The Legacy Apartments feature timeless finishes such as Caesarstone worktops and Amtico flooring, along with stylish matt black brassware and Porcelain tiled flooring.
K & R Group Ltd are completing all Drylining works on this project for Hill Group. At this stage we have completed the majority of metal works on 3 of 4 floors in Block A, and the 1st floor of Block B. The two showhomes are almost ready for release.
We will update you with more progress as the project continues.
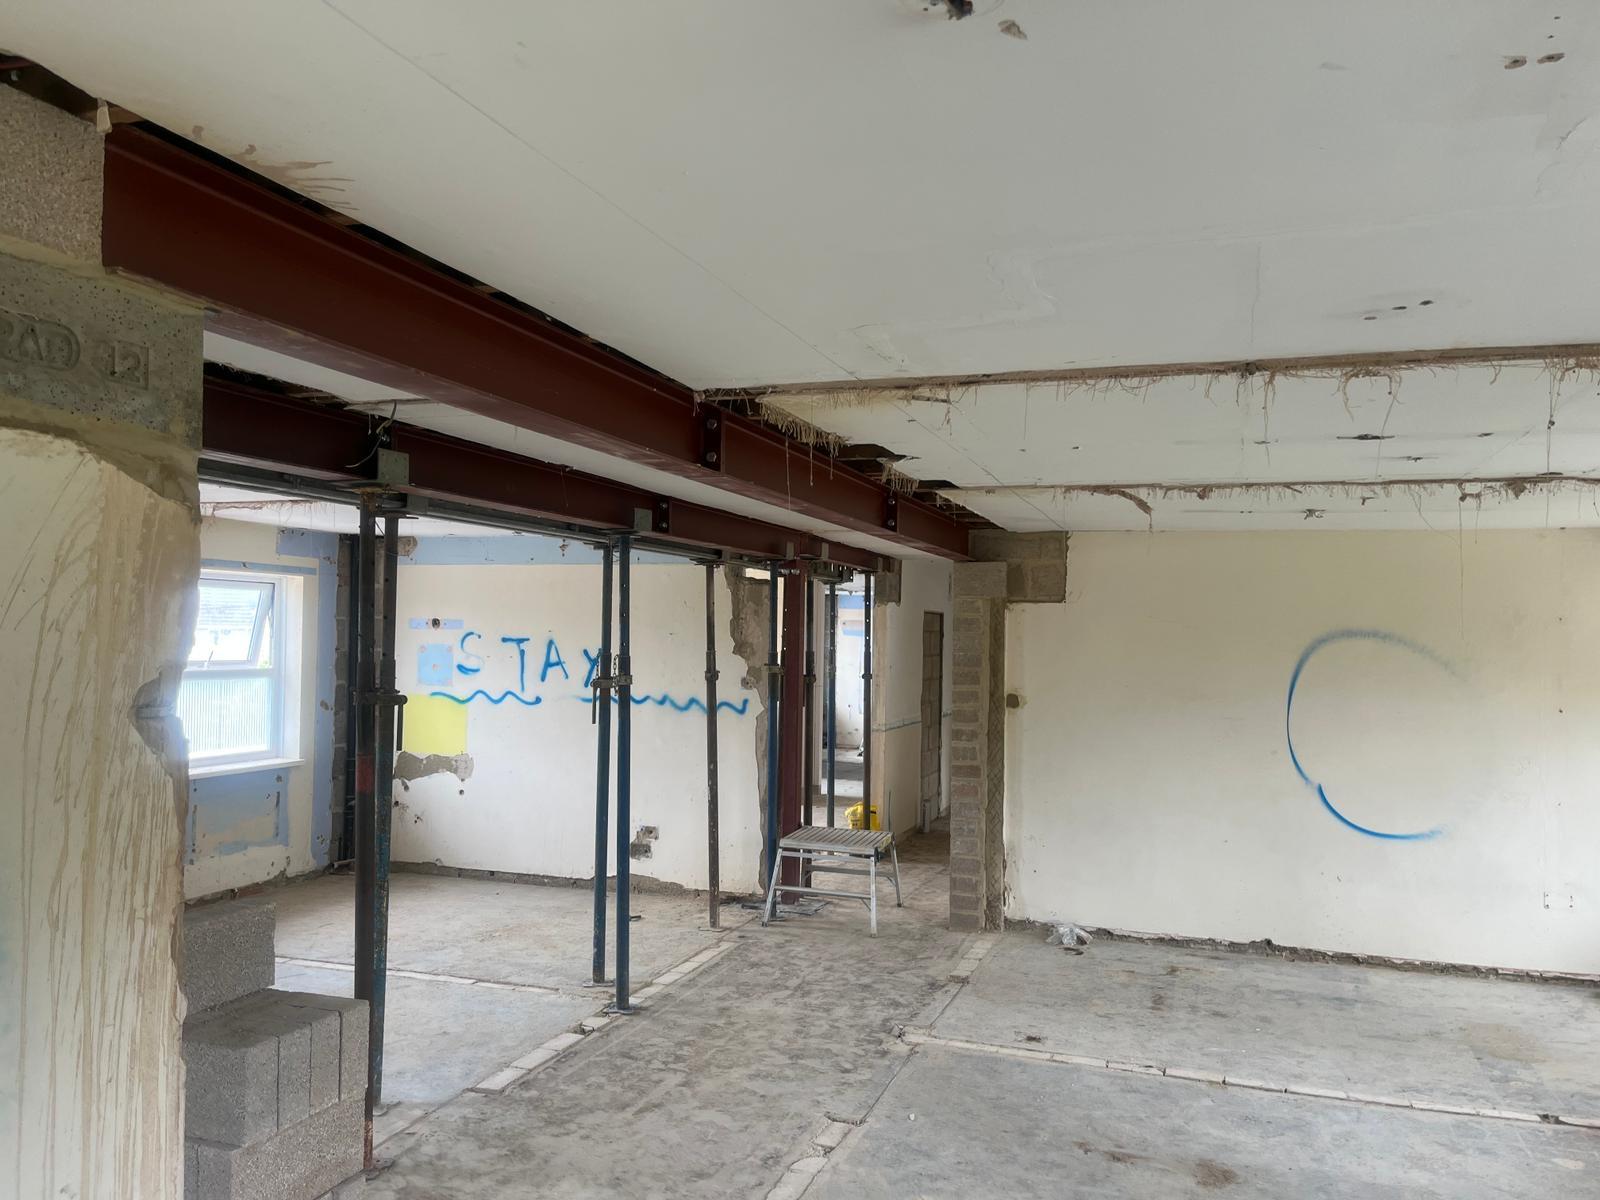
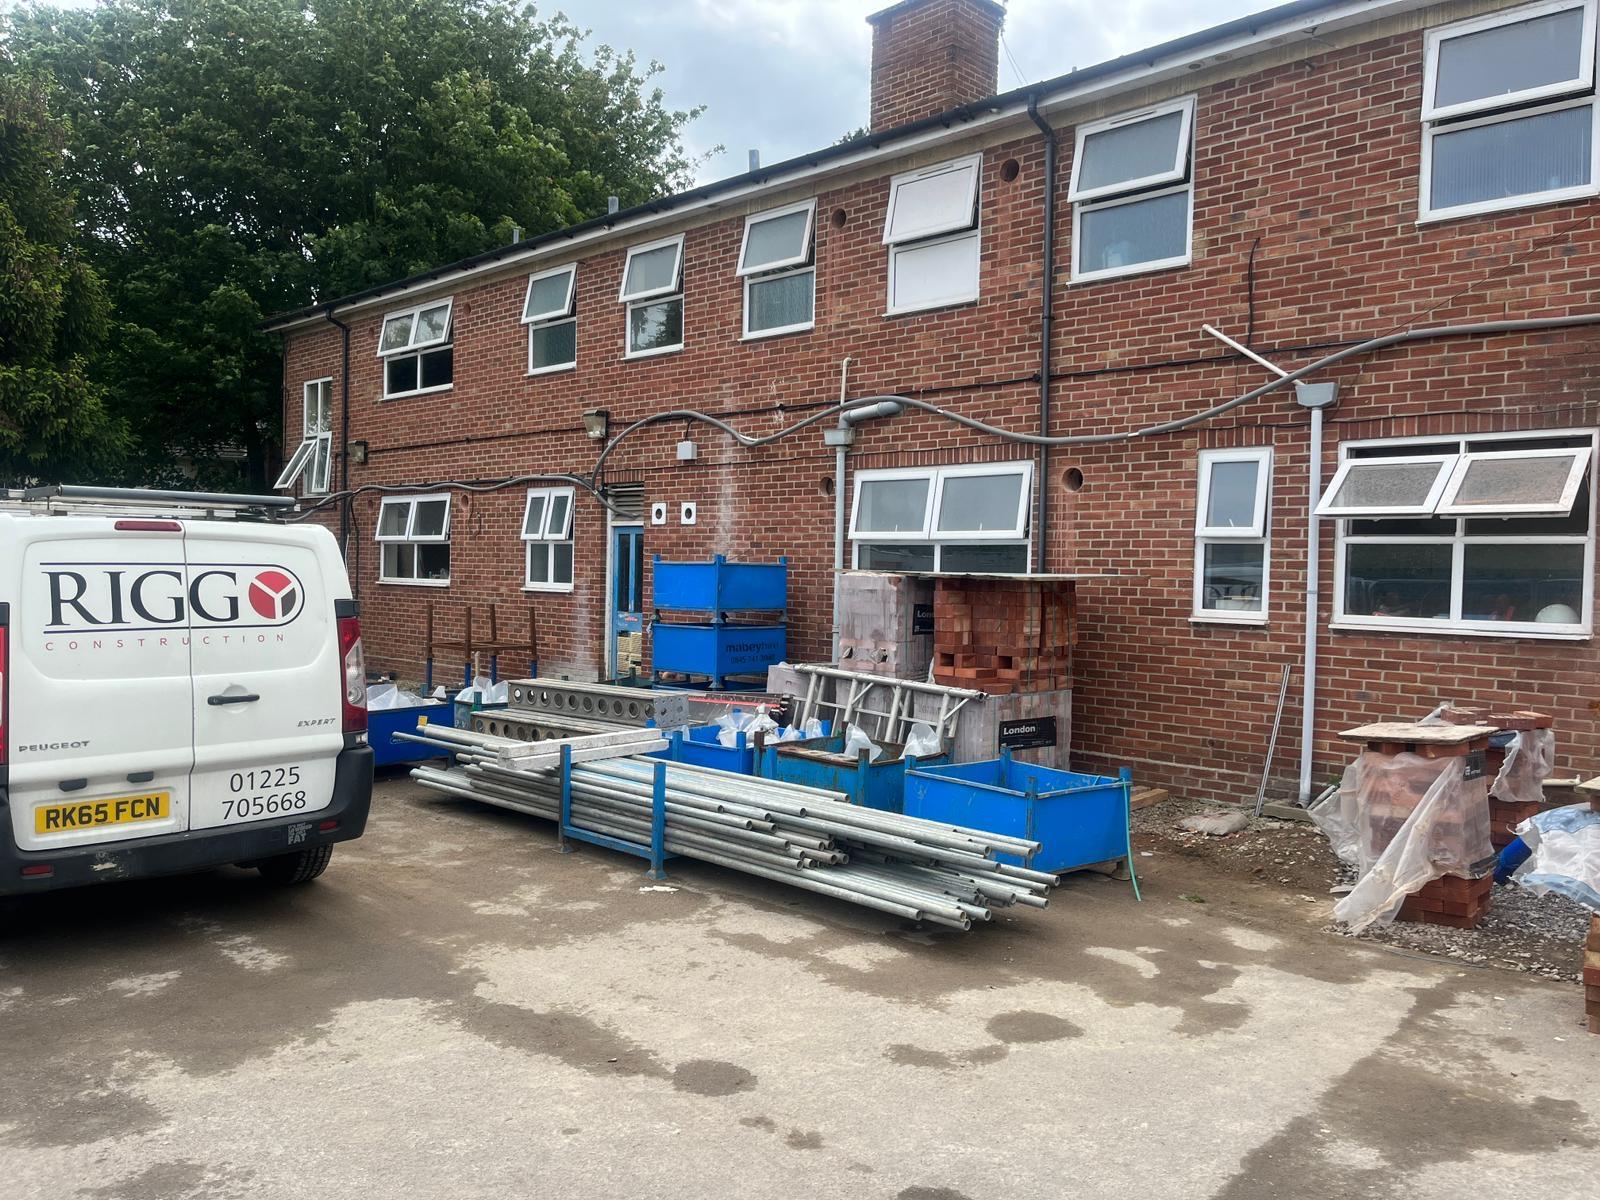
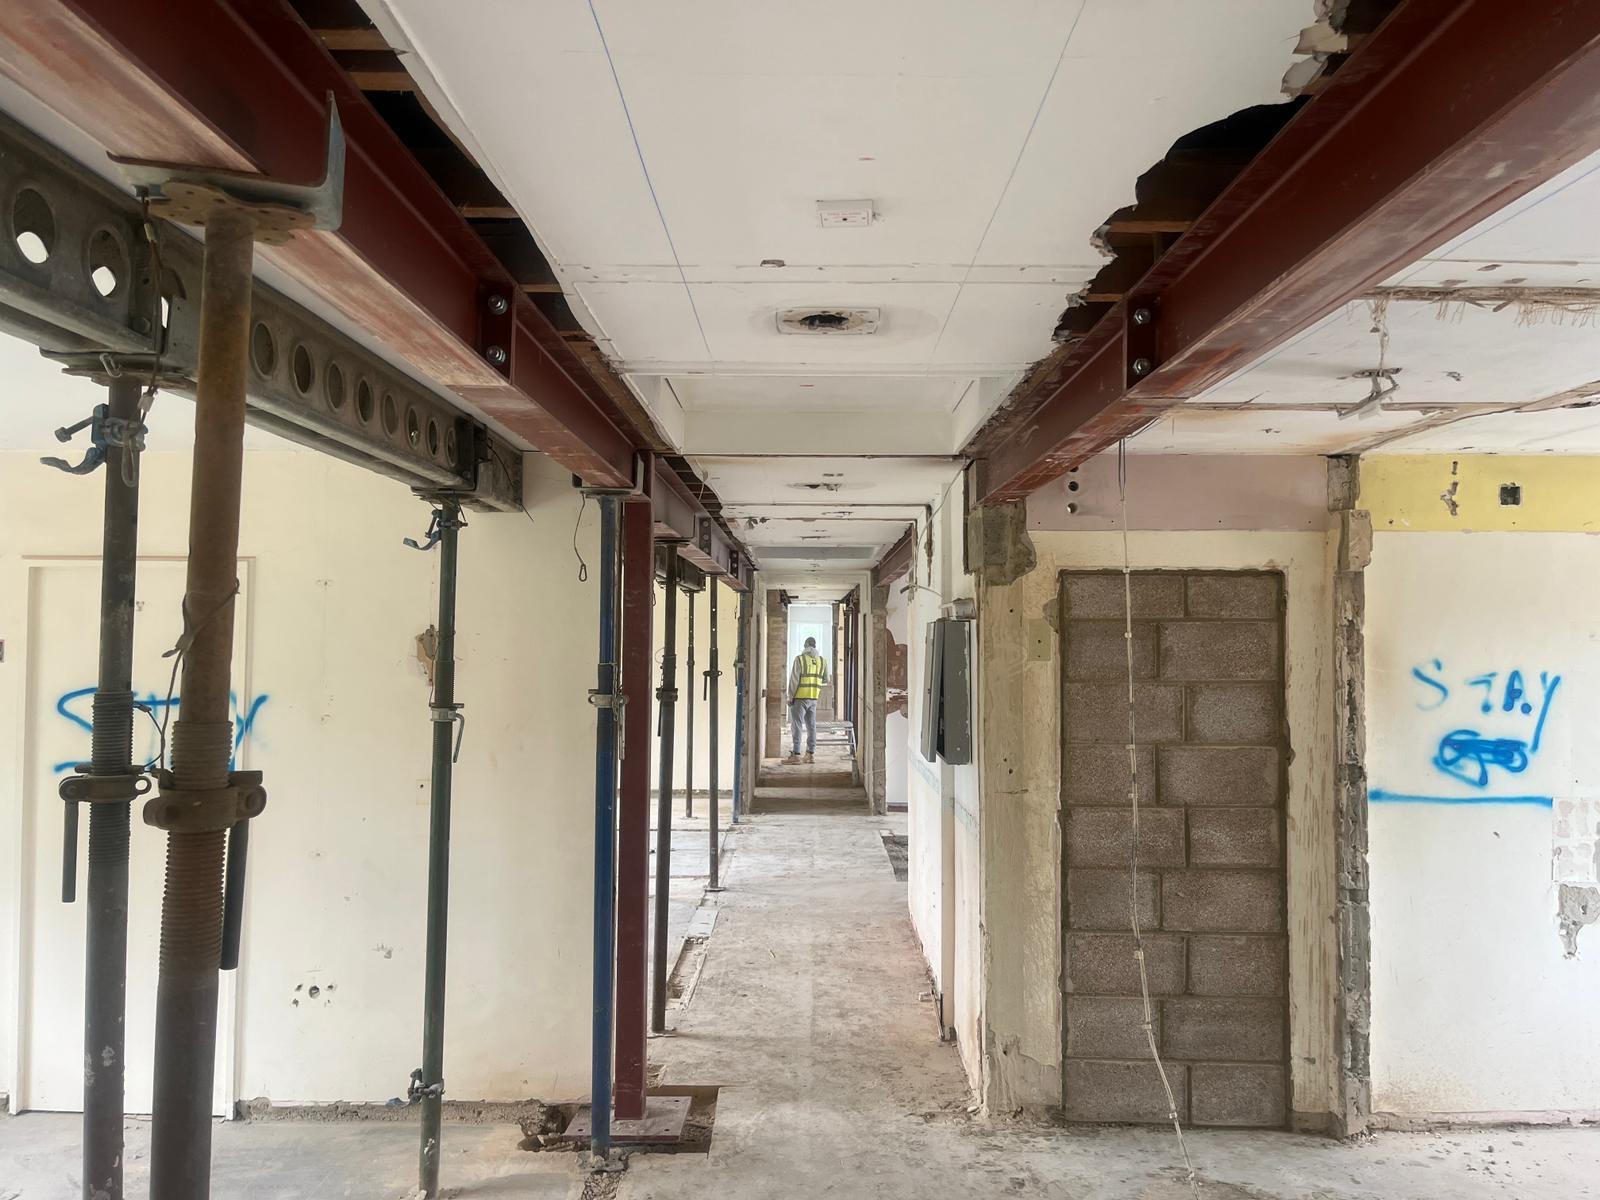
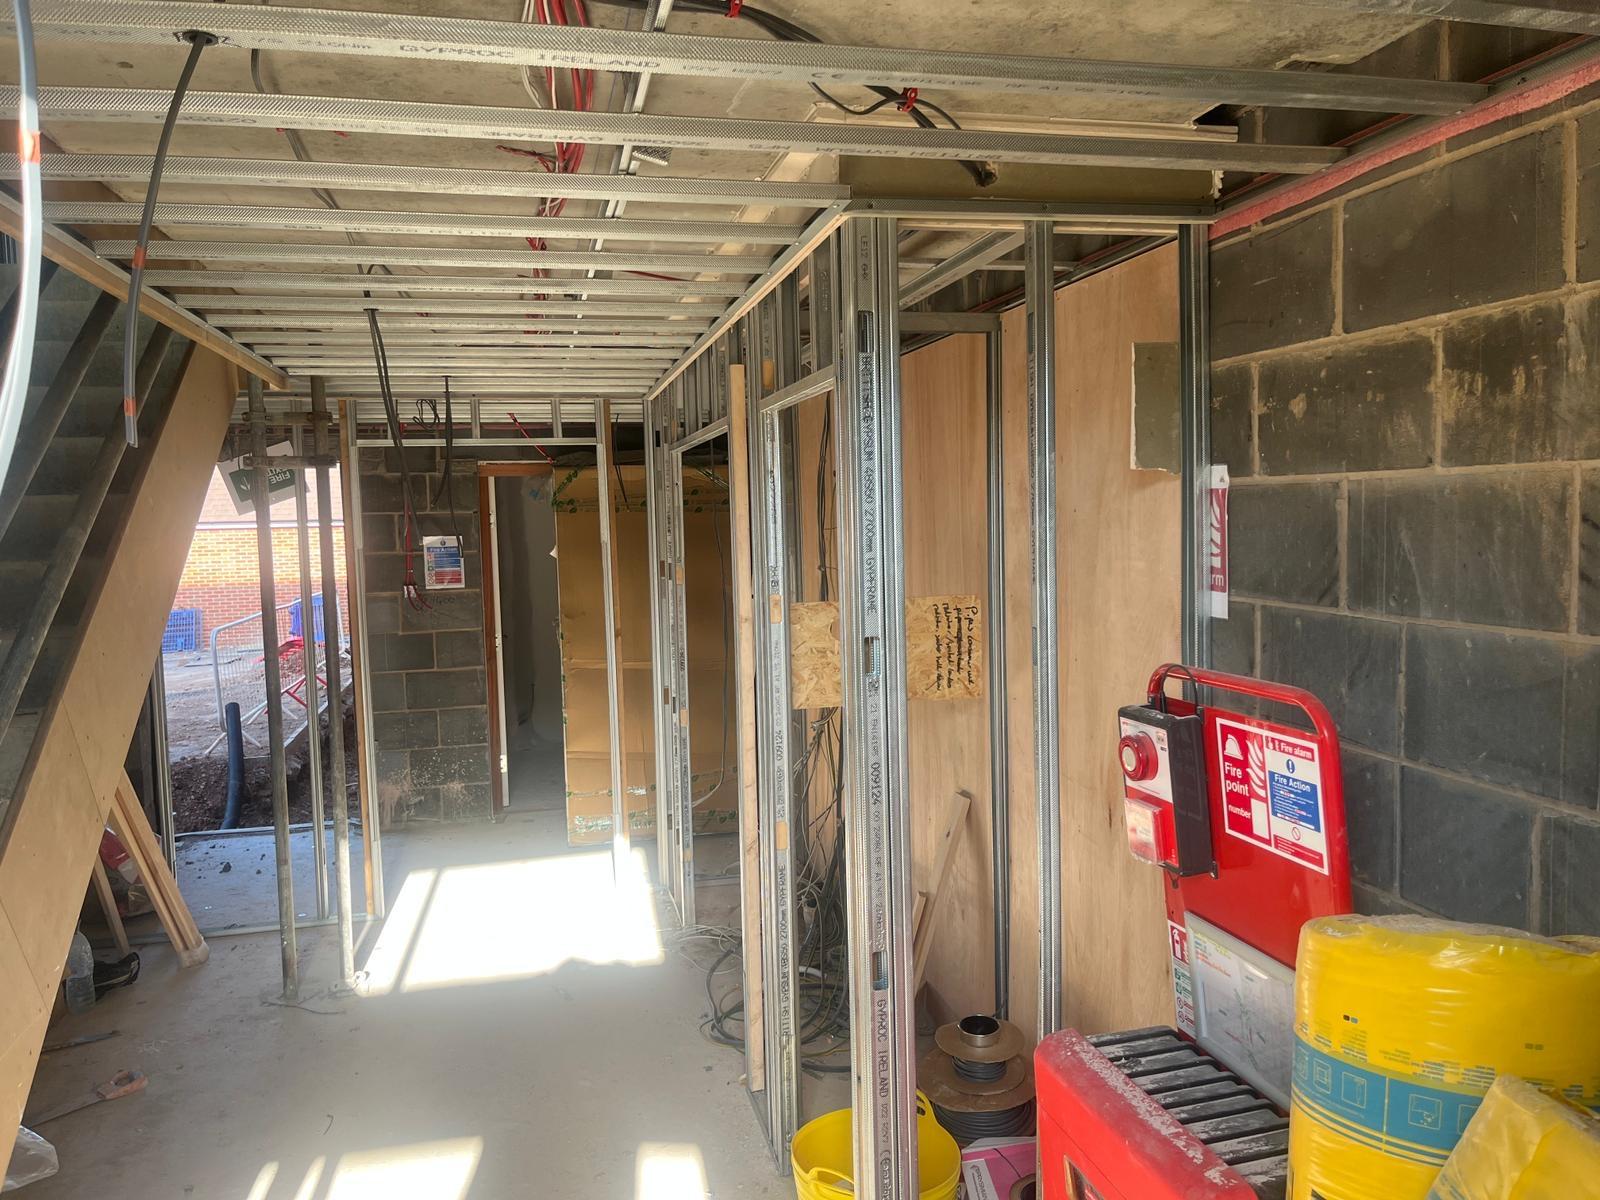
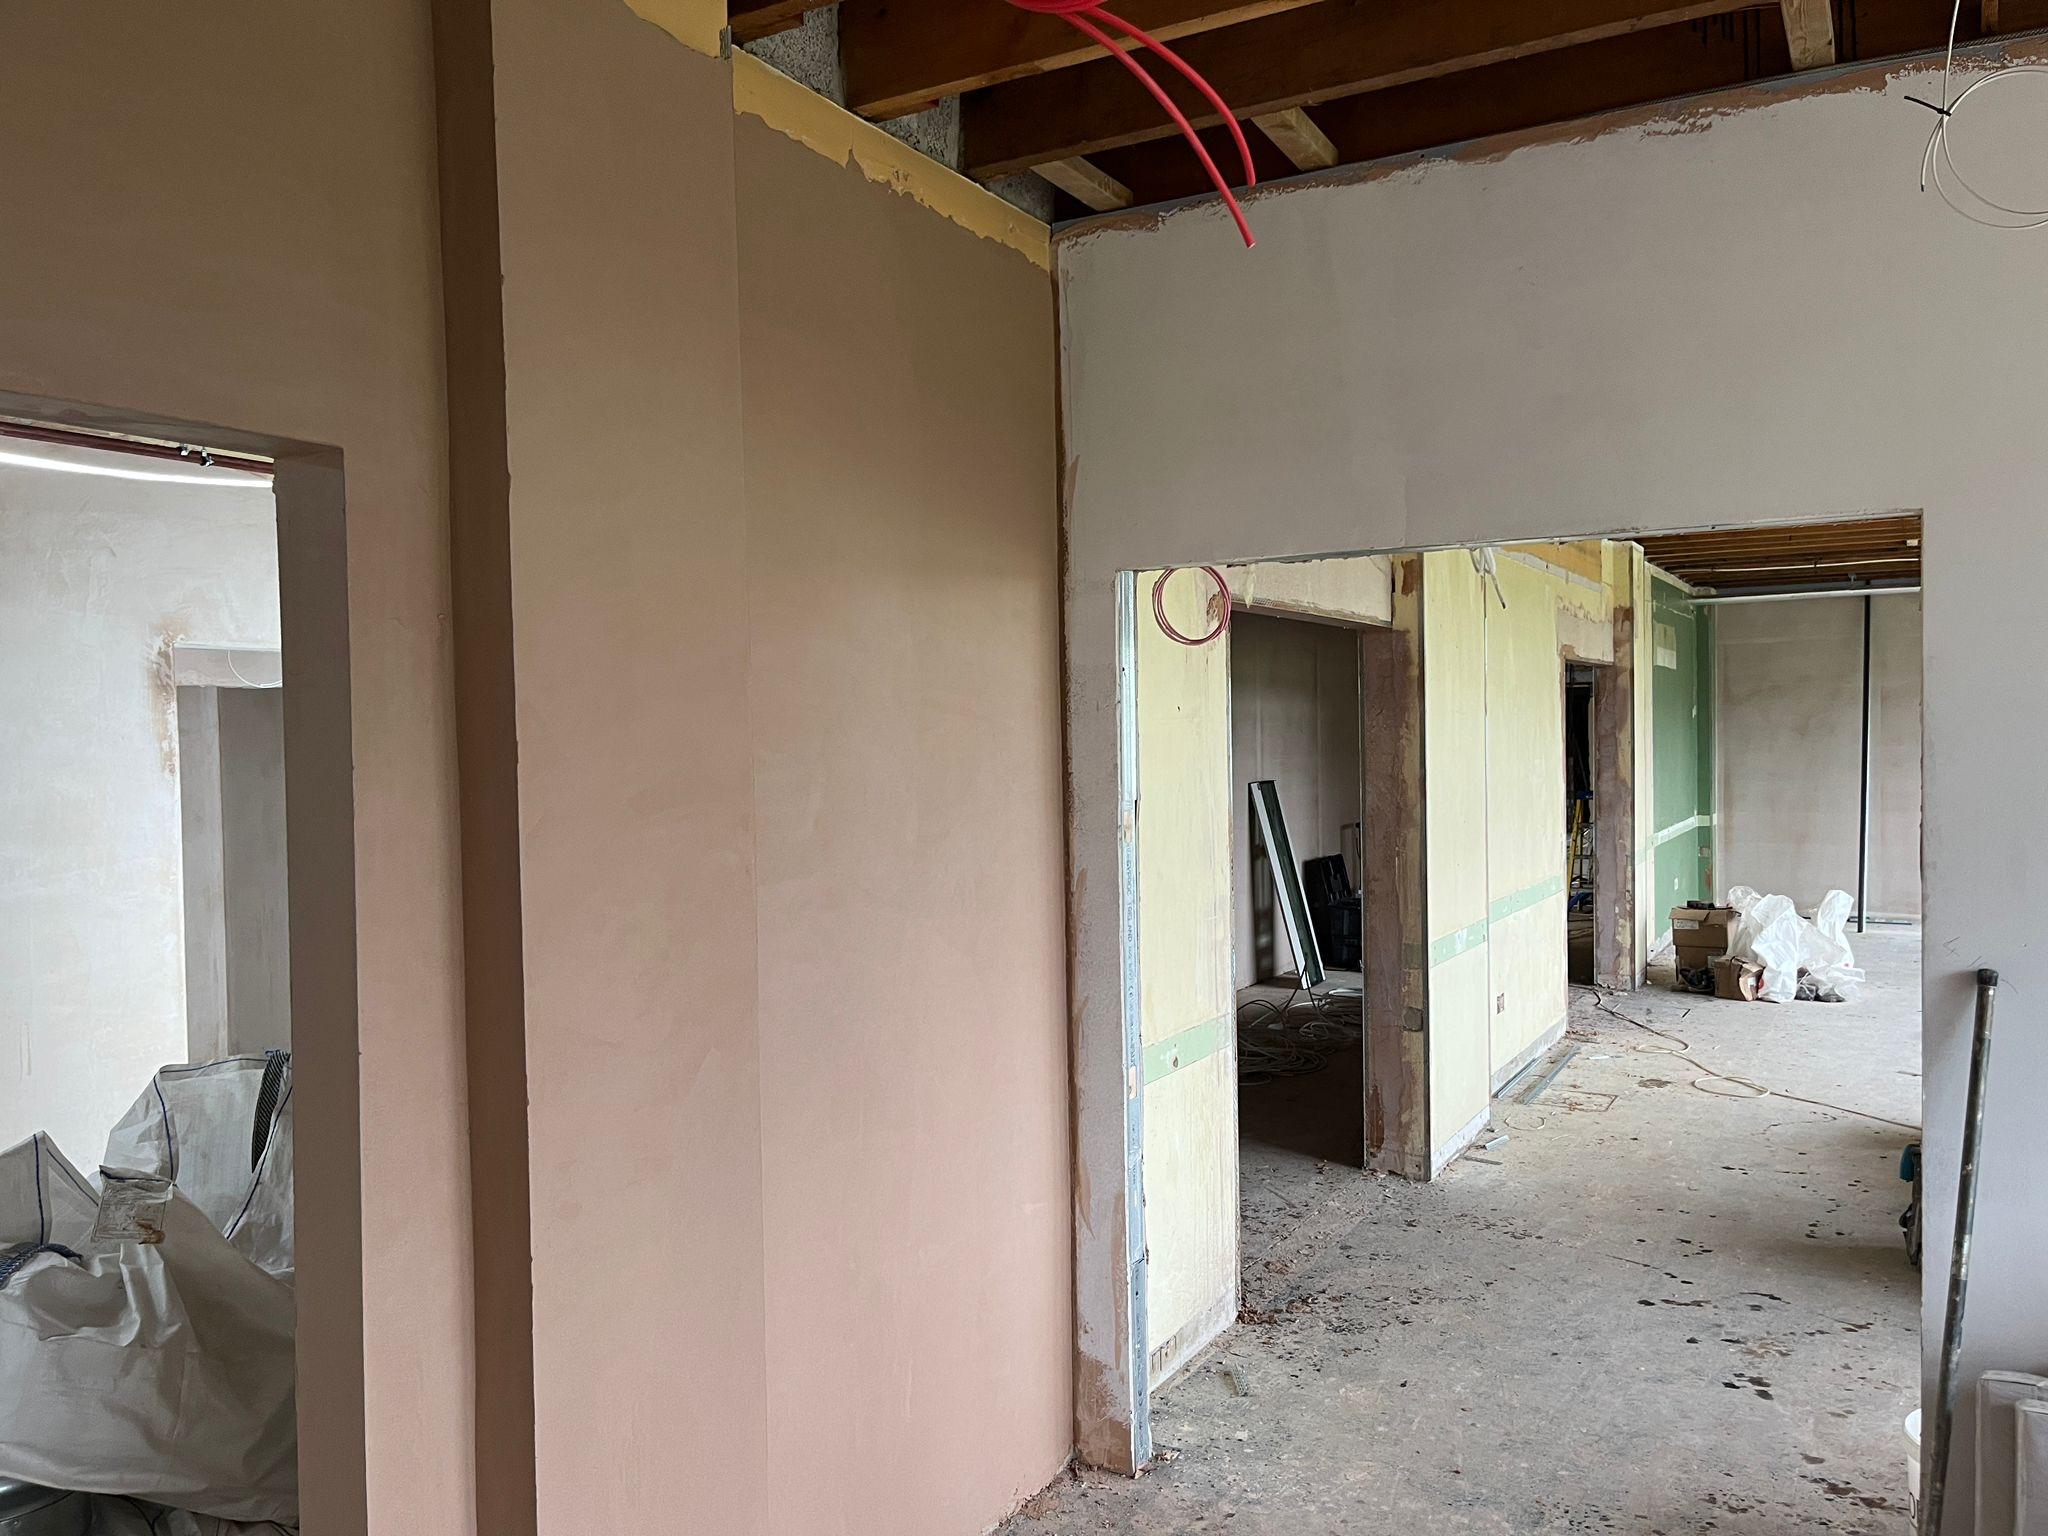
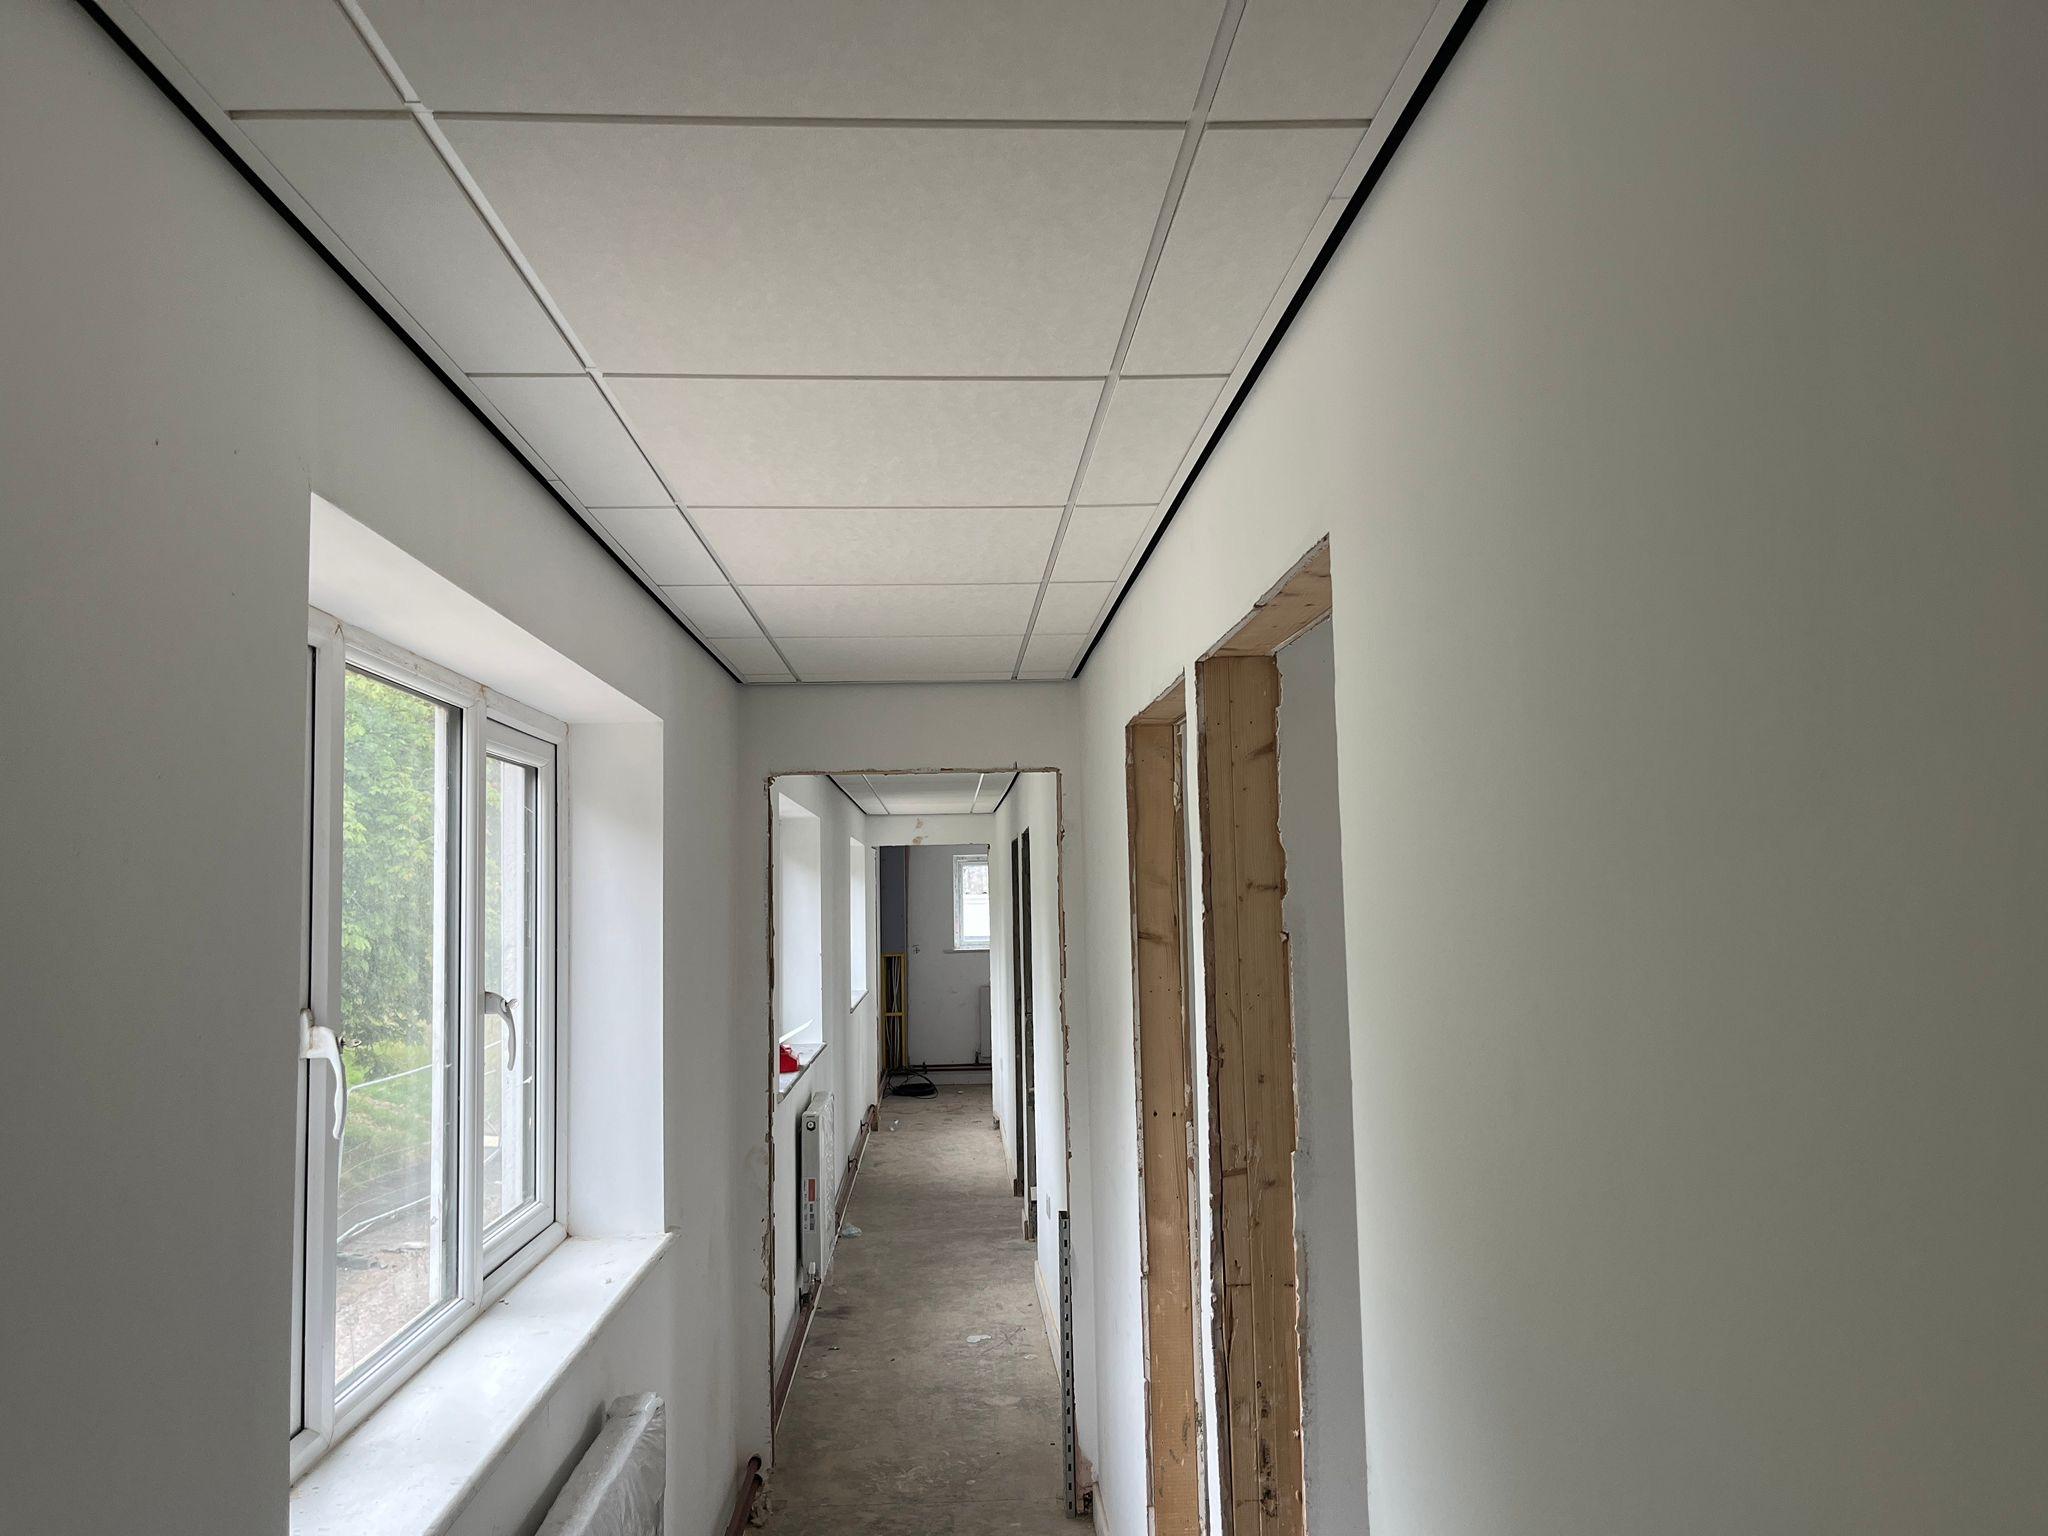
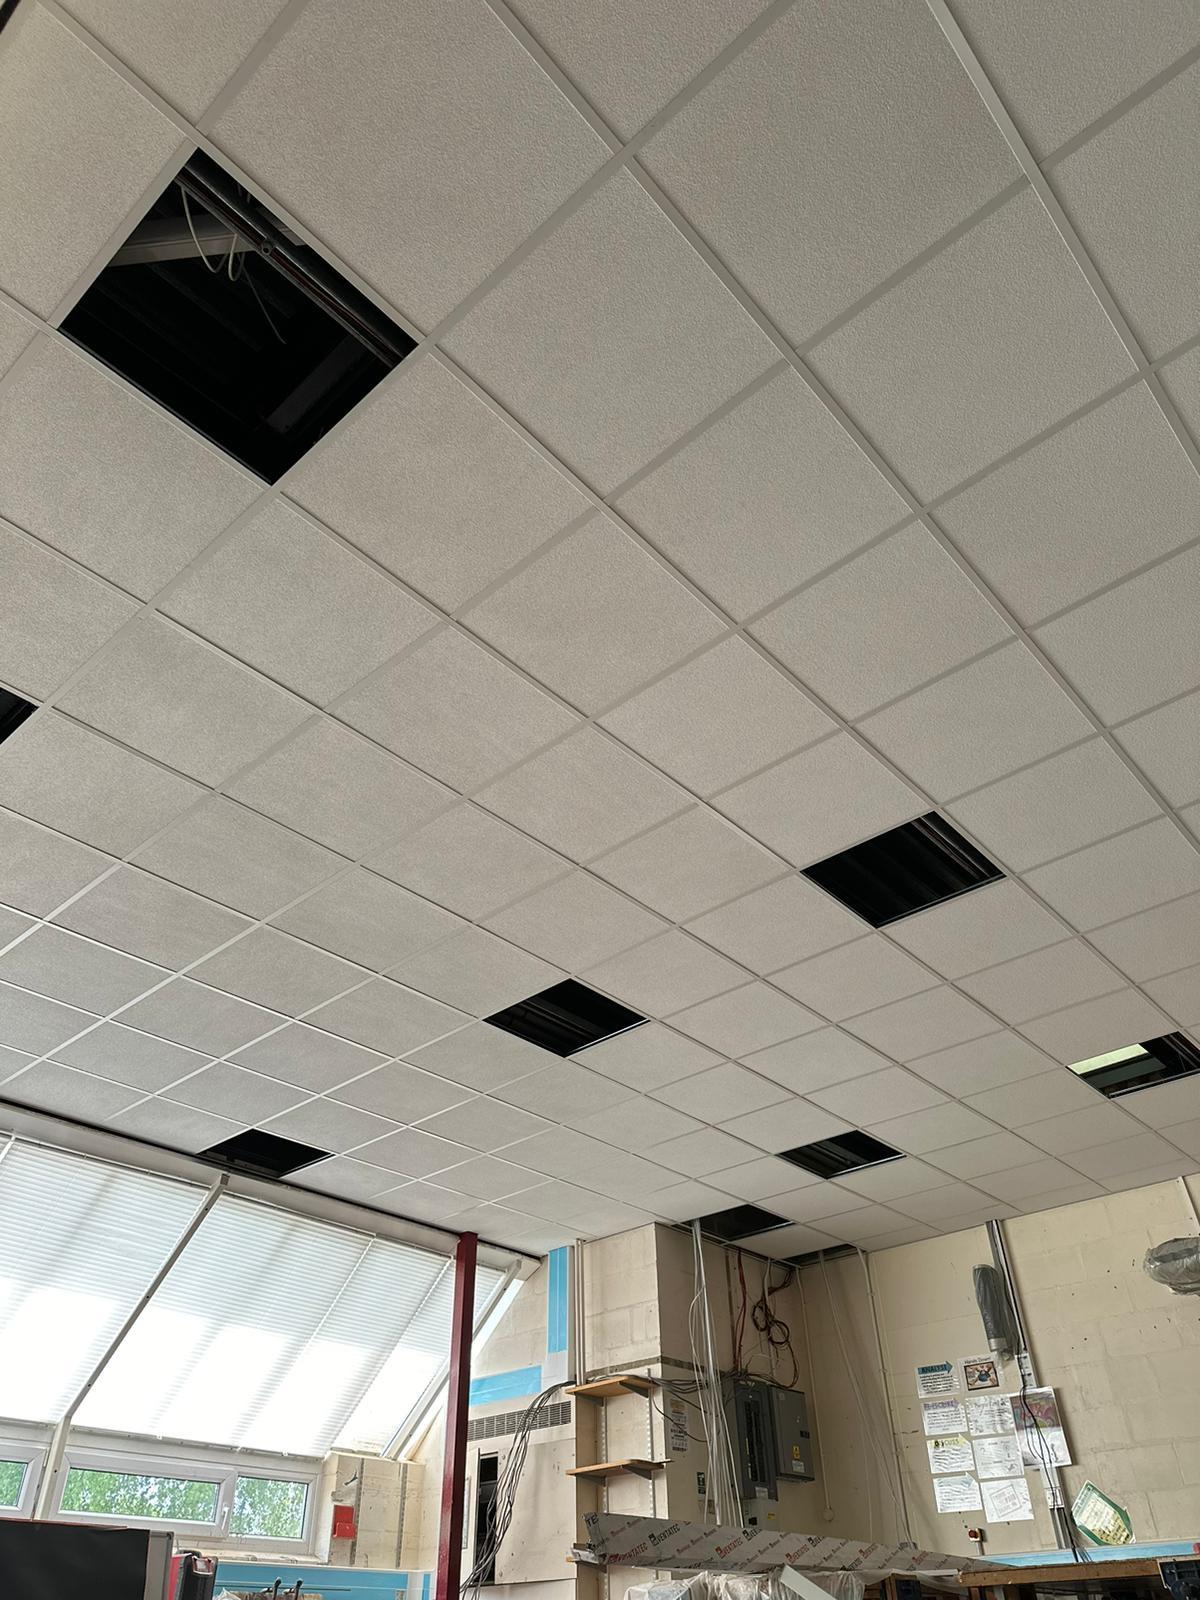
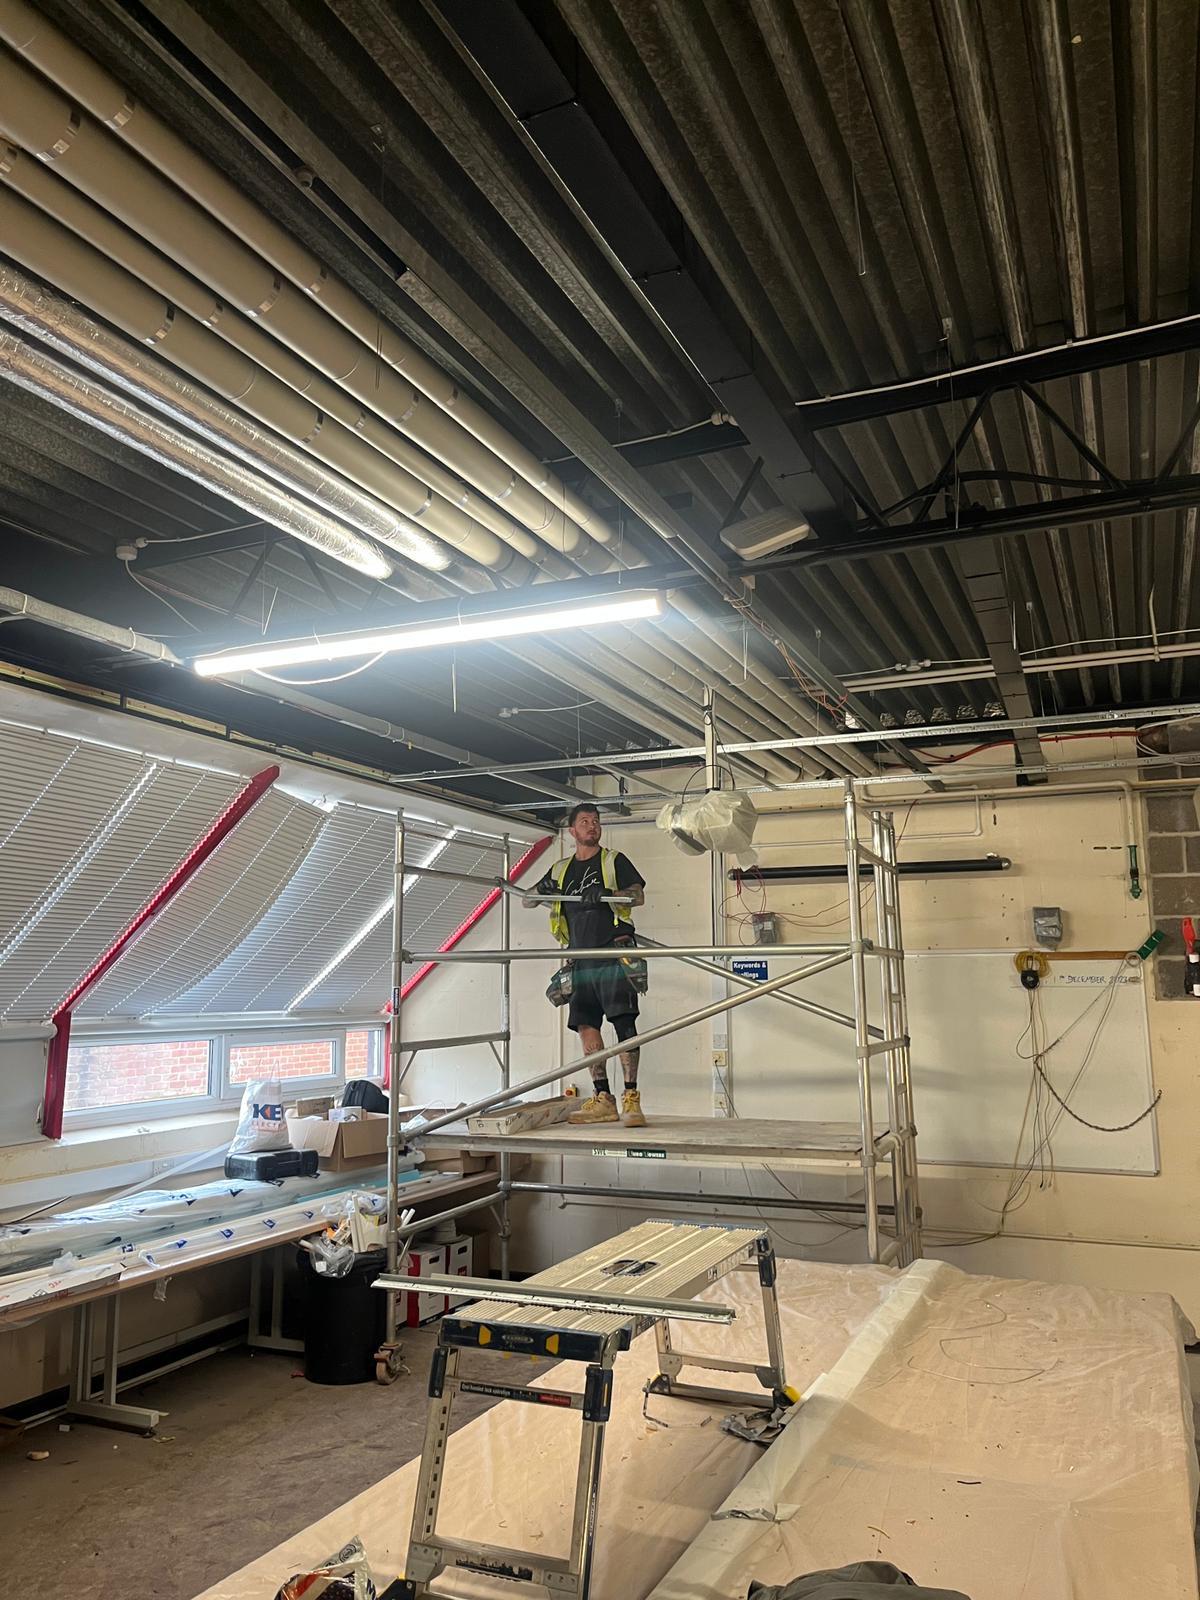
School Refurbishment - Springfield Academy, Calne
Another project completed in August 2024 for Rigg Construction (Southern) Ltd. A variety of services provided on this project which included:
- Grid ceiling
- Dabbing
- Insulation
- Fire proofing
- Fire curtains
- Re-skim
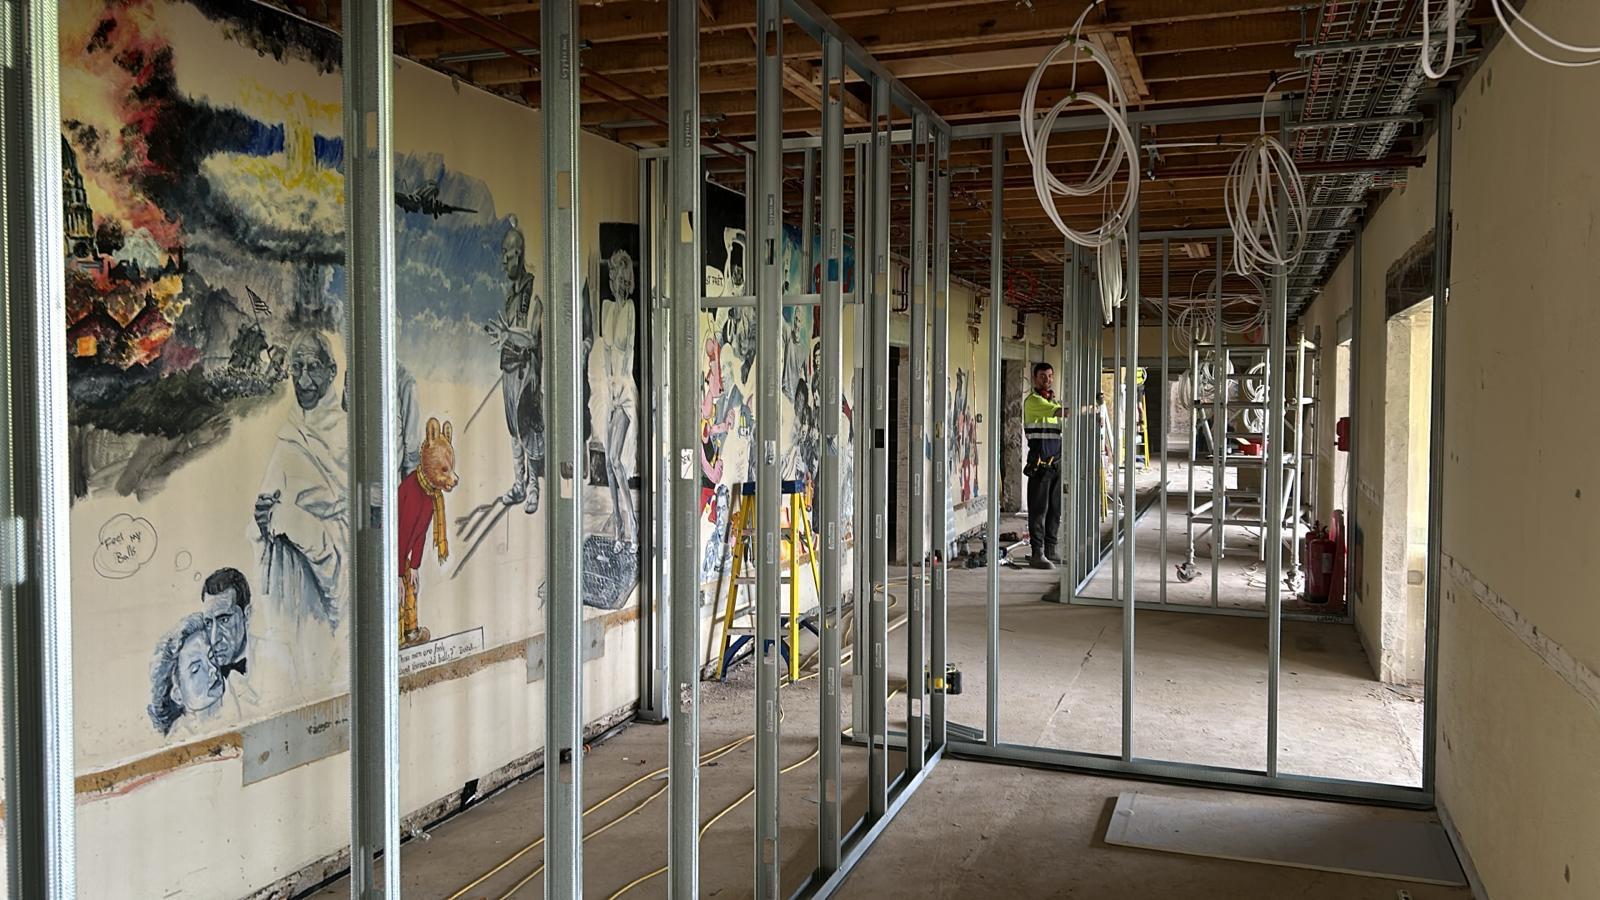
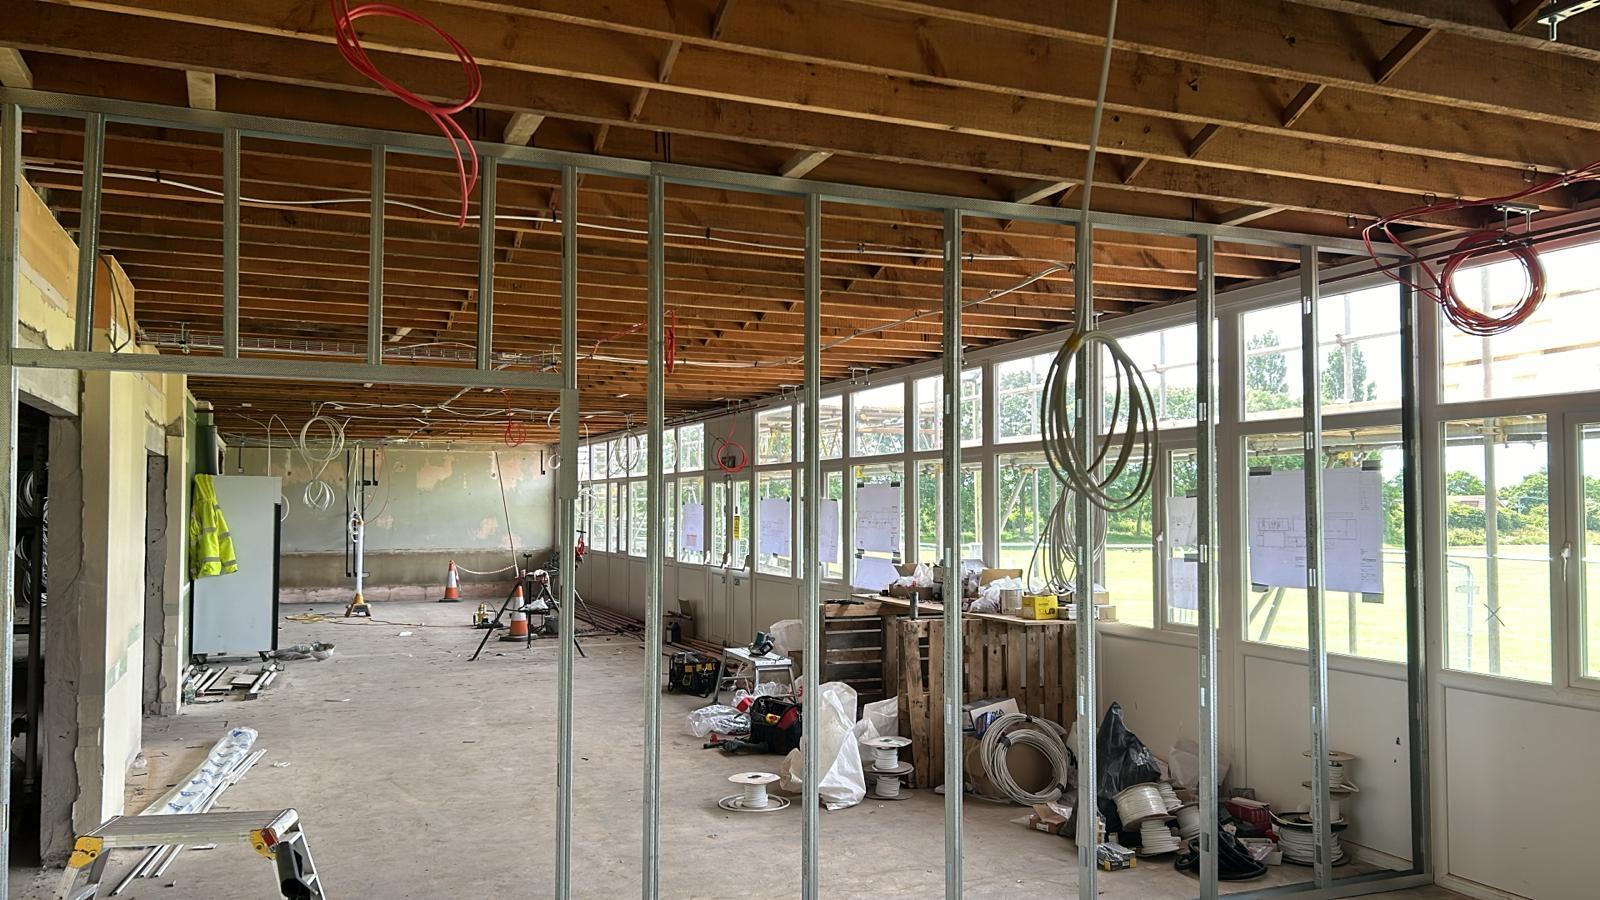
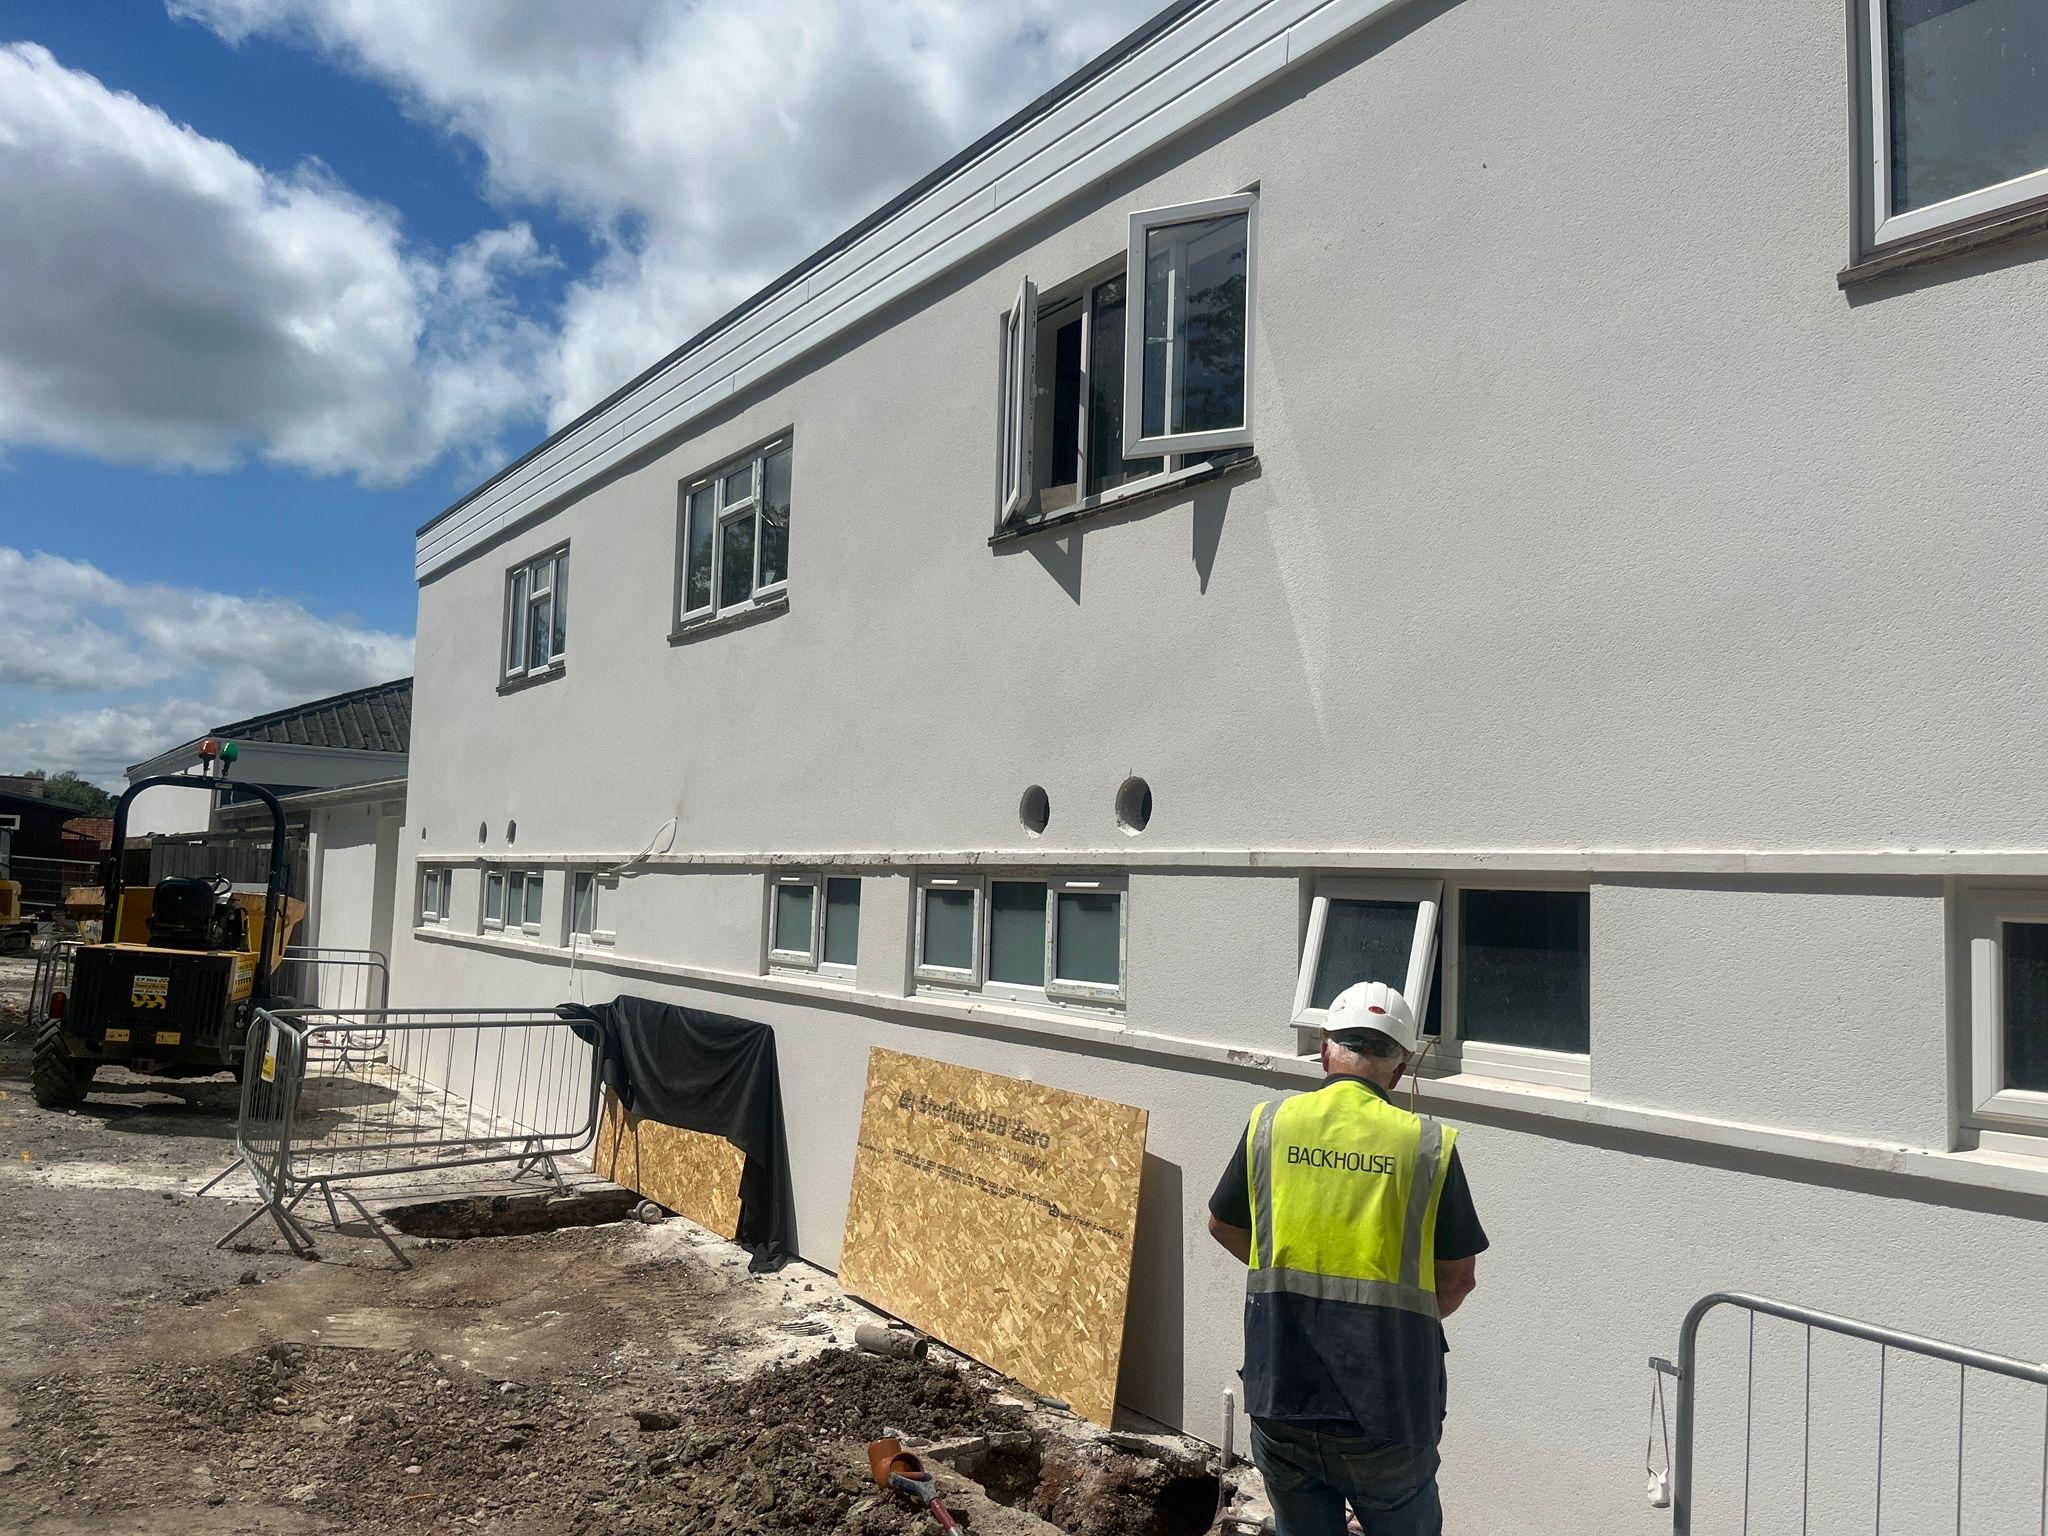
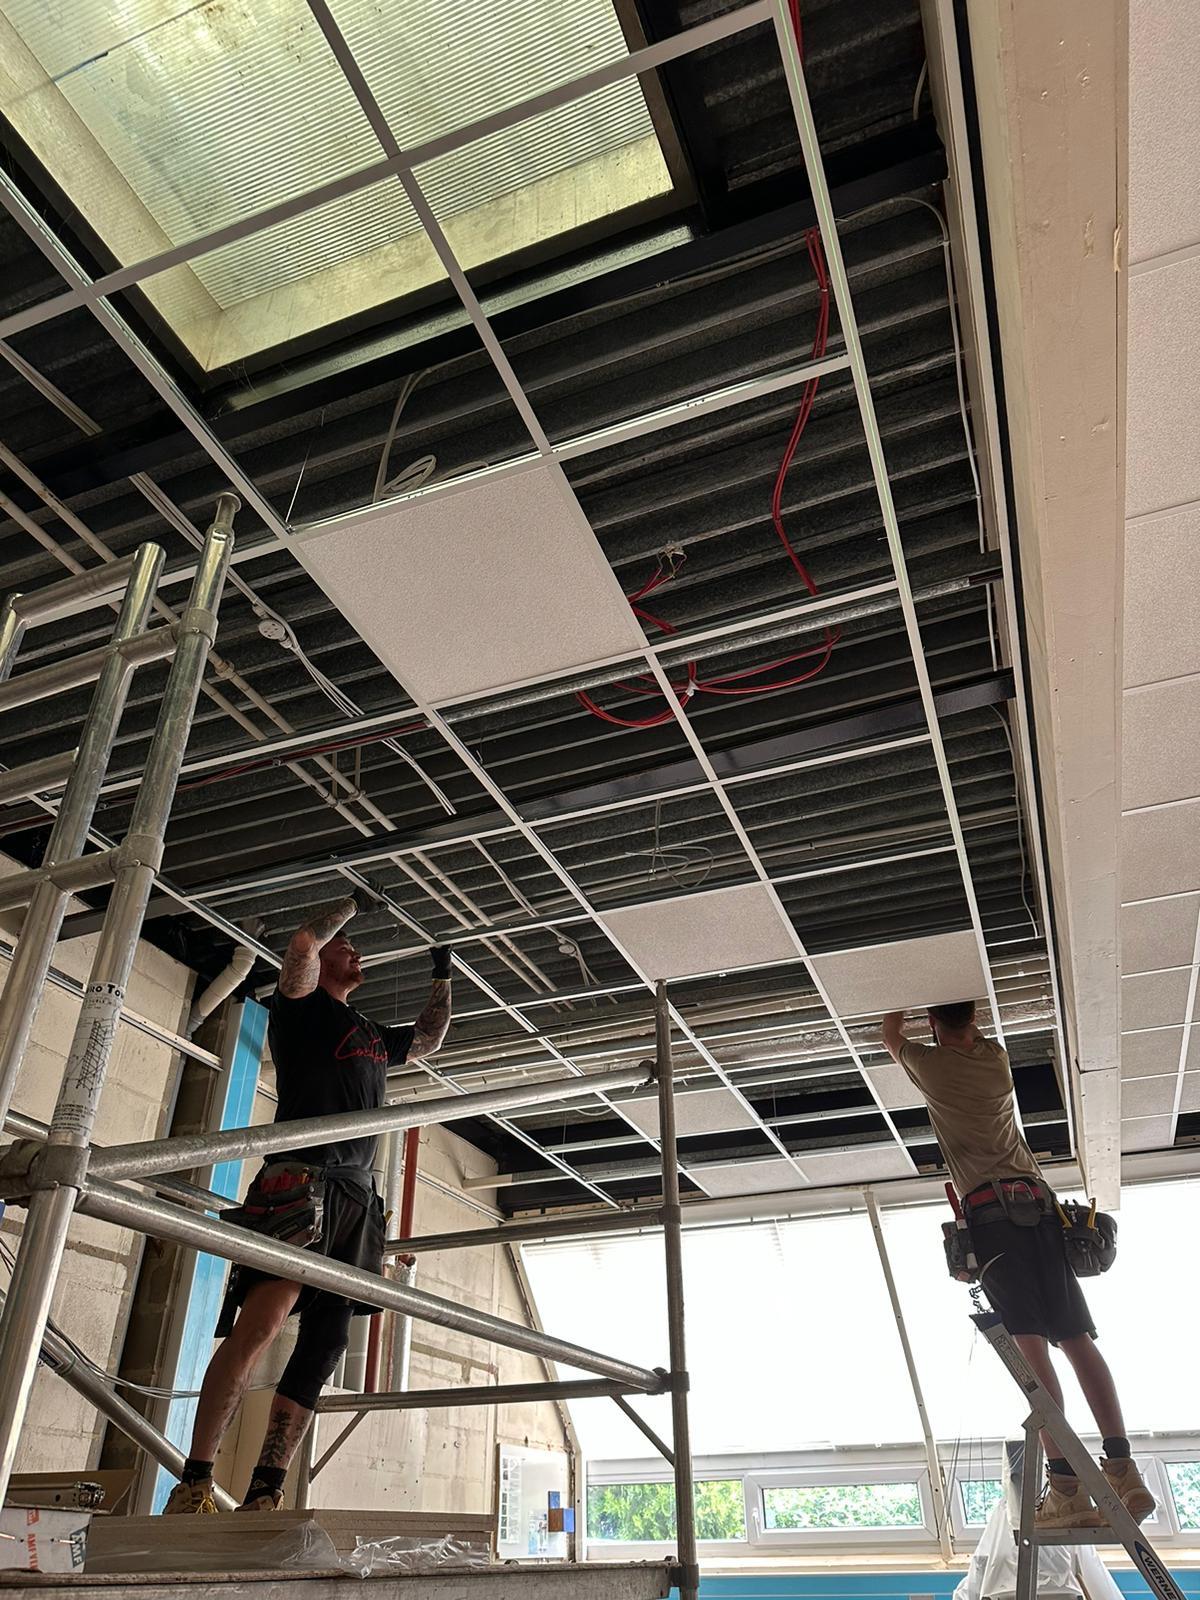
Commercial Remodel & Upgrade - Tor Leisure Centre, Glastonbury
A project which is almost complete, for Rigg Construction (Southern) Ltd. We have completed several requirements for the project which include:
- External render
- Grid ceiling
- Fire proofing
- Soundproofing
- Stud walls
The render part of the project began in August 2024 with the removal of the existing paint and rendered with PRB Oze Neige supplied by P1. We worked closely with Ryan Hall from PRB to ensure the correct specification and warranty of their system on this tricky surface.
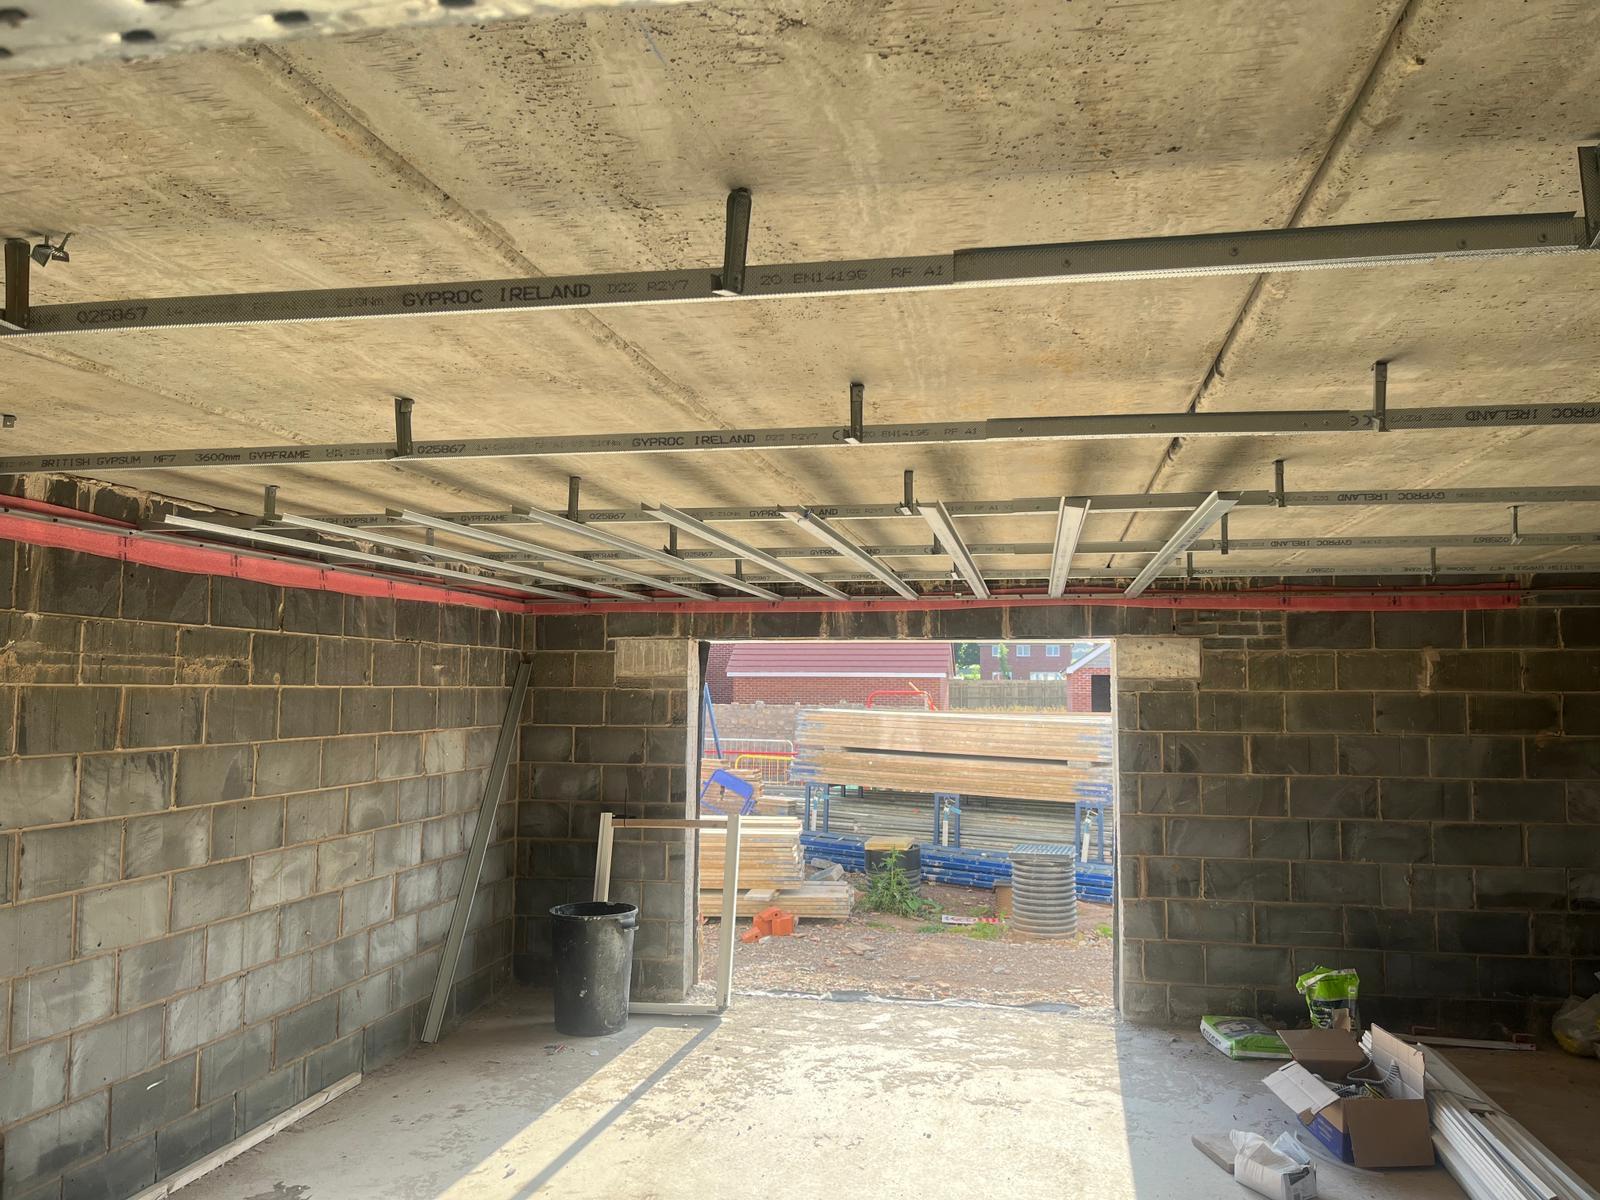
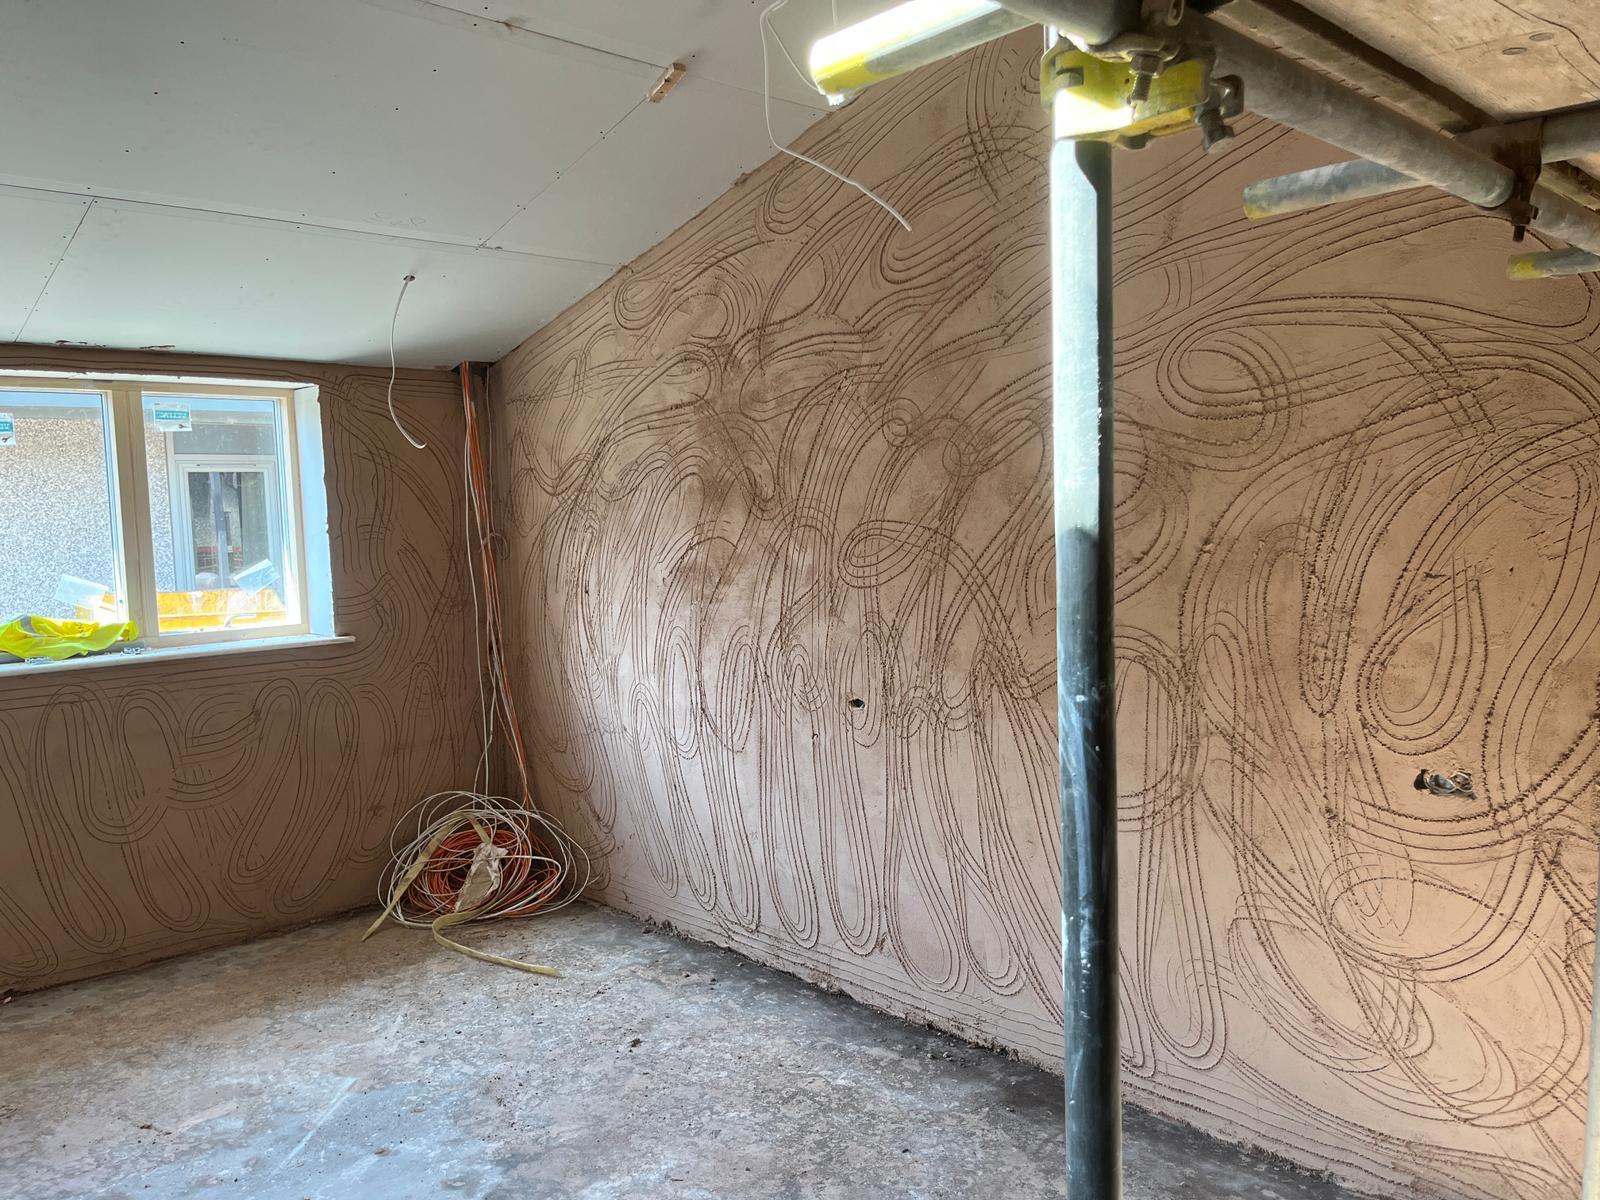
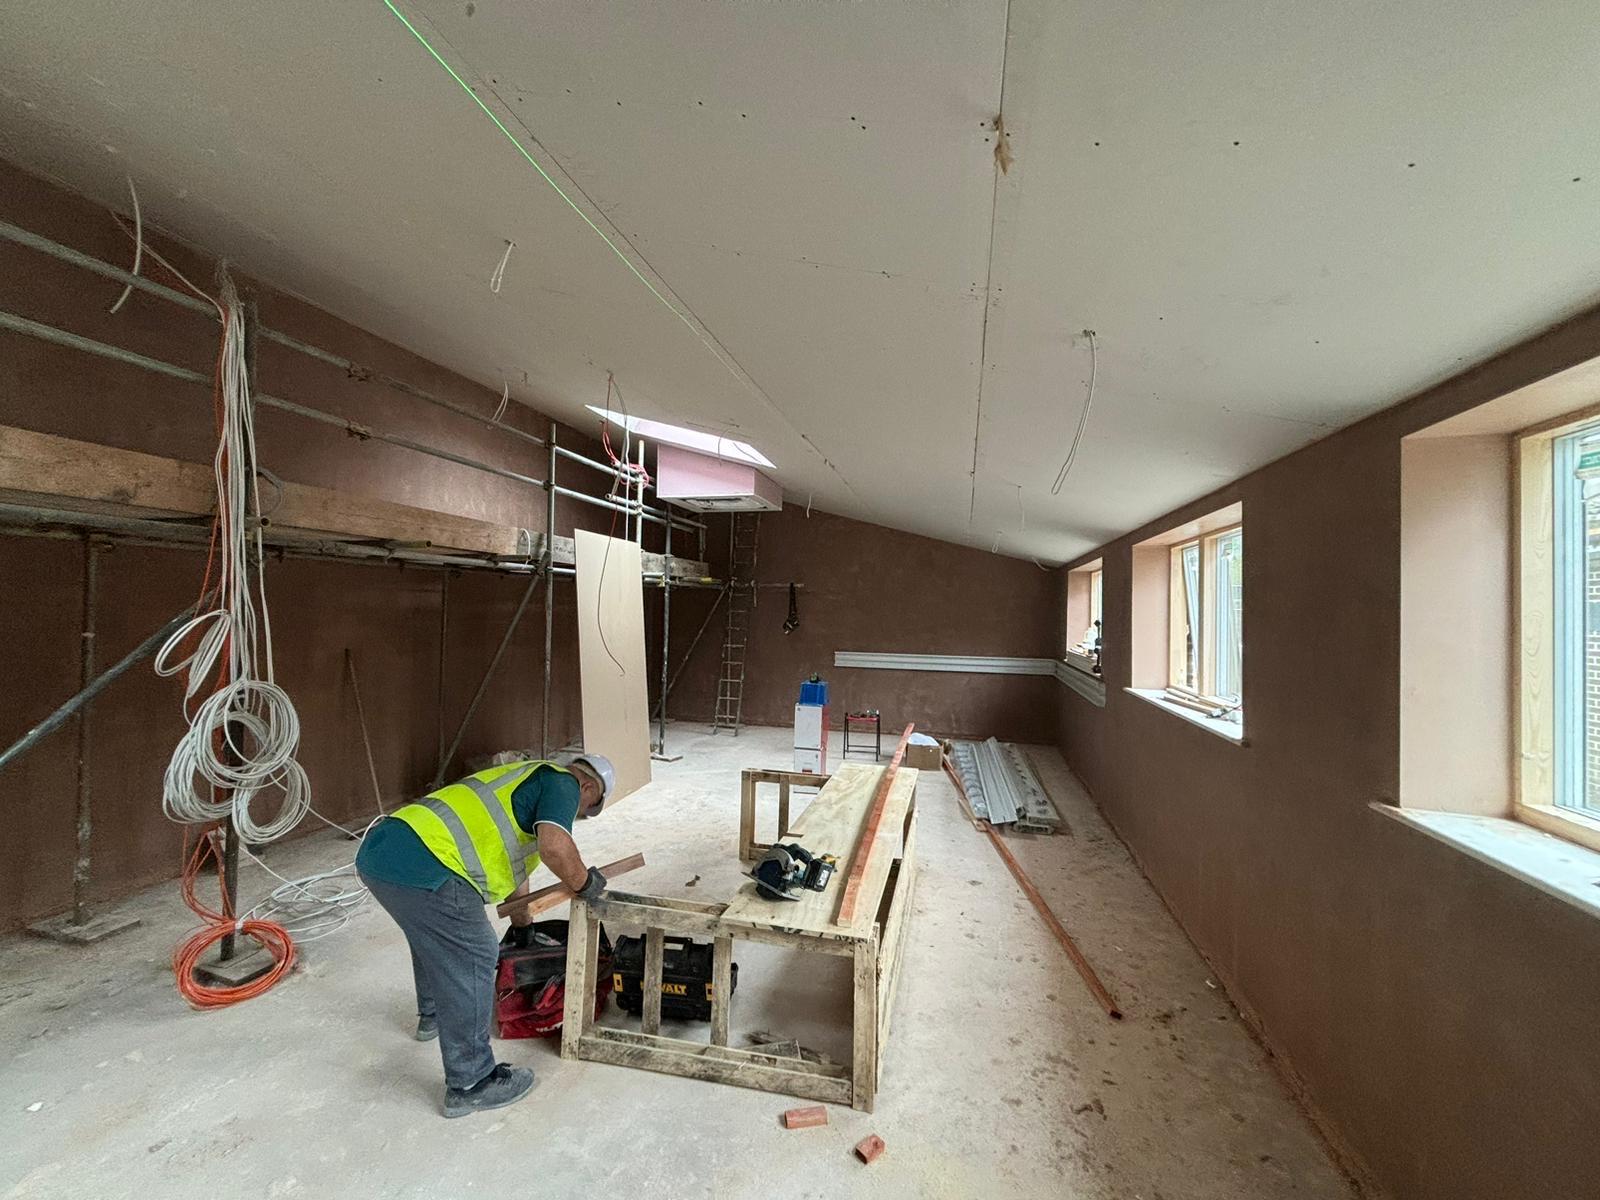
New Classroom Block - Norton Hill School. Midsomer Norton
A New Classroom Block project completed in August 2024 for Rigg Construction (Southern) Ltd, which included:
- Hardwall / Skim
- Grid Ceiling
- Fire batt Insulation
Rigg Construction (Southern) Ltd, trading since 1989, offers a complete service of new build, refurbishment and alterations, and repair and maintenance contracts, through various contractual arrangements including tender, partnering, and negotiation, on either traditional, design and build, or framework contracts.
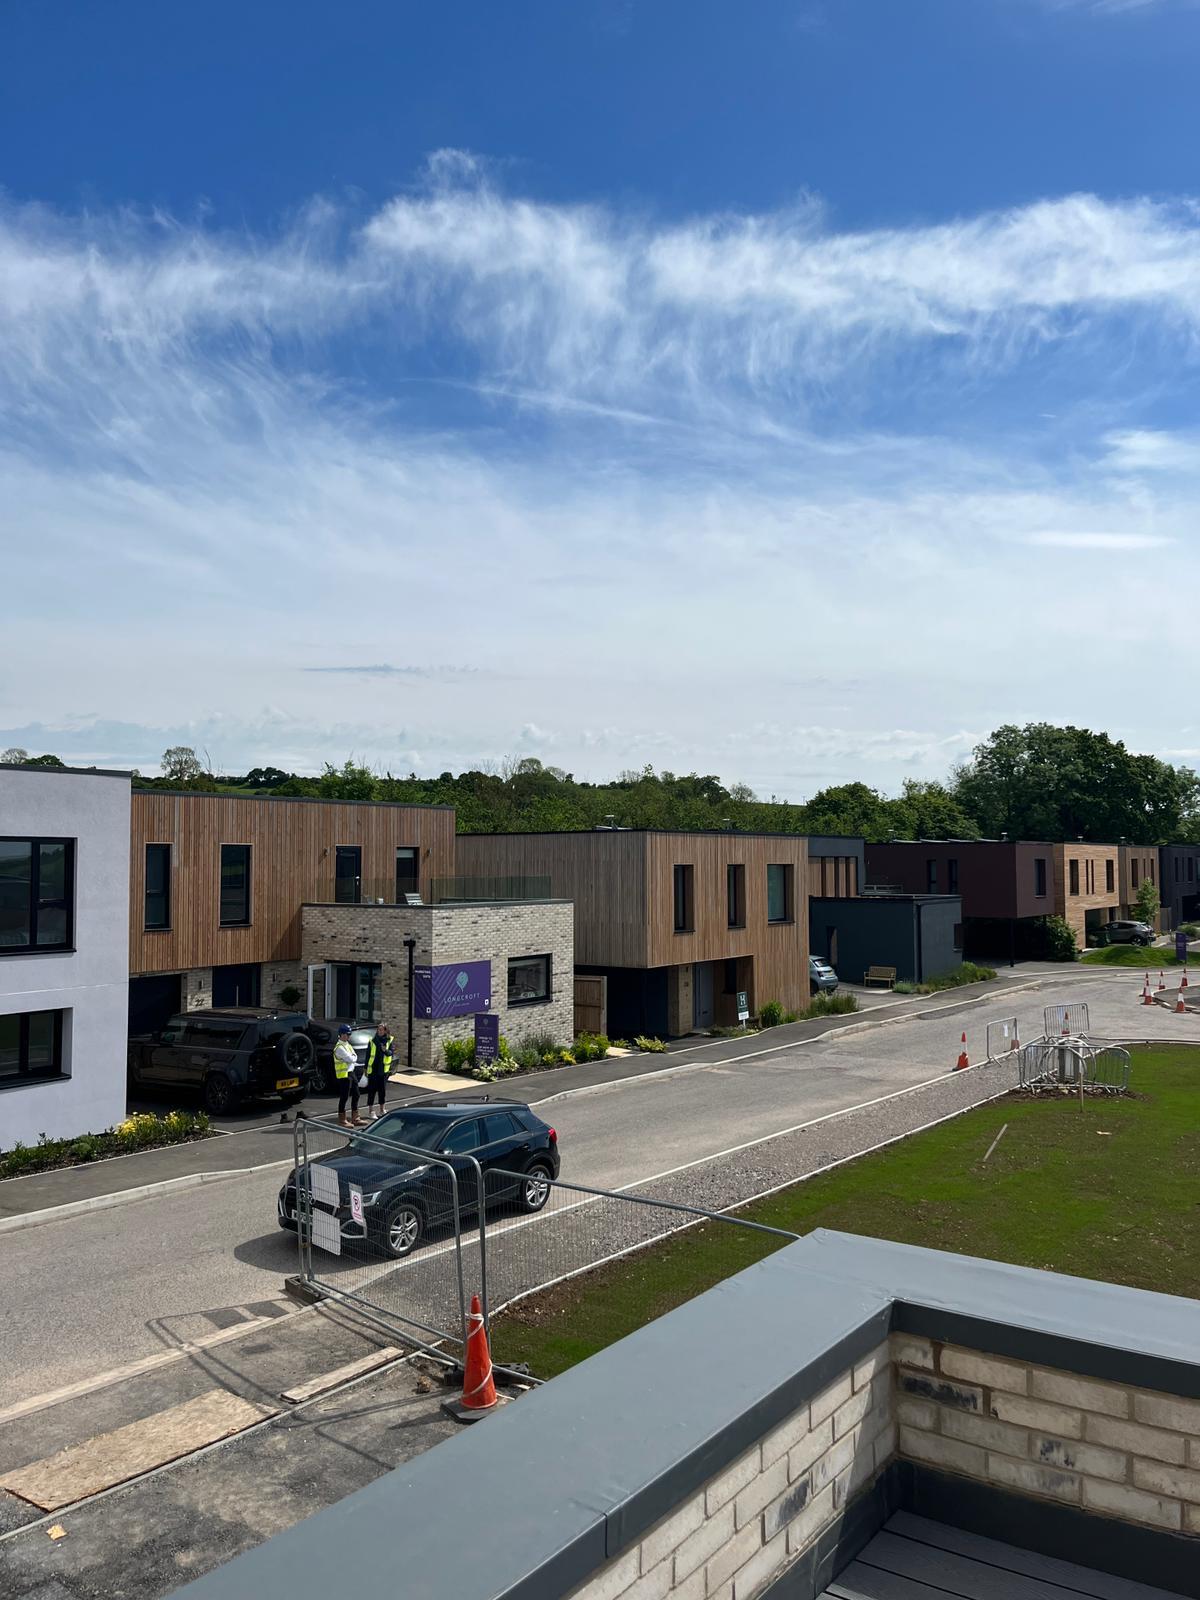
Bespoke Housing Development - Longcroft at Cubis, Bruton
A project we are currently working on for Acorn Property Group for both Drylining and Rendering. These services include:
- Boarding
- Dabbing
- Insulation
- Traditional Skim / Tape & Joint
- Render (thin coat system)
Longcroft at Cubis Bruton, comprises of twenty-eight contemporary 3 and 4 bedroom houses. Set in a natural amphitheatre overlooking Bruton, the homes are uniquely designed to be highly sustainable.
We will continue to add to this case study as the project progresses.
Housing Association Development - Bleadon Hill, Weston Super Mare
This project is almost complete for Vistry Group. K & R Group Ltd have completed the Drylining on these houses and apartments.
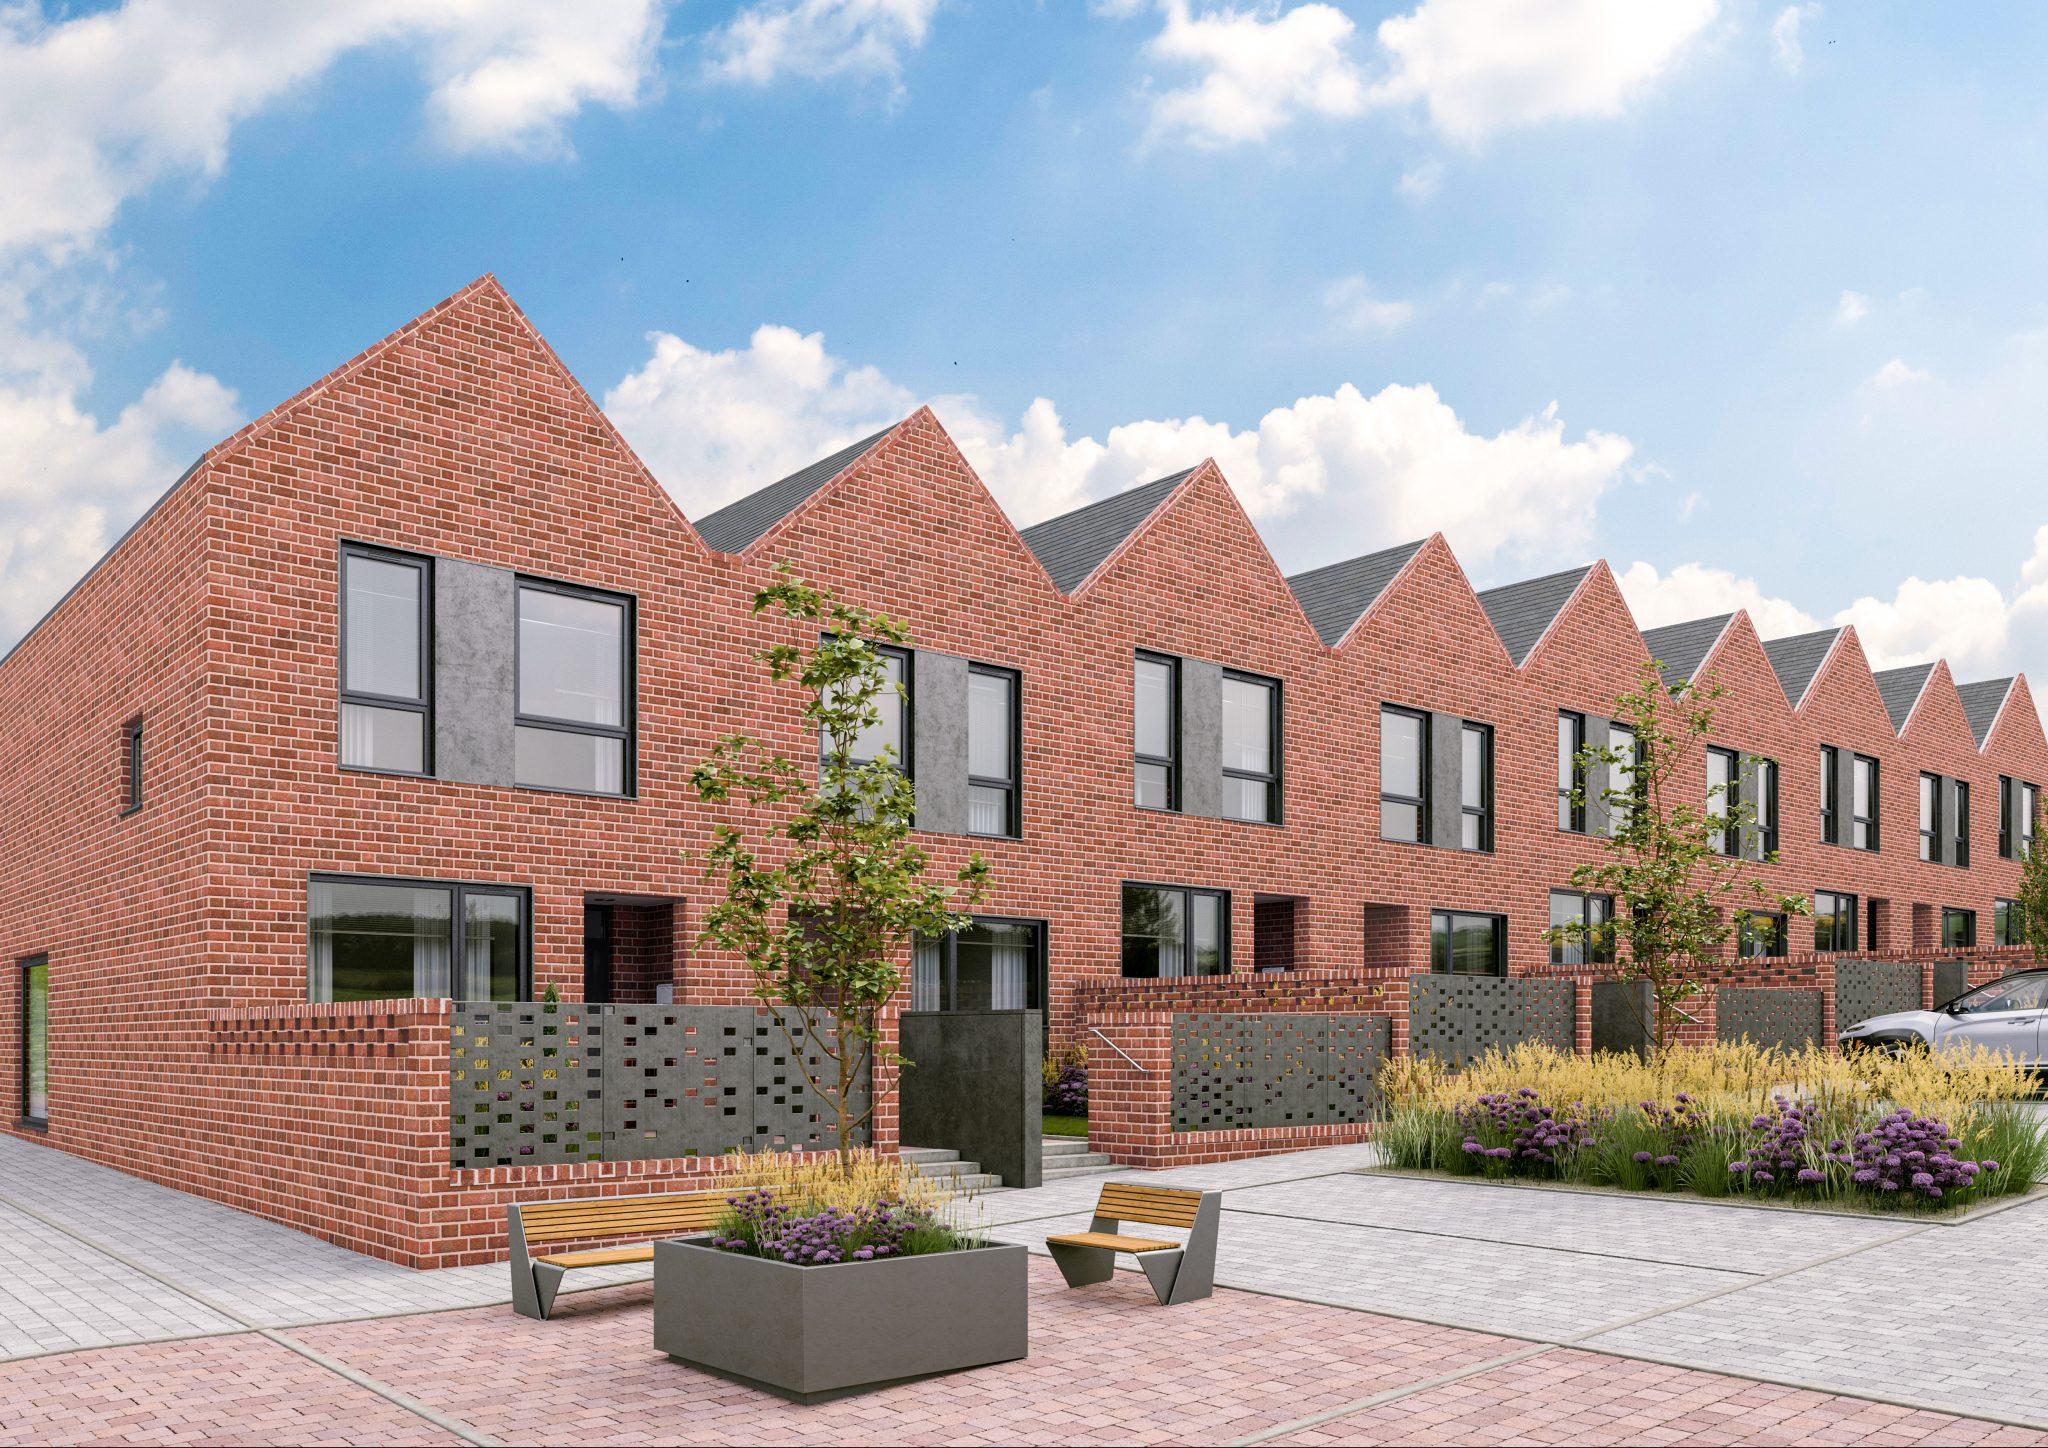
New Housing Development - Blundells Grange, Tiverton
Another Drylining project we are currently in progress with for Redrow which includes:
Blundell's Grange is on the outskirts of a thriving, characterful market town but surrounded by open countryside and with excellent transport connections, Blundell’s Grange offers buyers an enviable quality of life. These 2, 3, 4 and 5 bedroom homes are on the edge of bustling Tiverton.
We will continue to add to this case study as the project progresses.
New Housing Development - Elmhurst Gate, Carterton
A Drylining project we completed in 2024 for Miller Homes which included:
Miller Homes built a range of spacious and efficient new homes in Carterton and the project completed in 2024.
New Housing Development - Wellington Gate, Wantage
We are currently working on Phase 5, having already completed Phase 3 and 4 with Charles Church at Wellington Gate. This project has focused on Drylining which includes:
- Boarding
- Tape & Joint
- Dabbing
This development brings a lovely collection of four bedroom family homes to the village of Grove and the adjoining town of Wantage.
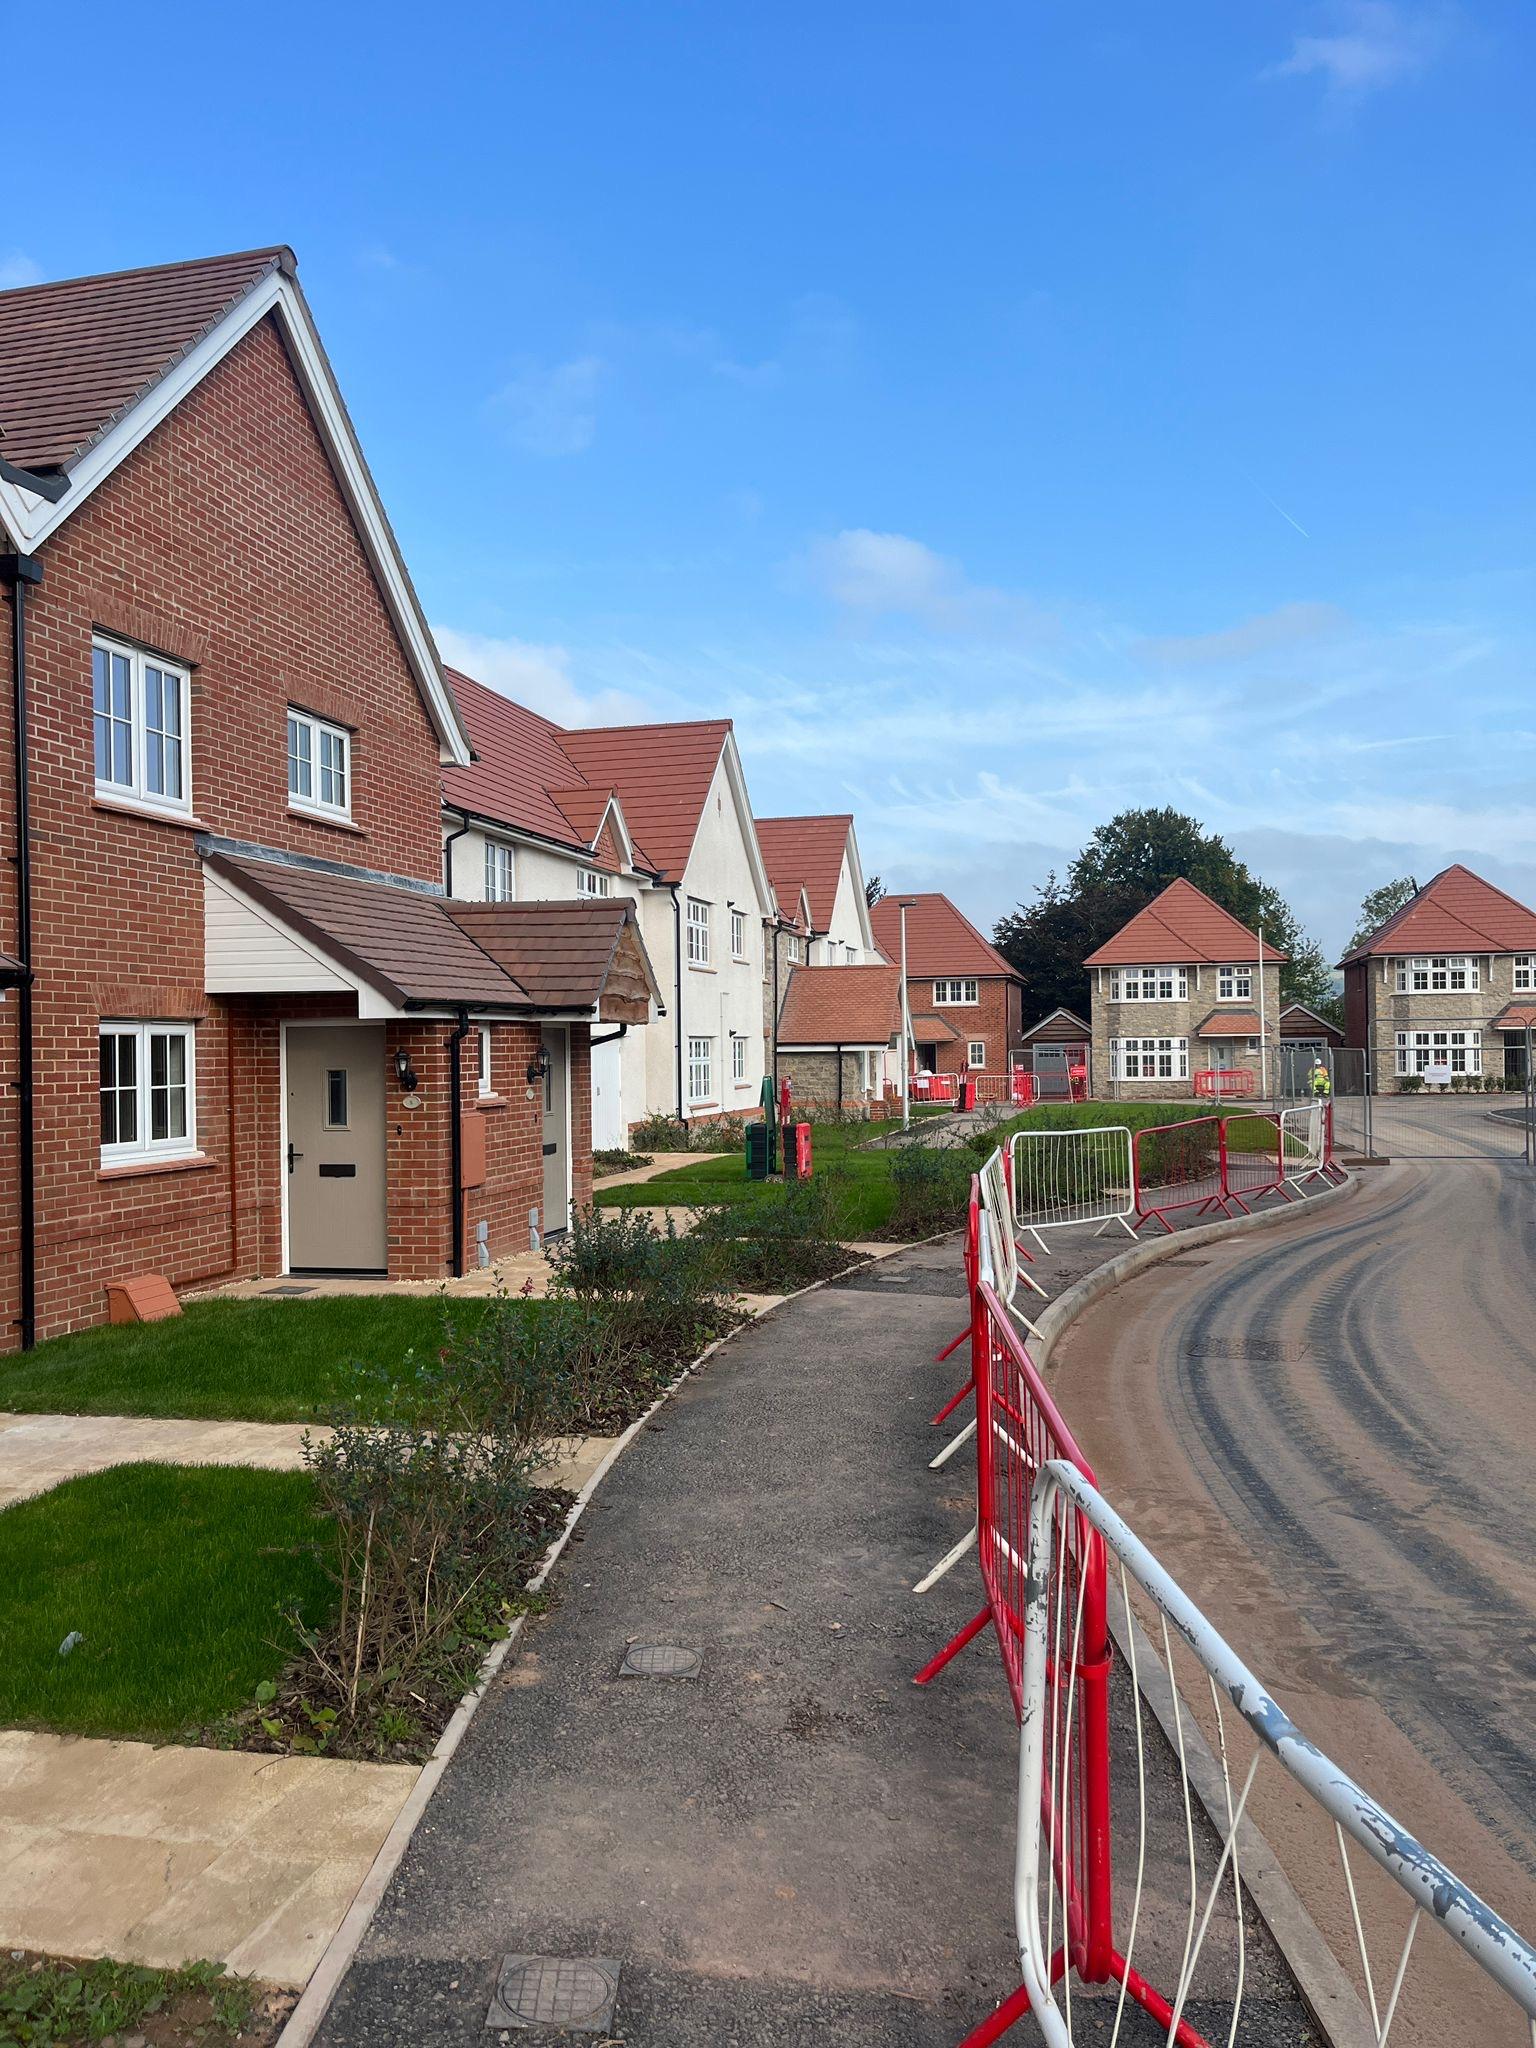
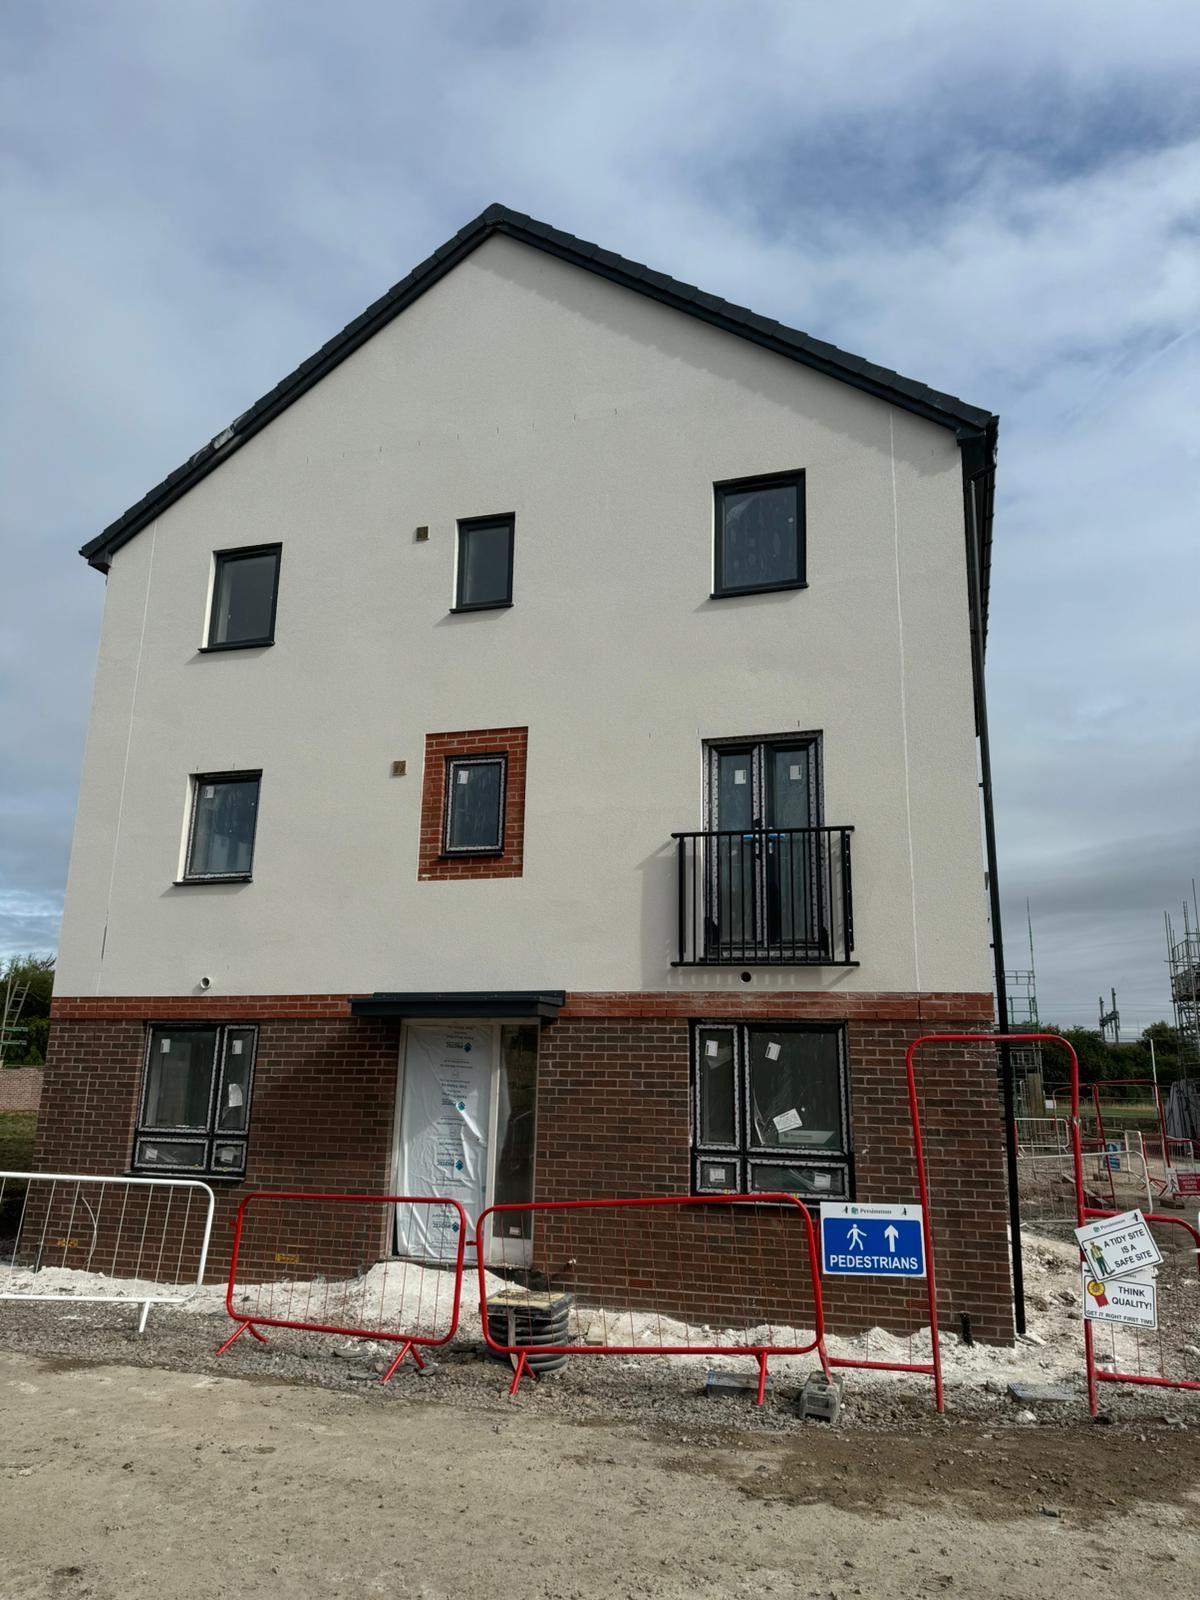
New Housing Development - Valley Park, Didcot
A current site we are working on for Persimmon which includes:
Persimmon Valley Park brings a collection of homes ranging from 1-bedroom apartments to 4-bedroom houses, to a newly developed area of Didcot, Oxfordshire.
K&R Group are using Weber Chalk on this development supplied by both Avonside Supplies & CCF.
We will continue to add to this Case Study as we progress throughout the project.
Bespoke Housing Development - Clayfurlong View & Orchard Grove, Kemble
Two recently completed projects for 2024 with Mackenzie Miller Homes in Kemble, Nr, Cirencester which included:
- Board
- Tape & Joint
- Dabbing
- Traditional Skim
- Render
Nestled on a quiet lane amongst lush mature trees, Clayfurlong View and Orchard Grove are both a characterful curation of 15 traditional Cotswold Homes in the village of Kemble.
Flawless design masterminded by Mackenzie Miller Homes’ interior specialists created light-filled, inviting living spaces that flow seamlessly.
New Housing Development - Orchard Field, Siddington
A recently completed project in 2024 for Stonewood Homes which included:
- Boarding
- Tape & Joint
- Dabbing
- Traditional Skim
- Render
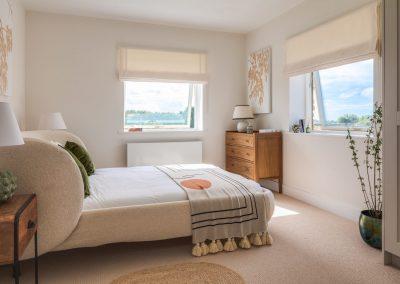
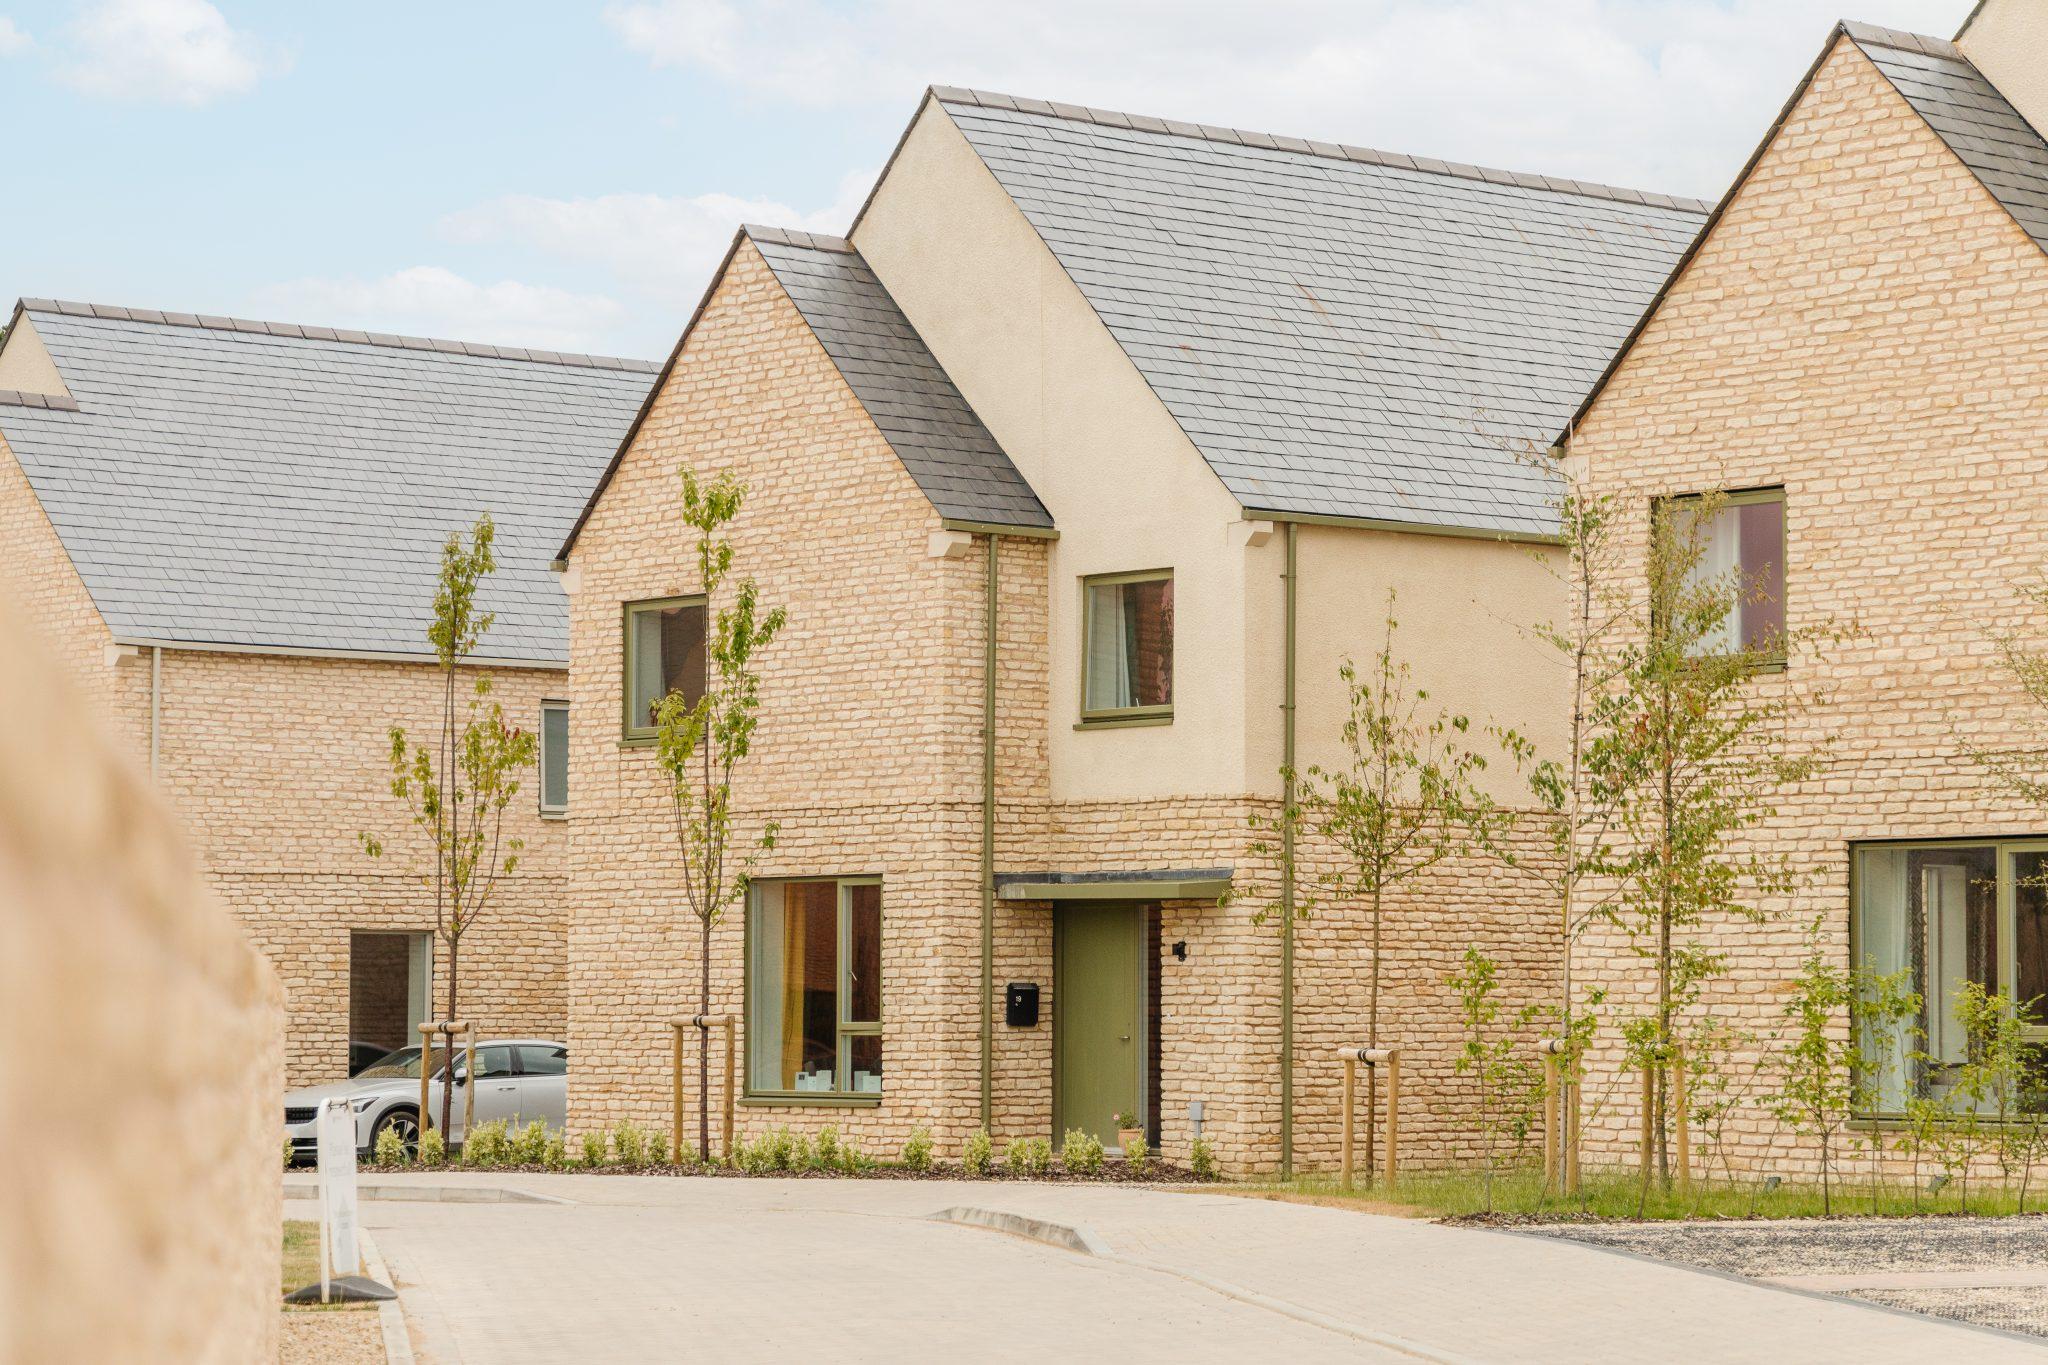
Orchard Field is a stunning neighbourhood of 88 sustainable homes that harness cutting edge energy-saving technology with beautiful design.
These homes were created by award-winning designers and leading environmental engineers whilst maintaining a traditional look and feel, with an abundance of light and flexible space that makes them ideal for modern living.
Each of the one, two, three, four and five bedroomed homes were designed to be as energy efficient as possible without compromising on the high standards of finish and craftmanship Stonewood produce in their award-winning developments.
Working to the stringent Association for Environment Conscious Building standards, which demand excellent construction and low energy consumption, K&R Group supported creating homes capable of cutting heating bills by up to 70 per cent compared to standard new homes. Every home had up to 12 solar panels seamlessly embedded into its slate-tiled roof, 45cm thick walls filled with eco-friendly insulation, triple glazing and airtight interiors to eliminate draughts. An energy-efficient mechanical ventilation heat recovery system keeps the interiors comfortably warm. Clever small-bore pipes deliver rapid hot water to sinks and showers so that heat loss and water waste is reduced.
New Housing Development - Somerbrook, Gt Somerford
A project completed for Stonewood Homes which included:
- Boarding
- Taping
- Dabbing
- Traditional Skimming
- Roughcast Render
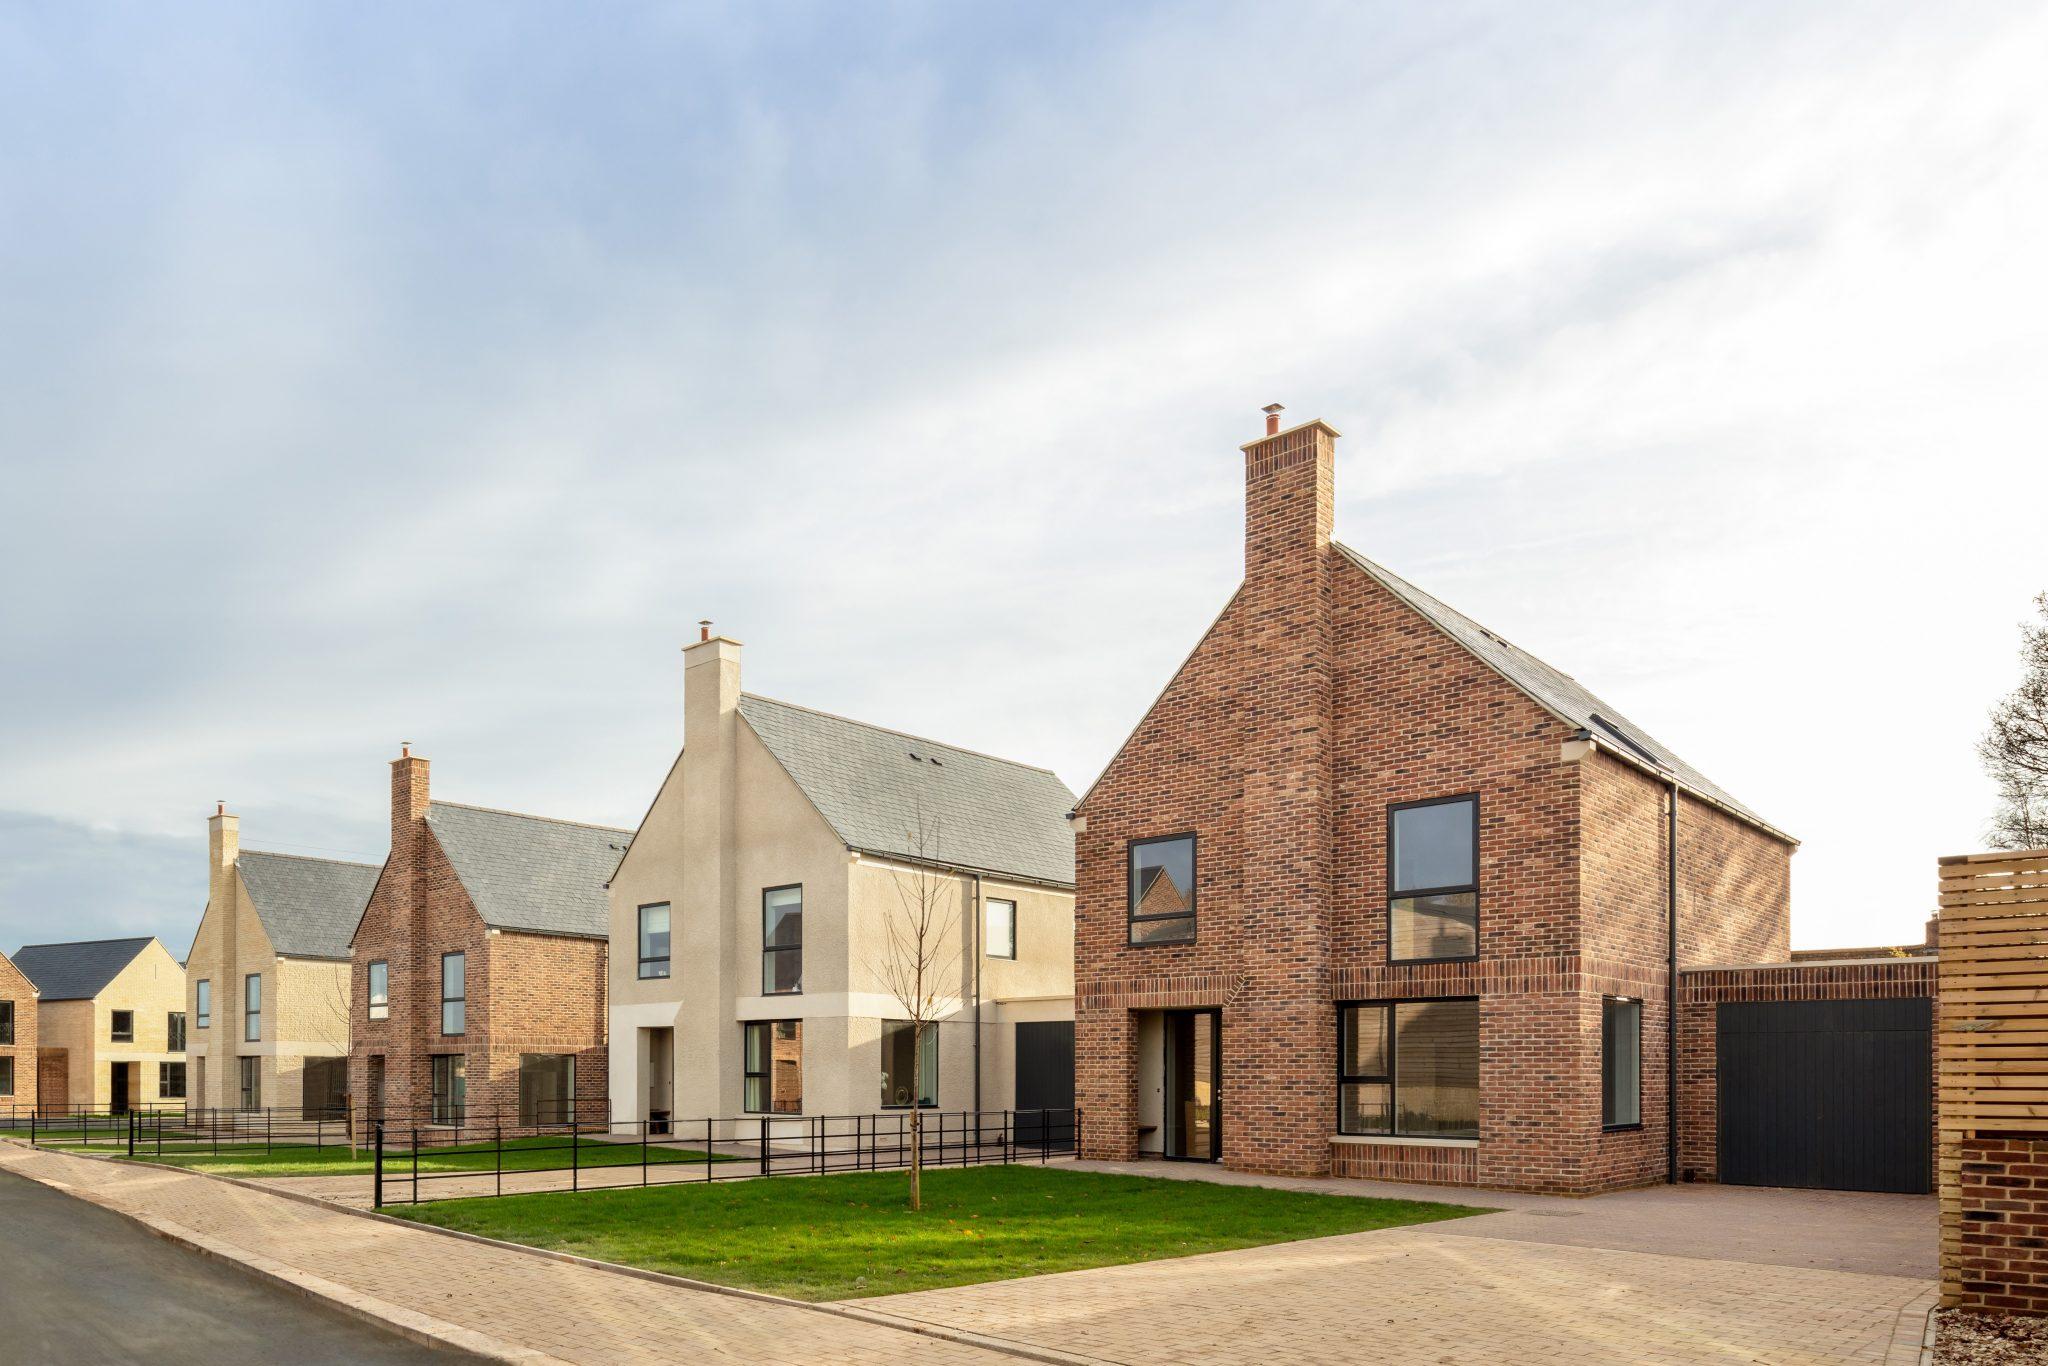
Somerbrook is a completed development of 38 high-quality homes located to the north-east of the picturesque village of Great Somerford in North Wiltshire. Set against the backdrop of a farm established in the 1500s, this development offered a range of two, three, four, and five-bedroom homes, including terraced, link-detached, and detached properties.
Designed to blend seamlessly with the nearby village, the homes feature traditional exterior finishes such as stone, red brick, and premium roughcast render, complemented by a charming mix of chimneys that echo the local architectural style.
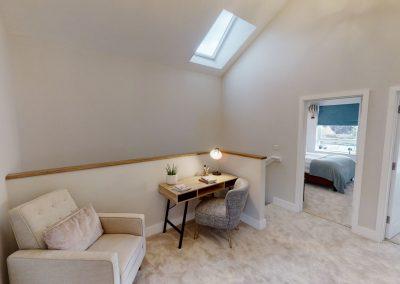
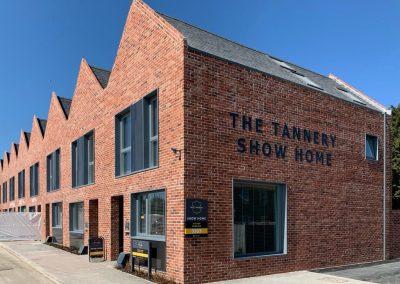
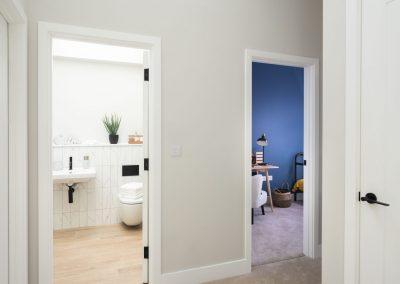
New Housing Development - The Tannery, Holt
A Drylining project we completed for Stonewood Homes. This included:
- Boarding
- Insulation
- Tape & Joint
- Skimming
This was an outstanding conversion of a historic industrial site in the Wiltshire village of Holt, blending 43 homes with a development of flexible work spaces in a beautiful rural setting.
Utilising some of the former tannery’s iconic brick buildings, the development cleverly integrated its residential and commercial users to foster a sense of community. The mixture of one, two, three and four bedroom homes are gathered around the former industrial complex with open spaces and communal areas designed to bring people together.
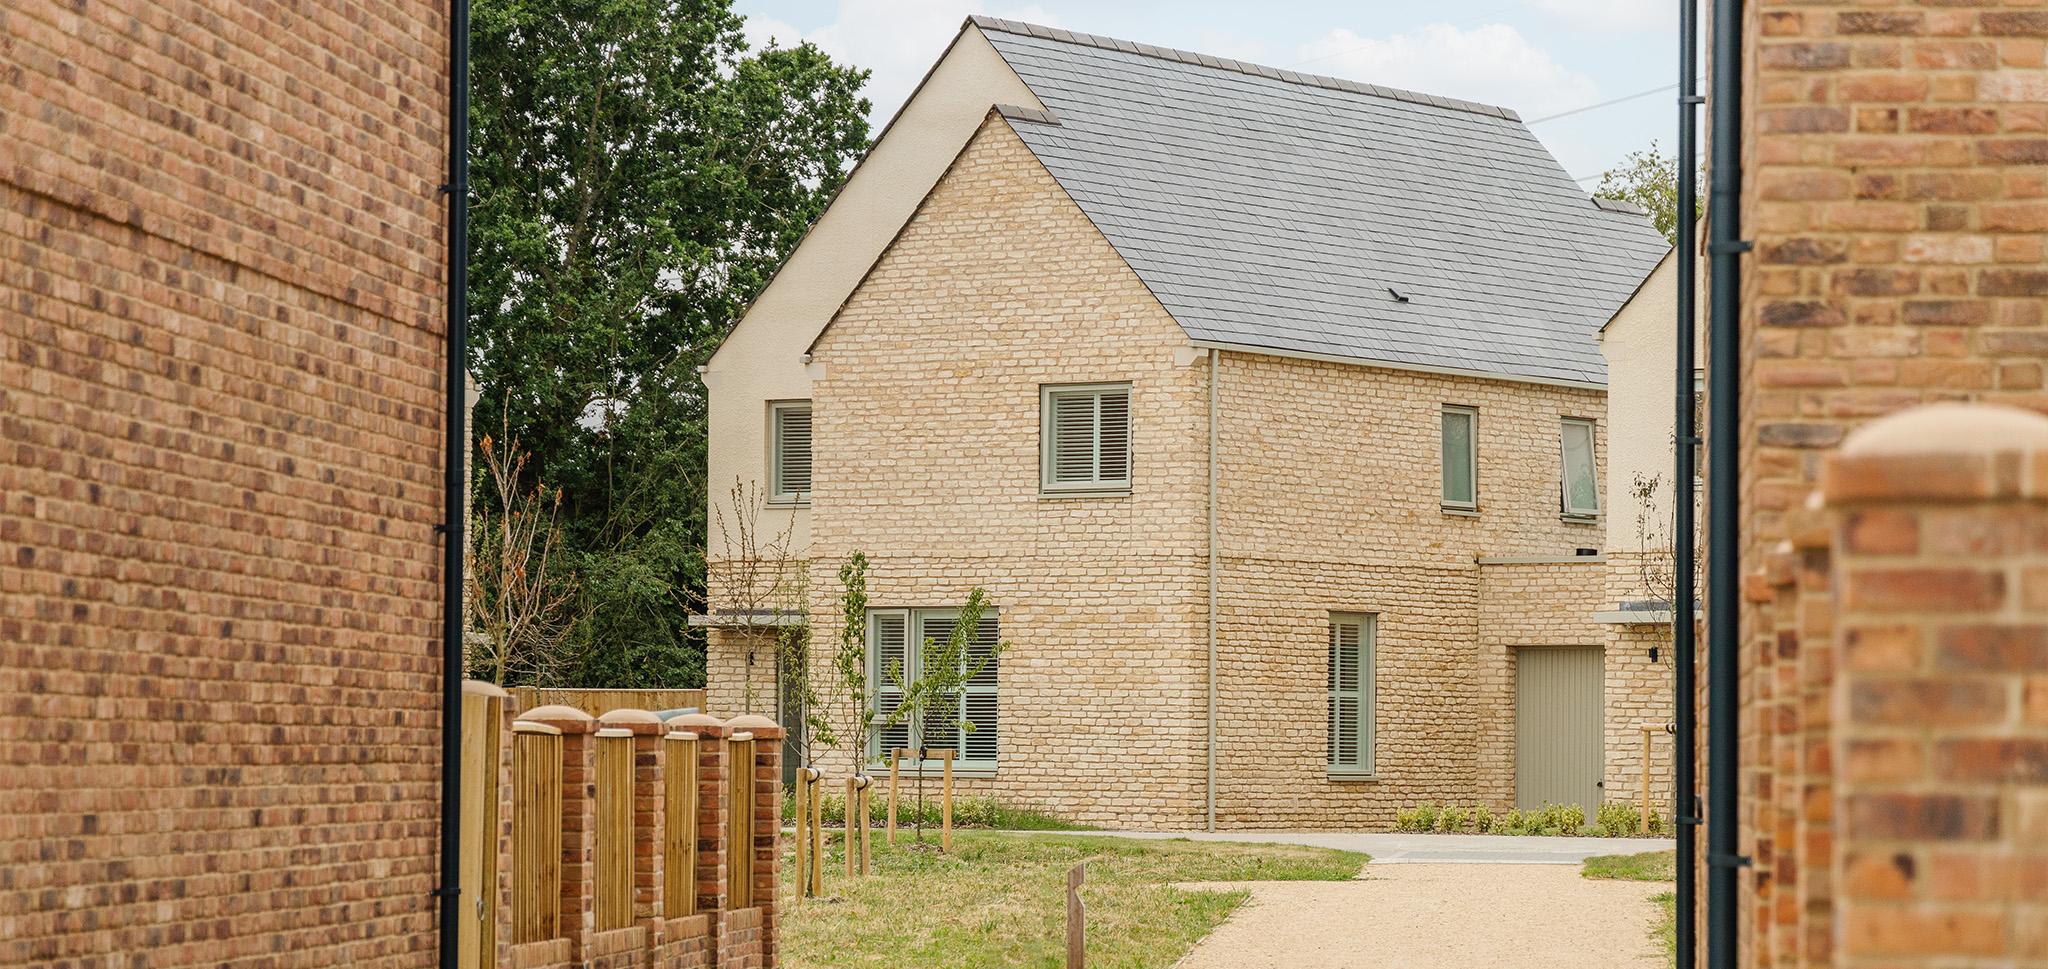
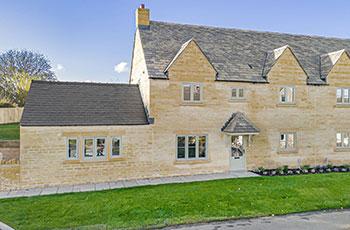
Bespoke New Build Houses - Chedworth
A recently completed Drylining project we completed for JPEG Carpentry Ltd; which included:
- Insulation
- Tacking
- Dabbing
- Traditional Skimming.
This was an exciting development of two traditional Cotswold stone 4 bedroom houses with large gardens, situated in a highly sought after village of Chedworth Gloucester.
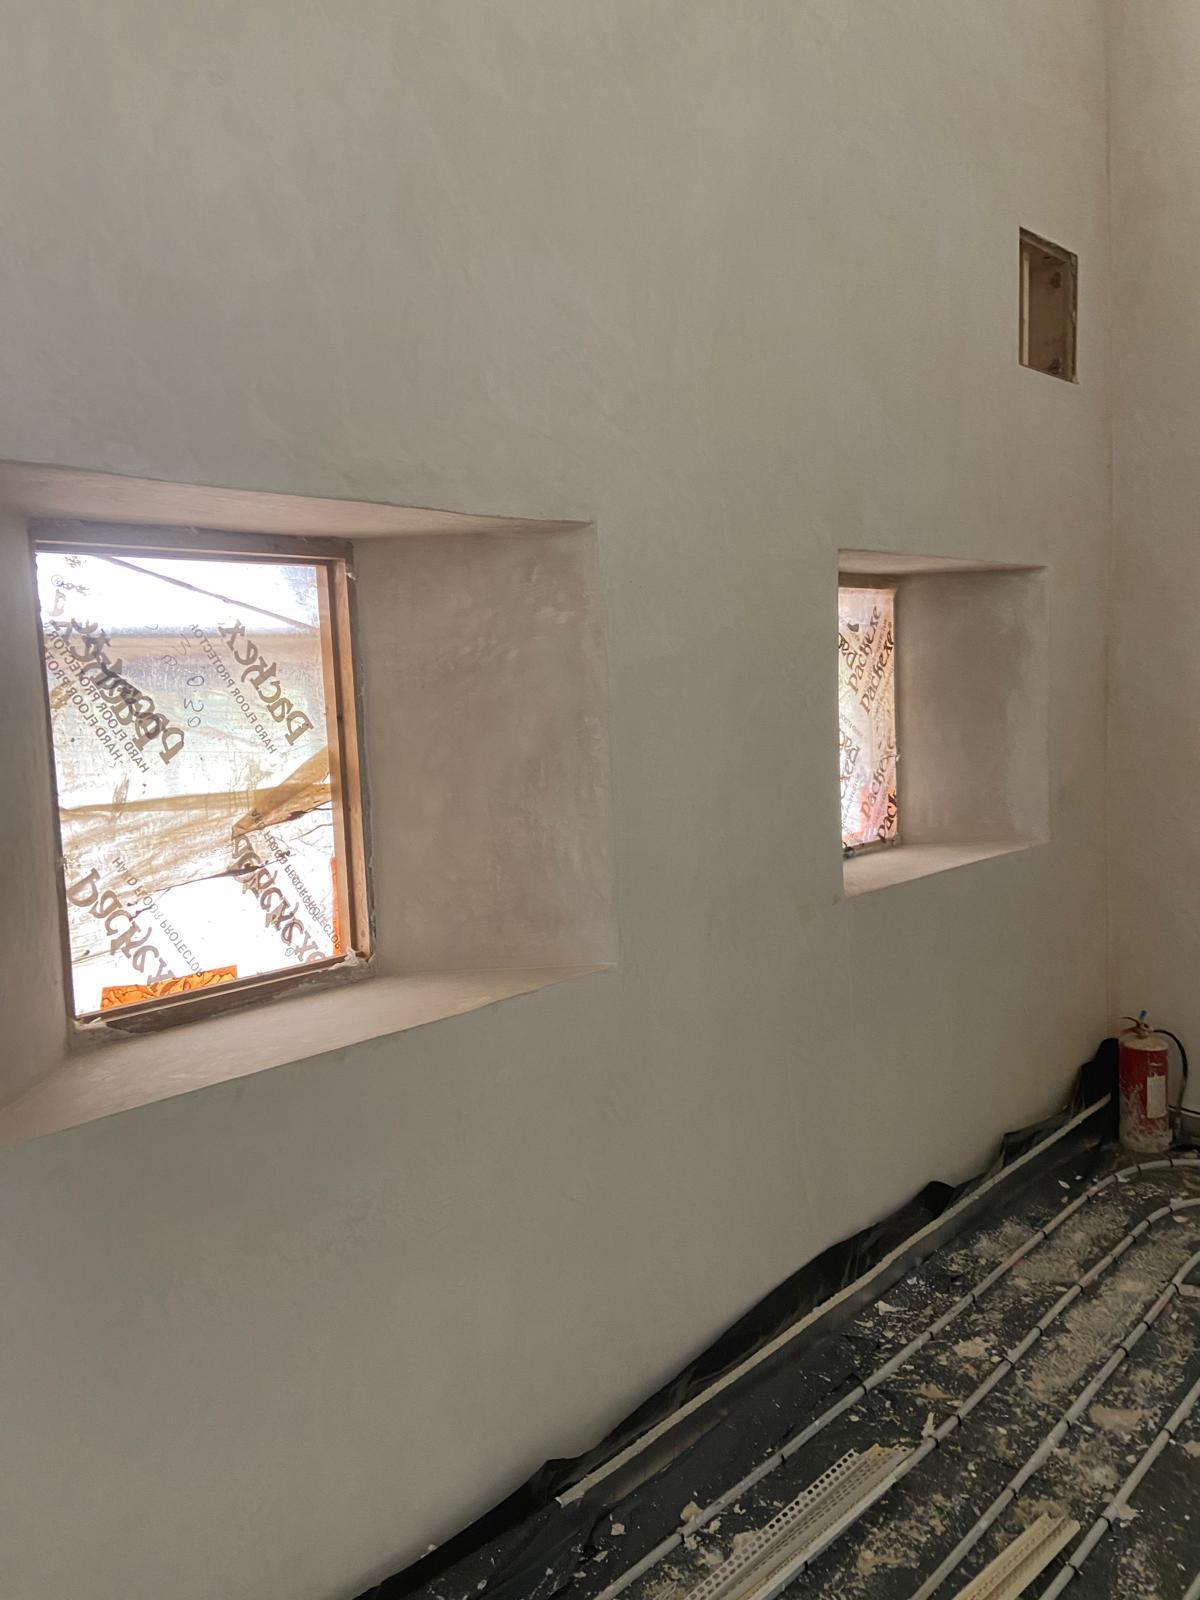
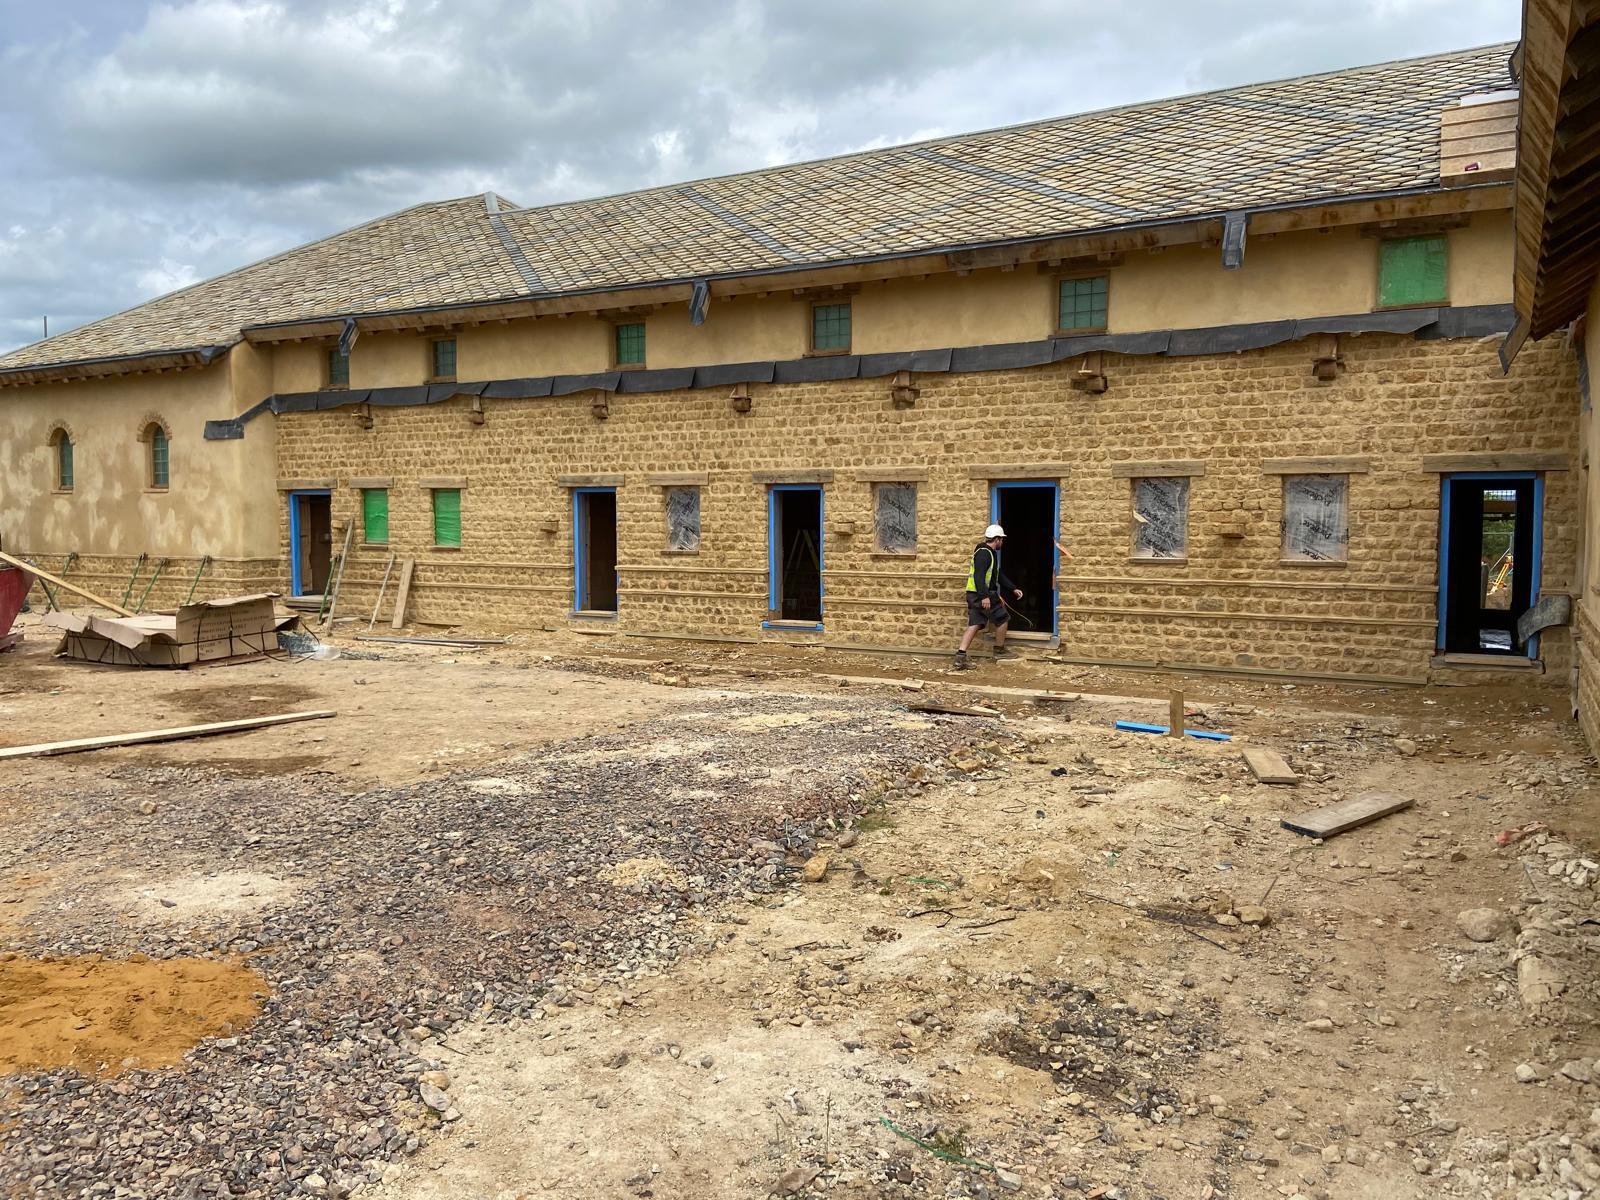
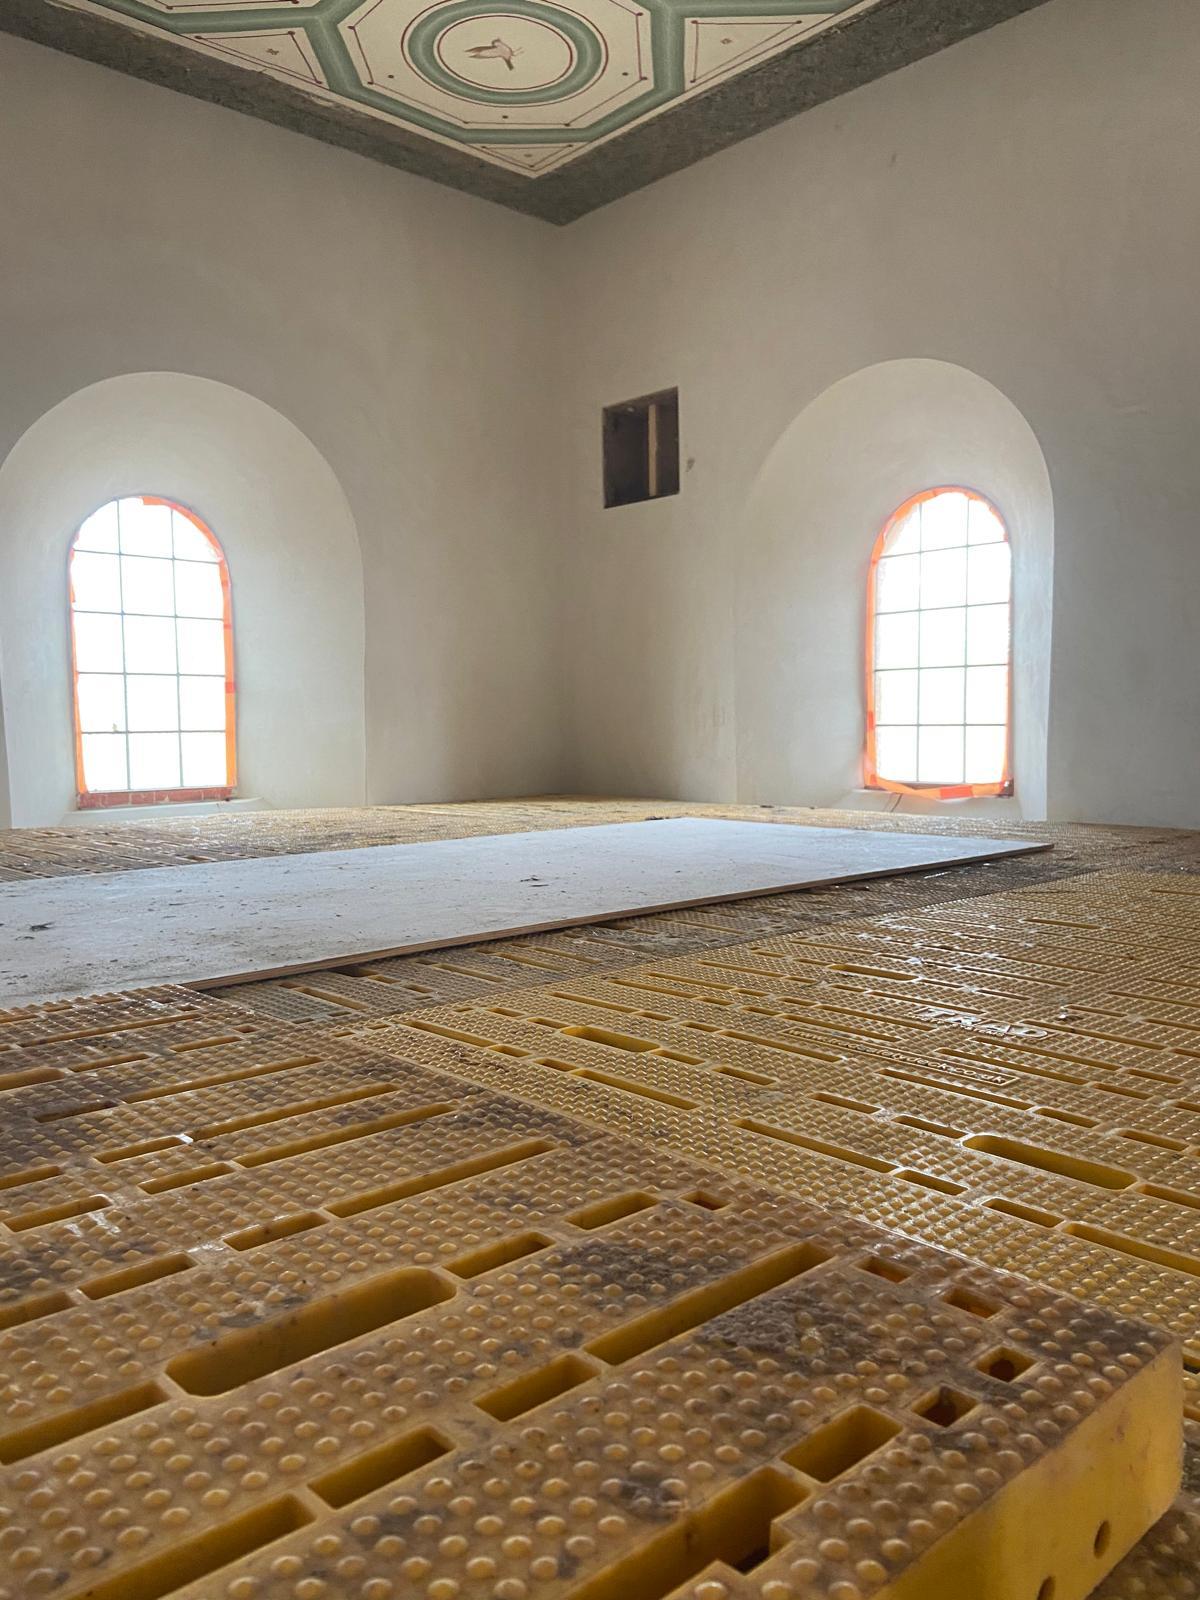
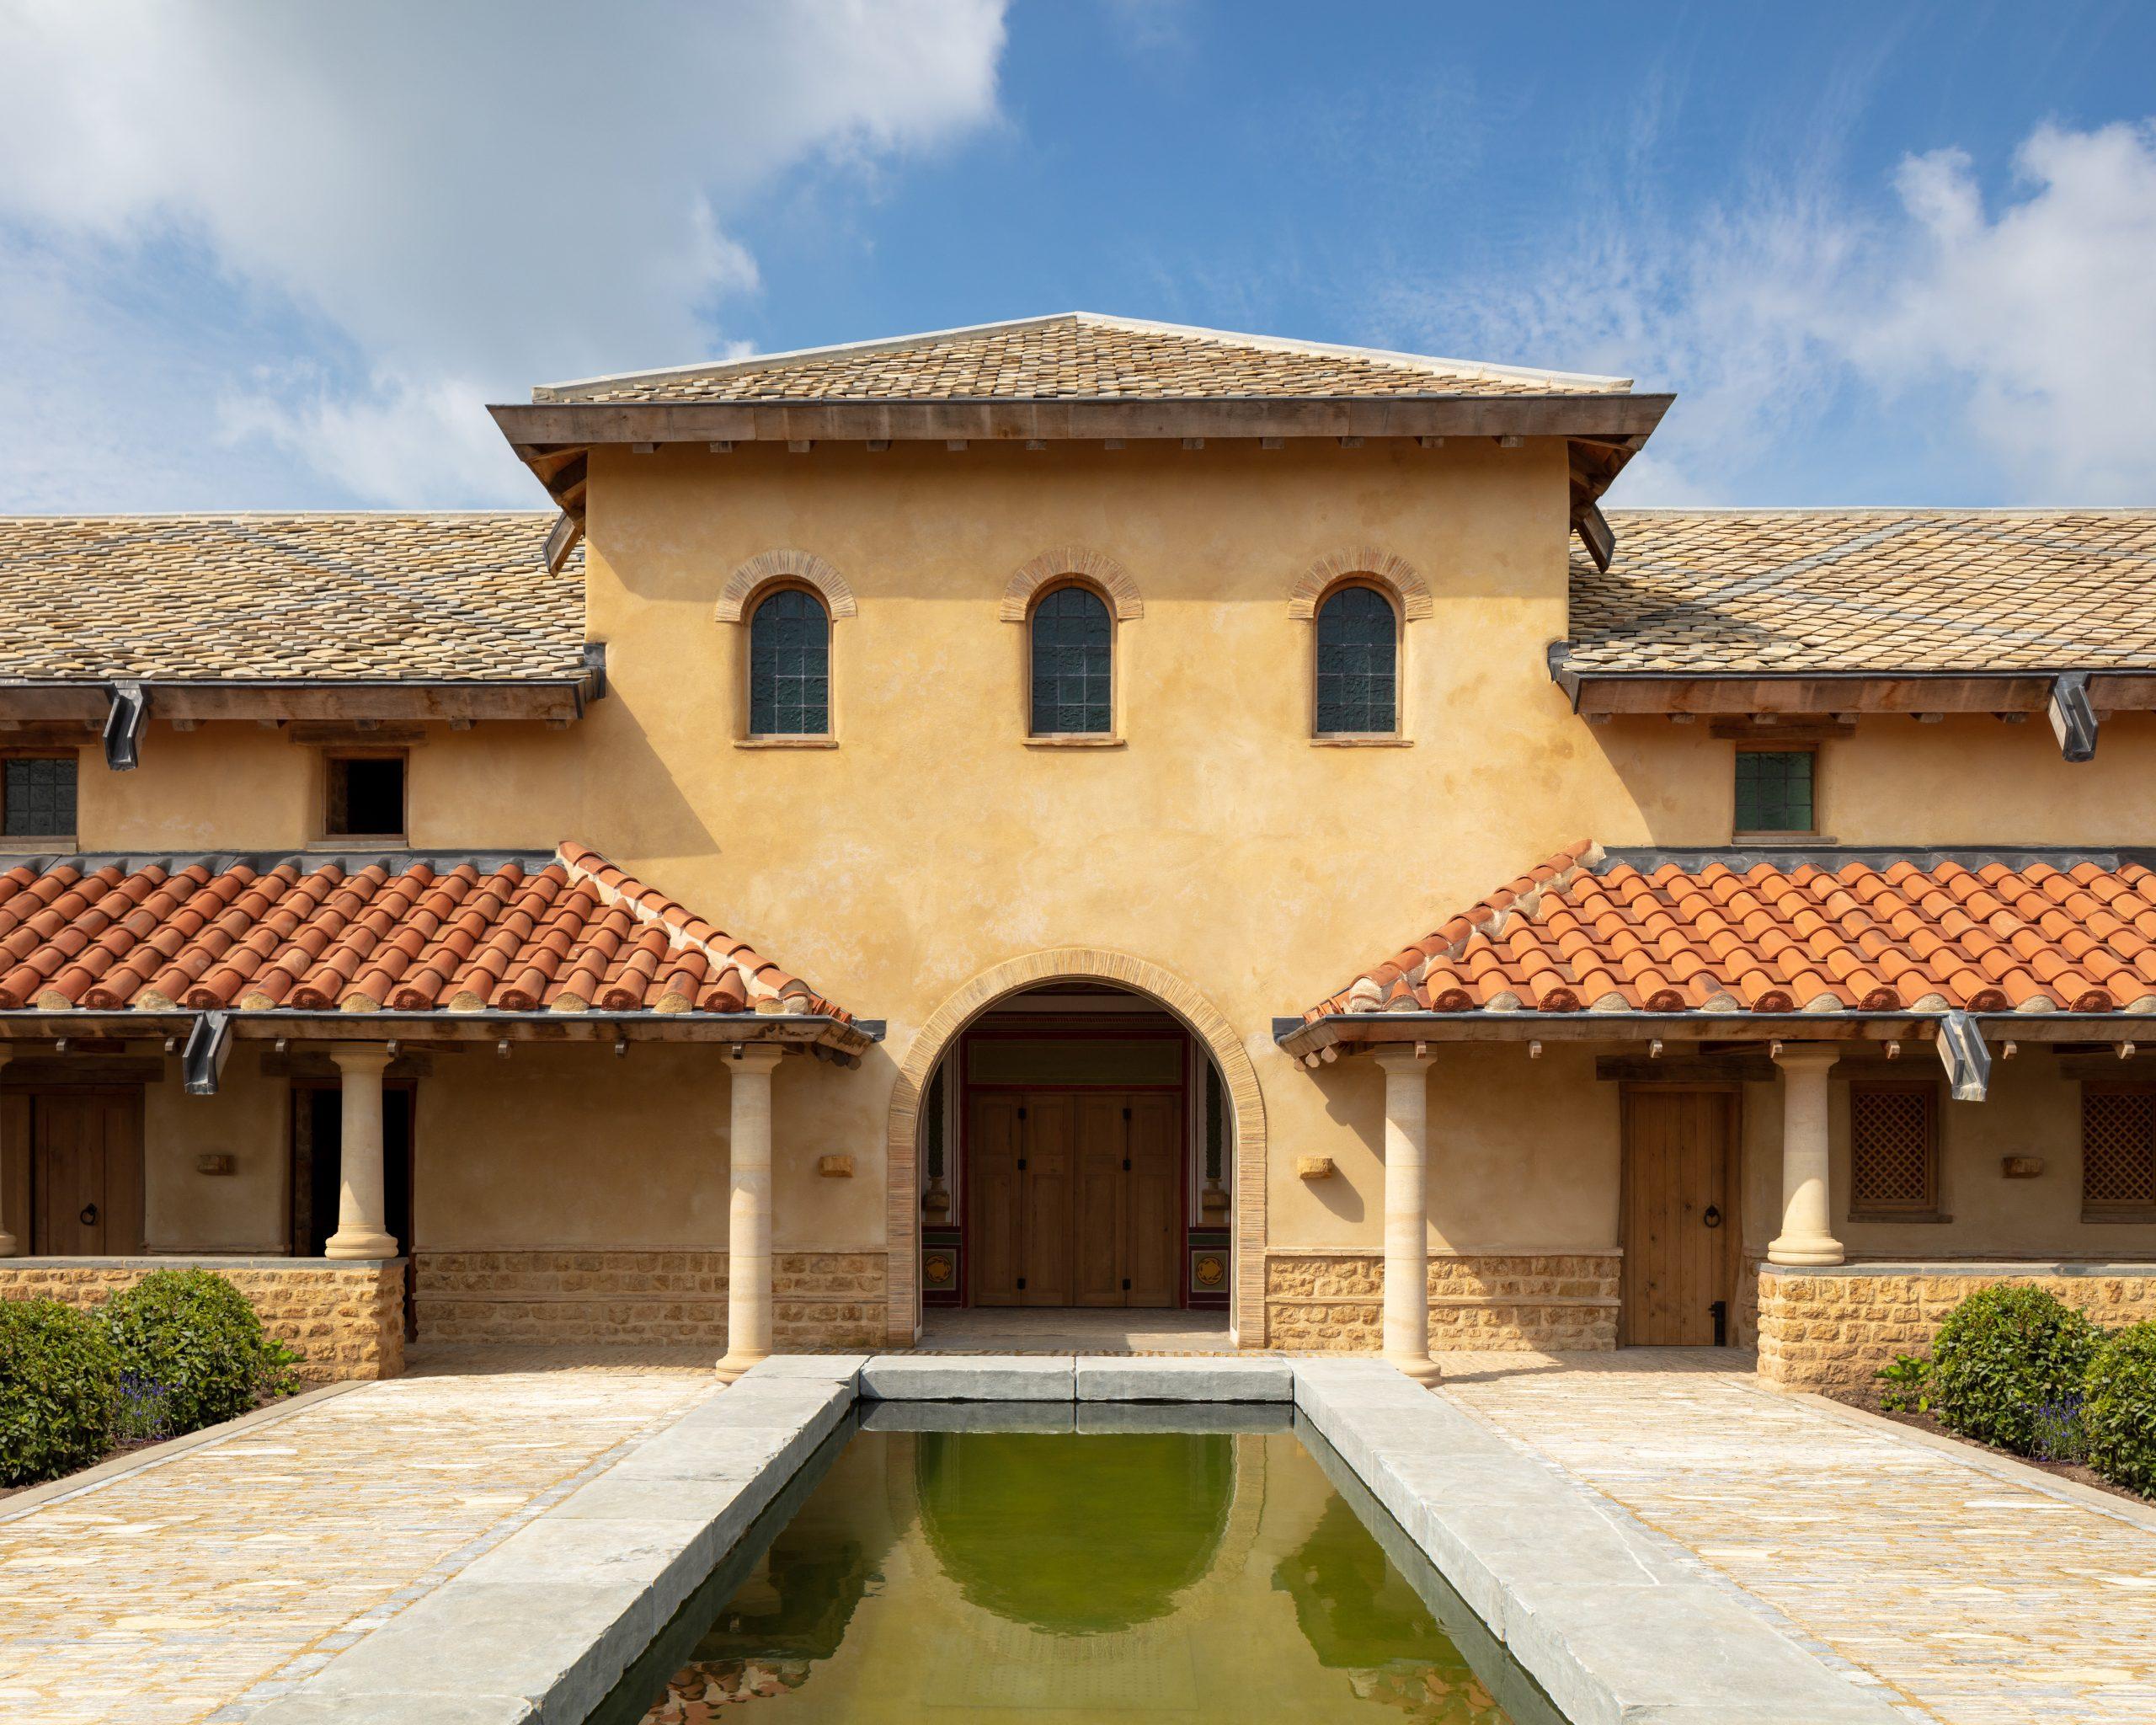
This prestigious project is one of the most interesting and challenging in K & R Group's history which we completed for Stonewood Builders.
Their client had a vision of creating a full-size authentic replica of a Roman Villa as the site is home to extensive Roman remains.
The Villa utilised traditional methodology in every possible way. Architects, engineers, historians and builders needed to form a robust team, which included K & R Group, to prepare an authentic and feasible design for the building.
Preparatory meetings involved obtaining historical samples from Italy to prepare numerous sample panels of specialist Render, known as Wattle & Daub.